
Here’s how I tackle bathroom ceiling mold in five straightforward steps. First, I gear up with an N-95 mask and gloves, then open windows and run the exhaust fan. Next, I choose my cleaner—vinegar works well for mild cases, while bleach handles stubborn spots on non-porous surfaces. I spray, wait about an hour, then scrub gently and rinse thoroughly. Finally, I dry everything completely and keep that exhaust fan running to prevent moisture buildup. Each step builds on the last for lasting results.
Step 1: Gear Up and Ventilate Your Bathroom

Step 1: Gear Up and Ventilate Your Bathroom
Before you tackle that moldy ceiling, you’ll want to protect yourself first. Mold spores are invisible troublemakers that’ll find their way into your lungs if you’re not careful.
Suit Up With PPE
I always grab these essentials before starting:
- N-95 mask or respirator
- Safety goggles
- Rubber gloves
Get That Air Moving
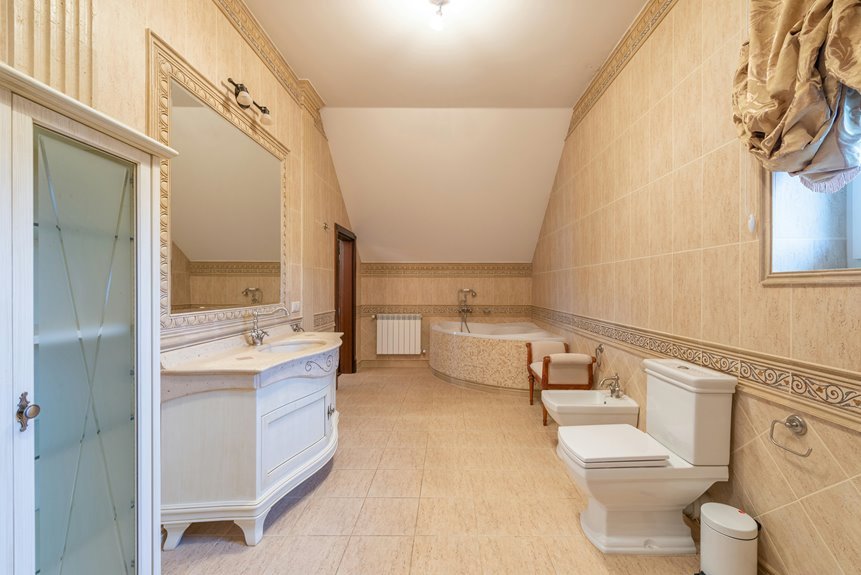
Next, create serious ventilation. Turn off your HVAC system—counterintuitive, I know, but it prevents spores from spreading through your ducts. Open a window and run an exhaust fan simultaneously. Keep your bathroom door open so air flows from clean spaces toward the moldy area.
This setup protects your health and stops contamination from traveling elsewhere in your home.

NIOSH-APPROVED N95 for at least 95 percent filtration efficiency against certain non-oil-based particles and aerosols

NIOSH APPROVED: For at least 95 percent filtration efficiency against certain non-oil based particles

NIOSH APPROVED for at least 95 percent filtration efficiency against certain non-oil based particles
Step 2: Choose Your Mold-Killing Cleaner (Vinegar, Peroxide, or Bleach)

Now that you’re protected and your bathroom’s got fresh air flowing through it, you’ll pick a cleaner that actually works on mold.
You’ve got three solid options, and I’ll walk you through each.
Vinegar is my go-to because it’s gentle and non-toxic. Spray it undiluted, wait about 60 minutes, then scrub and rinse dry. Fair warning: it kills mold but might not eliminate stubborn stains.
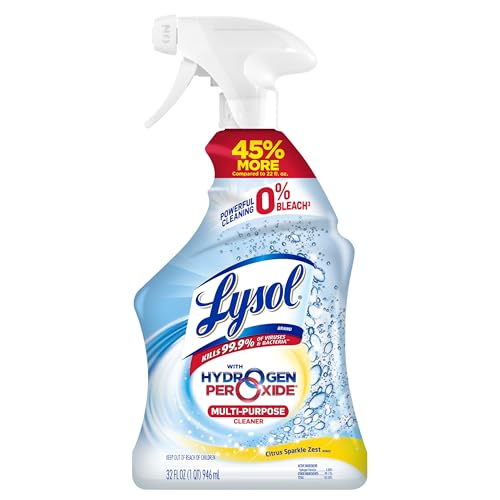
Hydrogen peroxide works faster. Spray the 3% solution, let it bubble for 10 minutes, then scrub and rinse.
Bleach packs the strongest punch, though only on non-porous surfaces. Mix one cup per gallon of water, with proper ventilation.
Consider your ceiling’s material and how extensive the growth is. Porous surfaces? Vinegar’s your friend. Tile or glass? Bleach handles it well. Choose based on what you’re fighting.

DESTROYS MOLD, MILDEW AND SOAP SCUM BUILDUP: This bleach spray cleans and whitens bathroom surfaces in seconds.

Contains (1) 28oz spray bottle of bathroom cleaner.

Simple & Easy to Use: wait 3-10 hours and rinse stains away without scrubbing required
Step 3: Spray, Wait, and Scrub Away the Mold

Time to actually tackle that ceiling growth—this is where your chosen cleaner does its heavy lifting.
Apply Your Cleaning Solution
Spray your selected cleaner—whether undiluted white vinegar or 3% hydrogen peroxide—directly onto the moldy areas. You’ll want complete coverage, so don’t hold back.
Let It Penetrate
Now here’s the hardest part: waiting. Leave your cleaner sitting for about 60 minutes. This gives the solution time to penetrate and kill the spores effectively. Patience pays off.
Scrub Gently
After the waiting period, grab a soft brush or sponge and scrub the mold away using gentle, circular motions. You’re removing visible growth without damaging your ceiling surface. Rinse thoroughly with clean water and dry completely to prevent moisture from encouraging regrowth.
No harsh chemical residue
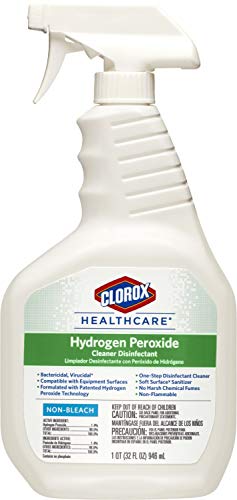
HYDROGEN PEROXIDE DISINFECTANT: Clorox Healthcare Hydrogen Peroxide Cleaner Disinfectant delivers great surface compatibility, low residue and fast kill times (1); pack may vary

EFFECTIVE DISINFECTANT: LEADER Hydrogen Peroxide 3 percent is an effective disinfectant against different kinds of microorganisms, like bacteria, virus and fungi.
Step 4: Rinse and Dry Your Ceiling Completely

Your scrubbing work has loosened the mold, but you’re not finished yet—rinsing and drying are just as important as the cleaning itself. I’ve learned this the hard way after watching mold creep back within weeks.
Rinse thoroughly with clean water, working in sections to remove all cleaner residue and mold particles. Use a sponge or cloth to wipe away loosened debris, making certain no soggy spots remain—these become breeding grounds for regrowth.
Dry completely by first toweling the ceiling, then running a fan or opening windows to maximize airflow. Good ventilation reduces humidity, which prevents mold from returning. This step takes patience, but it’s necessary. Once you’ve achieved a completely dry surface, you’re ready for primer and mold-resistant paint.

Multi-Surface Cleaner Spray: This black spore cleaner spray works on all surfaces, including those of bathroom, kitchen, shower, toilet, bathtubs, vinyl siding, drywall, for automobile tires, concrete floors, carpet & mats, fiberglass, gutters, and awnings to ceramic tiles, ZORBX extra strength remover and cleaner clears all ugly stains.

HOSPITAL GRADE: This professional-strength cleaning solution delivers deep, reliable results on everyday messes, helping maintain a visibly cleaner and healthier environment in homes and offices while leaving behind a light, fresh scent without harsh bleach odors.
Step 5: Lower Humidity and Keep Your Exhaust Fan Running

How’s your bathroom’s air quality right now? I’ve learned that running my exhaust fan isn’t optional—it’s necessary for mold prevention. Here’s what I do:
My Humidity Control Strategy:
- Run the fan during and after every shower
- Keep it going for 15–60 minutes afterward, depending on room size
- Aim to maintain indoor humidity below 50%
This simple routine prevents moisture from settling on your freshly cleaned ceiling. I’ve found that upgrading to a more powerful fan made a real difference in my space. If you want to keep mold away, pair your exhaust fan with a dehumidifier or crack open a window. These combined efforts work together, giving you lasting mold prevention that actually sticks.

Retrofit Bathroom Ventilation Fan: Equipped with a revolutionary DC/ECM motor and SmartFlow technology, this whisper quiet, Energy Star-certified exhaust fan provides superior performance and easy, flexible installation

50 CFM BATHROOM EXHAUST FAN: 50 CFM is sufficient ventilation to remove, moisture, odor and pollutants from your smaller powder room or bathroom up to 45 sq. ft.

Product Specifications: 120V(with power plug), 50CFM, 0.6A, 3000Rpm , 60Hz. Precision-balanced 5/8 coil pack and aerodynamic blade keep noise below 1.5 sones, so quiet you'll forget it's running


