
Yes, you can paint teak successfully—but here’s the catch: teak’s natural oils create a slick barrier that resists paint adhesion. I’ve found that deep cleaning, removing oil buildup, and using stain-blocking primer work well together. Marine enamel bonds better to oily wood than standard exterior paint. Sand properly between coats, apply thin layers, and seal with polyurethane for lasting results. The real challenge isn’t painting itself; it’s the prep work that determines whether your finish holds up or peels away within months.
Is Painting Teak Worth It? What You Should Know First
Why do teak’s natural oils make painting so tricky? I’ve learned that teak oils actively resist paint adhesion, meaning your finish won’t stick properly without intervention. Here’s what matters most:
Consider Your Piece’s Value
High-quality Grade-A teak deserves oiling or professional restoration instead. Painting is often permanent—you can’t easily reverse it. I recommend honestly assessing whether your piece warrants this commitment.
The Real Preparation Challenge
Teak oils bleed through finishes, creating unsightly discoloration. You’ll need a stain-blocking primer—either shellac or oil-based—to stop this problem. Without it, I’ve seen oils compromise even quality paint jobs.
When Painting Makes Sense
Lower-grade pieces or outdoor furniture benefit from paint’s protection. If your teak’s already damaged or you want a different color, painting works well. Just understand you’re making a permanent decision.

Designed for interior and exterior surfaces

Non-Toxic & Low Odor, Safe for Indoor Use: Breathe easy with our water-based wood stain! It’s non-toxic, environmentally friendly and low VOC formula makes it perfectly safe for indoor projects like kitchen cabinets, bedroom furniture, and more — without the strong chemical fumes found in traditional stains.

Wood Stain & Sealer in One:Skip the multi-step hassle! Our water-based wood stain combines staining, sealing, and protection in one easy application—no extra primers or topcoats required. It’s designed for all wood furniture (indoor/outdoor) and penetrates deeply to deliver rich, even color while locking in protection, saving you time and effort on refinishing or new wood projects.
Why Do Teak’s Natural Oils Make Painting So Challenging?

Here’s the thing about teak wood—those oils that make it so beautiful and weather-resistant outdoors are actually working against you when you’re trying to paint it. I’ve learned that teak oils continuously rise to the surface, creating a slick barrier that prevents primer from bonding properly. These oils bleed through finishes, causing staining or complete finish failure if you don’t block them first.
What makes this especially tricky is that teak oils can resurface even after you’ve painted, leaving you with adhesion problems that stick around longer than on regular wood. You’ll need stain-blocking primers and possibly extra coats to combat this. The oils sabotage your paint’s grip, making the whole process more demanding than painting untreated wood.

LONG-LASTING PROTECTION - Outperforms any teak oil or sealer, even under harsh tropical sun and salt conditions; a reliable choice for all your fine woods
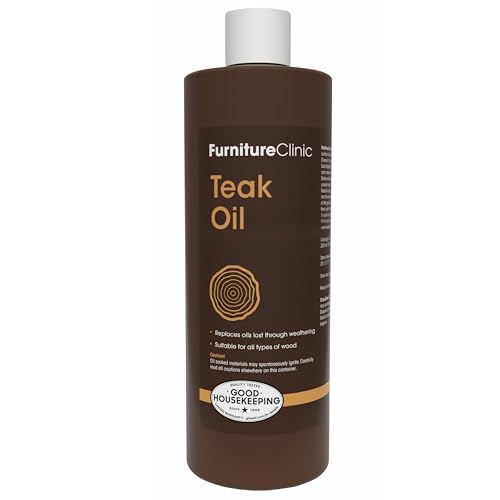
ENHANCES THE BEAUTY OF THE WOOD: Teak Oil restores the beauty of grey, old and weathered teak furniture to give a golden-brown natural finish.

MARINE-GRADE TEAK SEALER beautifies wood & repels water without making surfaces slippery; use this natural danish oil finish instead of teak oil to protect the teak on boat decks, trim, cockpit, swim platform, handrails, cabinetry, grab rails & more
When Professional Restoration Makes More Sense Than DIY

Given how stubborn teak’s natural oils really are, you might find yourself wondering if calling in a professional actually makes sense—and honestly, for certain situations, it really does.
If you’ve got a premium, Grade-A piece, professionals preserve what makes it special. They handle teak’s natural oils without letting paint obscure the beautiful grain you paid for. They’ll use proven systems—proper primers, matching finishes—rather than guessing with store-bought options.
Here’s where pros shine: they prevent costly mistakes. Wrong primer selection? Paint failure in months. They also offer reversible solutions, keeping your future options open if you change your mind later.
For aged or high-quality teak, that expert touch saves both time and money. Sometimes calling someone beats learning the hard way.
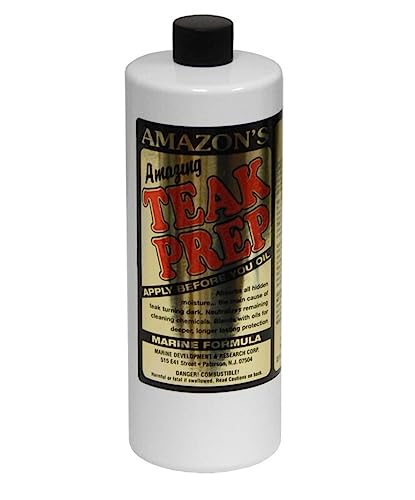
TEAK PREP 32

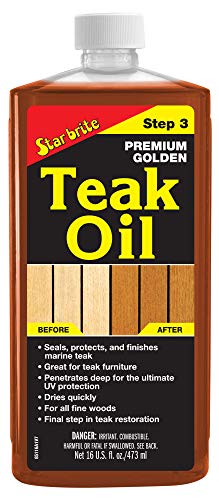
ULTIMATE WOOD PROTECTION: STAR BRITE Teak Oil provides superior protection for teak and other fine woods - Suitable for teak furniture, marine teak, decks and teak shower benches

【3 IN 1 - One Step Grain Paint】 JUNGARIAN Wood Grain Furniture Paint=Base-coat + Wood Stain + Sealer in one! Traditional wood stain need to be paired with a base-coat and varnish. Our wood grain furniture paint requires only one step, paint and wait for it to dry, your furniture will look brand new in just a few hours! Save money and save on construction steps
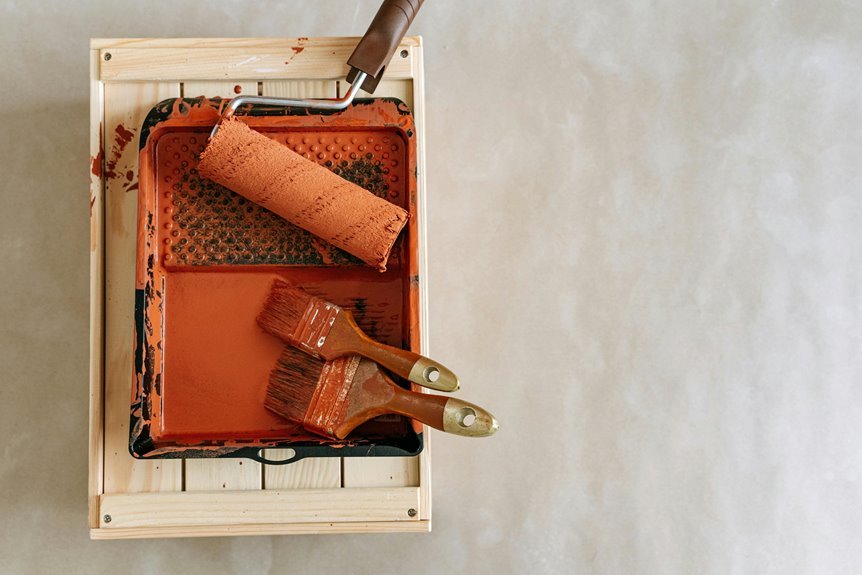
Deep Clean Your Teak to Remove Oil Buildup

I’ve learned that teak’s natural oils, while beautiful, prevent primer from sticking if I don’t remove them first. You’ll need to tackle both the surface dirt and mildew that accumulate over time, plus that stubborn oil buildup lurking beneath. Getting this deep clean right is the difference between a paint job that lasts and one that peels away.

HIGH-QUALITY MARINE POLYMER — 10oz cartridge of black waterproof caulk made with a one-part silane polymer that forms a solid rubber compound. Our marine caulking for boats offers the highest rated UV resistance, excellent chemical resistance, superior temperature stability, and easy sanding to improve project turnover time.


PROTECT WOOD SURFACES: SENVEN Polyurethane Protective Finish protects and adds beauty to your interior wood projects, including woodwork, furniture, doors and cabinets. The clear top coat protects against scratches, spills, dirt and more.
Remove Surface Dirt And Mildew
Why does teak seem to attract so much grime? I’ve noticed that outdoor teak collects dirt, mildew, and stubborn buildup faster than other woods. This happens because teak’s natural oils create a surface that traps debris.
| Cleaning Method | Best For | Drying Time |
|---|---|---|
| Mild soap and water | Regular dirt | 24 hours |
| Dedicated teak cleaner | Oil buildup | 24-48 hours |
| Outdoor wood cleaner | Mold and grime | 48 hours |
| Soft-bristle brush | All surfaces | Varies |
| Power washer (low) | Heavy buildup | 24 hours |
I start by scrubbing all surfaces thoroughly with mild soap, water, and a soft brush. For stubborn mold or grime, I apply a stronger outdoor wood cleaner, following label directions carefully. Complete rinsing removes all residue—this step is important. Once clean, I let my teak dry completely in sunlight for 24-48 hours before proceeding further.
Eliminate Teak Oil Buildup
How deep does that oily film actually go? I’ve learned it penetrates the wood’s surface, making simple soap ineffective. That’s why I now use a dedicated teak cleaner or diluted degreaser, scrubbing along the grain to lift oils from within.
My Deep-Cleaning Process:
- Apply teak oil buildup remover generously
- Scrub with a stiff brush, following wood grain
- Rinse thoroughly with clean water
- Dry completely in sunlight for 24–48 hours
Once dry, I wipe the entire surface with alcohol or lacquer thinner, catching any remaining oils I might’ve missed. This final step improves primer adhesion later. I’ve found that skipping this makes paint peel within months. Your patience here prevents frustration later—follow the process carefully.
Sand the Surface for Primer Adhesion
Because teak’s inherently oily surface can resist primer adhesion, proper sanding is where you’ll set yourself up for success.
Choose Your Grit Wisely
I’ve found that grit selection matters tremendously. If your teak’s been painted before, grab 120-grit sandpaper. For bare teak, step up to 180-grit. This creates that slightly raw surface primers cling to.
Sand with the Grain
Always sand along the wood grain’s direction—never across it. Cross-grain scratches undermine your work and prevent even primer bonding. Think of it like following a map; you’re working with nature’s pattern, not against it.
Remove Every Speck of Dust
After sanding, I use a damp cloth or tack cloth to eliminate all dust. This clean substrate is necessary for proper bonding. Without it, primer won’t adhere properly, and you’re setting yourself up for peeling paint down the road.

This total teak care kit includes three easy to use products to restore and protect teak or other fine woods

INCLUDES - Teak Cleaner (17 oz), Teak Brightener (17 oz), Teak Oil (17 oz). Does not include Lint Free Cloth, Scrub Brush, or Bucket. For these additional items see the Garden Restoration Kit.

STEP ONE - CLEANING: Remove any dirt and grime from the surface of your furniture. Take the Teak Cleaner for outdoor furniture and shake the bottle well before use. Mix the cleaner into a bucket of warm water at a ratio of 1:5 (1 part Teak Cleaner to 5 parts warm water). Dip a Scrubbing Brush into the mixture and scrub the surface to loosen and dirt and grime. Wipe the wood down using a clean, lint-free cloth. Rinse the wood with clean water to remove any excess Teak Cleaner.
Choose a Stain-Blocking Primer for Oily Woods

Now that you’ve sanded away the surface and prepped your teak, you’re ready for the next step: a stain-blocking primer specifically formulated for oily woods. I’ve learned that teak’s natural oils resist regular primers, so choosing the right one matters tremendously.
Best Primer Options
Shellac-based primers like BIN work exceptionally well because they grip oily surfaces effectively. Oil-based primers are equally reliable. Both block ghosting and bleed-through—those frustrating dark spots that ruin your finish.
Apply a thin, even coat across your entire piece. Let it dry completely; patience here prevents future problems. You might need a second coat for maximum protection.
If oils still peek through after painting, don’t panic. Wait a week, then add another primer layer before continuing. This extra step keeps your paint adhered properly and lasts longer.

Cover stain, QT, Oil based stain killer primer/sealer

Multipurpose, 100% acrylic primer sealer that provides excellent adhesion to a variety of interior & exterior surfaces.

【WOOD STAIN & SEALER IN ONE】This teak wood stain combines primer and top coat in one, eliminating the need for separate steps. It deeply penetrates to nourish wood from within while forming a dense protective seal on the surface, enhancing hardness to resist daily scuffs and scratches. Ideal for DIY enthusiasts to restore wood finishes with ease
Select Marine Enamel Paint: Not Standard Exterior Paint

I learned the hard way that standard exterior house paint won’t cut it on teak—it’ll peel and fail within a season, especially near saltwater or intense sun. You’ll want marine enamel paint instead, which is engineered to withstand UV rays and salt spray that would damage ordinary finishes. The key difference is that marine enamels bond better to teak’s oily surface and hold their color and gloss far longer than regular paints can manage.

ENHANCE YOUR TEAK: Our Premium Teak Oil is specifically formulated to seal, protect, rejuvenate and enhance the natural beauty of teak wood, ensuring your outdoor furniture maintains its stunning appearance. Enhances and protects teak and fine wood furniture, marine teak, decks and more!

ENHANCE & RESTORE: Using our Teak Brightener will restore gray or weathered wood back to its original color and restore any remaining dark spots that remained after the cleaning process.

10x MORE - PREMIUM NATURAL FORMULA: Furniture Clinic's 5 Liter Teak Oil is a clear oil that is formulated using a traditional recipe of pure, high-quality Tung and Linseed Oil. This safe and non-toxic oil dries to a natural matte finish.
Marine Enamel Advantages
Standard exterior paint won’t cut it when you’re painting teak, and that’s where marine enamel steps in as your real solution. Marine enamel resists saltwater exposure and UV rays far better than standard paint—critical if your teak’s exposed to the elements. It adheres well to teak’s oily surface when paired with a stain-blocking primer first. The hard-wearing finish withstands high-traffic areas and weather without flaking or peeling. Oil-based marine enamels offer superior film strength and abrasion resistance, though water-based versions now deliver comparable durability. Application requires 2–3 coats and proper curing time, but that investment pays dividends. Teak benefits from this protective coating.
Paint Selection Criteria
You’ve got the right idea choosing marine enamel over standard exterior paint, and now comes the part where you’ll actually pick the one that’ll work best on your teak.
Here’s what separates marine enamel from the rest:
- Oil- or water-based formulations designed specifically for oily woods
- High-adhesion properties that grip teak’s natural oils firmly
- Salt spray and UV resistance built into the formula
- Marine-grade durability that outlasts ordinary exterior coatings
Picking the right marine enamel requires attention to detail. Look for products labeled “high-adhesion” and “marine-grade” on the label. These paint types bond differently than standard exterior paints, creating lasting finishes on challenging surfaces like teak. Your choice here determines everything that follows.
Test Your Color and Apply the First Coat
Test First, Paint Later
Oils in teak shift how colors dry, so I always test my chosen shade on a hidden corner. Let it cure fully—usually 24 hours—before deciding. This prevents disappointment and expensive repainting.
Applying That First Coat
When you’re ready to paint teak, use thin, even strokes along the grain. This minimizes lap lines and helps your primer grip better. Don’t glob it on; multiple thin layers beat one thick one.
After 24 hours, lightly sand with 220-grit paper, wipe dust away, then apply your second coat. Bold colors might need three coats for solid coverage.

Apply periodically to refresh your dense woods and help protect them from UV rays
Advanced tung oil polymers provide maximum protection for teak and other fine woods

Provides interior or exterior one-step protection and color for dense woods such as teak, rosewood and mahogany
Sand Between Coats and Apply Your Second Coat

Once that first coat’s fully dried—and I mean truly dry, not just surface-dry—it’s time to sand lightly with 220-grit sandpaper. This step matters more than you’d think. You’re creating a smooth surface that helps the next coat stick properly. Here’s what I do:
- Sand gently in circular motions
- Wipe away all dust with a damp cloth
- Let the surface dry completely
- Inspect for any missed spots
After sanding and cleaning, I apply my second coat with the same technique as the first. The paint flows on more smoothly now, filling in tiny imperfections. Between coats, I’ve learned that patience is necessary—rushing this process compromises your final result. You’re building something that’ll last, and that takes deliberate steps.

Innovative Marine Varnish Formula: TotalBoat Halcyon enhances natural wood grain and color with an ultra-hard hard finish that’s easy to apply. Create beautiful results on wooden boats, outdoor furniture, doors and trim, cabinets, and woodworking projects

Innovative Marine Varnish Formula: TotalBoat Halcyon enhances natural wood grain and color with an ultra-hard hard finish that’s easy to apply. Create beautiful results on wooden boats, outdoor furniture, doors and trim, cabinets, and woodworking projects

Semco Teak Wood Honey Tone Finish Sealant Protector Sealer (Quart)
Seal Painted Teak With Exterior Polyurethane

The real secret to making your painted teak last isn’t just in the paint itself—it’s in what comes next. I’ve learned that applying polyurethane sealant protects your hard work effectively.
Apply Multiple Coats
I recommend two to three thin coats of water-based exterior polyurethane. Each layer shields against moisture, UV rays, and those annoying scuffs that happen during regular use.
Drying Between Coats
Here’s where patience matters. I let each coat dry completely—and I mean completely—before applying the next one. A dusty surface ruins adhesion, so I wipe everything down carefully.
The Final Step
Before using your furniture or expecting rain, let everything cure for several days. Verify your polyurethane works with your paint type first. This protection is worth the time investment.
REMOVE DIRT, GRIME, and MORE : Our Teak Cleaner will remove any dirt and grime from the surface of your outdoor wood furniture.

COMPLETE TEAK CARE KIT - Our 16 Ounce Teak Kit provides a total solution for restoring and protecting teak or other fine woods, includes three easy-to-use products

Perfect for refinishing and protecting exterior wood such as picnic tables, chairs, swing sets and more
Mistakes That Tank Paint Jobs on Teak (And How to Avoid Them)

Why do some painted teak projects fail within months while others last for years? I’ve learned it comes down to avoiding critical missteps with teak furniture.
Why do painted teak projects fail within months? It comes down to avoiding critical missteps with furniture preparation.
The biggest culprits:
- Skipping thorough cleaning — oily residues repel primer and topcoats, guaranteeing failure
- Inadequate sanding — use 180-grit for bare teak, 120-grit for previously painted surfaces
- Wrong primer choice — non stain-blocking or water-based primers can’t handle teak’s natural oils
- Rushing cure time — skipping proper drying between coats causes peeling and cracking
I’ve made these mistakes myself. Teak’s natural oils are stubborn adversaries, but they’re beatable. Invest time in preparation—cleaning removes mildew, sanding opens the wood’s surface, and quality stain-blocking primer seals those oils permanently. Your patience now prevents regret later.
How Do You Reverse a Paint Job if You Change Your Mind?

How Do You Reverse a Paint Job if You Change Your Mind?
If you’ve painted your teak furniture and now you’re second-guessing that decision, there are clear options available.
Stripping Back to Bare Wood
Your first option is removing that paint entirely. Chemical strippers or heat guns work well for this, though chemical methods are gentler on teak’s grain. After stripping, you’ll sand the wood thoroughly and apply teak-specific oils or sealers to restore its natural appearance.
The Sanding Route
If you want to keep the paint but change direction later, plan ahead. Use reversible coatings—paints that sand down without damaging underlying wood. When you’re ready to switch, multiple sanding rounds with 220-grit paper between coats gradually removes topcoat layers.
Professional Help
Consider hiring professionals offering reverse-finishing services. They’ll restore your teak’s appearance, preserving grain and patina that makes quality pieces valuable.
Maintain Your Painted Teak Furniture Long-Term

Once you’ve invested the time in painting your teak furniture, you’ll want that finish to last—and honestly, keeping it looking fresh doesn’t require constant fussing.
Your Maintenance Strategy
I’ve found that regular upkeep prevents bigger problems down the road. Here’s what I focus on:
- Clean gently with mild soap and water every few months
- Inspect for wear around edges and joints where paint thins
- Touch up chips immediately using the same paint and primer you used initially
- Reapply sealant every 2–3 years to maintain UV and moisture protection
The key is catching small issues before they become major restoration projects. When you keep your painted teak furniture maintained this way, you’re actually protecting your investment and making future refinishing simpler. That’s the practical approach that keeps your pieces looking well-cared-for.
The Best Color Choices for Painted Teak Furniture

How you choose to color your teak furniture shapes whether that warm golden wood becomes a focal point or fades into the background.
I’ve found that teak exterior paint color selections fall into two camps. For subtle elegance, I’d pick off-white, light beige, or taupe—they complement teak’s golden grain without overwhelming it. These softer hues maintain that classic character we love.
If you’re after boldness, dark brown or charcoal enamel creates striking contrast while staying timeless. When matching boat or deck schemes, white hues read cleanly and make accessories pop.
Here’s my tip: test your chosen color on a hidden spot first. Let it cure 24–48 hours. Teak’s oils shift how colors appear, and you’ll want certainty before committing.


