
Refinishing engineered floors is possible—but your veneer thickness determines everything.
A 2mm layer allows roughly one refinish, while thicker 4–6mm veneers support ten-plus cycles.
Before sanding, assess moisture damage, identify your finish type, and measure that veneer.
Minor surface wear? Consider screening and recoating instead of full sanding to preserve options.
Get professional confirmation on your floor’s condition, because one misstep eliminates future refinishing possibilities entirely.
Understanding these specifics upfront prevents costly mistakes.
Can You Actually Refinish Your Engineered Floors?

Refinishing feasibility hinges on professional assessment. Deep scratches, moisture damage, or warping might make replacement smarter than risking a sanding disaster. Get an expert evaluation before committing.

Wood Veneer Sheets Variety Pack for Creative Projects: this wood veneer sheets variety pack includes 30 square veneer sheets in mixed brown colors, giving you multiple wood grain options in one set for marquetry, inlay, and woodworking designs

Wood Veneer Sheets Variety Pack for Creative Projects: this wood veneer sheets variety pack includes 30 square veneer sheets in mixed brown colors, giving you multiple wood grain options in one set for marquetry, inlay, and woodworking designs

Generous Coverage: OVER 18 square feet of veneer with 65 pieces measuring 5" x 8" each, featuring many exotics and deeply figured pieces with variety in packs always changing
Veneer Thickness: The Key to Refinishing Limits
How thick is your floor’s protective layer? That’s the question I’d ask before planning any refinishing project.
Your veneer thickness directly determines your refinishing limits. Here’s what I’ve learned: a 2 mm wear layer allows roughly one refinish, while 3 mm gives you two to three opportunities. Premium 4–6 mm layers? They support potentially 10+ refinishes.
A 2 mm veneer allows one refinish, 3 mm enables two to three, while premium 4–6 mm layers support 10+ refinishes.
Why thickness matters: Each sanding cycle removes material. Floors thinner than 2 mm are risky—you’ll sand through to the core. Hand-scraped or distressed finishes present another challenge; their uneven wear layers often mean light maintenance only.
Check your documentation or contact your manufacturer. Knowing your veneer thickness helps you understand what’s realistically possible for your specific floor.

{Basic Information}-----17" diameter screen discs. 80 grit. Designed for a floor buffer or rotary floor machine.

{Basic Information}:12"x18" diameter screen discs.220 grit. Designed for a floor buffer or rotary floor machine.

{Basic Information}-----17" diameter screen discs. 60 grit. Designed for a floor buffer or rotary floor machine.
Five Signs Your Engineered Floor Needs Refinishing
When does your floor stop looking like itself? I’ve noticed five clear refinishing signs that tell you your engineered floors need attention.
| Sign | What It Looks Like | What It Means |
|---|---|---|
| Deep scratches | Visible gouges through finish | Sealer’s compromised |
| Dull appearance | Loss of shine and luster | Topcoat degraded |
| Wear layer damage | Less than 2mm remaining | Refinishing risky |
| Water staining | Spots won’t clean away | Moisture penetrated |
Your wear layer reveals the most. If scratches expose the core underneath, refinishing becomes unsafe. Dull spots and fading indicate your topcoat’s failing. Water damage that resists spot treatment signals deeper trouble.
I’d recommend getting professional assessment before deciding. They’ll evaluate your veneer thickness and refinishing history. You’ll know exactly where you stand—and what’s possible next.

ASTM 1869 Certified Accuracy: Reliable moisture vapor emission testing for concrete slabs to meet ASTM F1869 standards; helps prevent adhesive failures, warping, and mold issues before flooring or coatings installation.

HUMIDITY SENSOR: Our handy meter tool can quickly determine what level of remediation is needed to keep your family safe from black mold. High levels of dampness that go untreated are the leading cause of harmful fungus growth in the home.

ASTM 1869 Certified Accuracy: Reliable moisture vapor emission testing for concrete slabs to meet ASTM F1869 standards; helps prevent adhesive failures, warping, and mold issues before flooring or coatings installation.
Preparation: Moisture, Finish Type, and Veneer Assessment

Before you grab that sander, I need you to pause and assess three critical things: whether your floors harbor hidden moisture that could spell disaster, what type of finish currently protects your wood so you know how to remove it, and whether your veneer’s thick enough to survive the refinishing process. Each of these factors determines whether you can safely move forward or need to call in a professional—skip this step, and you might end up with damaged floors that cost far more to fix than prevention would’ve cost upfront. I’ll walk you through evaluating each one so you can refinish with confidence.

The hardener penetrates deep into the wood and its special resin binds and reinforces the decayed wood fibers

Reliable Furniture Care: IMPRESA Water Mark Remover Wood Cleaner Spray rejuvenates and protects wooden furniture with ease. Its oil-based formula penetrates deeply, eliminating water marks and enhancing the natural beauty of wood surfaces

RAW WOOD CLEANER: An essential preparatory cleaner for wood surfaces (3,750-5,000 ft² spread rate); specifically designed to clean & electrostatically remove dust after sanding & vacuuming
Moisture Assessment and Damage
Why does moisture matter so much when you’re thinking about refinishing engineered wood? It’s the difference between a successful project and a costly mistake.
Before you sand anything, you need to understand your floor’s moisture history. Here’s what I assess:
- Moisture levels across the entire floor using a moisture meter
- Subfloor conditions to catch hidden water damage before refinishing begins
- Veneer thickness to determine how much sanding your specific floor can handle
- Past moisture damage that might reappear after refinishing
Minor moisture damage? That’s refinishable. Significant damage typically means replacement is your better option. I’ve learned this the hard way—rushing past moisture assessment compromises adhesion and finish longevity. A professional can confirm whether your veneer and wear layer can safely tolerate the refinishing process given what your floor’s endured.
Finish Type Identification
How’s your floor’s current finish holding up? Before you refinish, you’ll want to identify what’s protecting your engineered wood. This matters because different finishes behave differently during refinishing.
You’re likely dealing with either polyurethane or a penetrating oil finish. Polyurethane comes in two varieties: water-based, which dries quickly and stays crystal clear, or oil-based, which adds a warm amber glow but takes longer to cure.
Here’s what I’d do: perform a moisture assessment first—high moisture wreaks havoc on finishes regardless of type. Once you’ve confirmed your moisture levels are safe, examine your finish type closely. This finish type identification step determines your sanding approach, product selection, and timeline ahead.
Veneer Thickness Evaluation
Once you’ve identified your finish type, you have one more critical measurement to take before you sand a single board—the veneer thickness itself.
This step separates successful refinishing from costly mistakes. Your veneer thickness determines your refinishing viability and how many times you can actually sand your floors. Here’s what you need to know:
- 1/8″ veneers allow approximately two refinishes maximum
- 3/16″ veneers permit three to four refinishes with proper care
- Thinner veneers increase risk of sanding through to the core
- Verify manufacturer specs before proceeding with any work
The wear layer—that protective surface—becomes thinner with each sanding. Measure at transitions or damaged edges where thickness is visible. You’ll prevent over-sanding disasters by knowing your limits upfront.
Screening and Recoating: A Gentler Alternative
If your engineered wood floors show signs of wear but the damage isn’t deep, there’s good news—you don’t necessarily need to strip everything down to the bare wood. Screening and recoating offers a gentler path forward for your engineered flooring. This method uses light abrasive steps to refresh the surface, then applies fresh polyurethane—all while preserving your original veneer.
| Step | Process | Benefit |
|---|---|---|
| Light abrading | Removes worn finish | Minimal veneer loss |
| Surface prep | Dust control | Clean application |
| Recoating | Fresh polyurethane | Restored durability |
Before proceeding, I’d recommend getting professional assessment. They’ll evaluate your veneer thickness and finish condition to confirm screening and recoating will deliver lasting results. This approach works best when wear is mainly surface-level and your veneer’s thick enough to handle recoat cycles safely.

Premium Sandpaper Sheets Assortment:80/120/180/220/320/400 Grit (2 sheets of each) silicon carbide sand paper,easily cuts into 1/4,1/3,or 1/2 sheets to fit any sanding block or tool.Suitable for woodworking, metalworking, crafting, and DIY projects.

Package Contents: 24 pcs sand paper kit measuring 9 inch(L) x 3.6 inch(W),12 grit wet dry sand paper assortment pack comes with 120/150/180/240/320/400/600/800/1000/1500/2500/3000 Grit, 2 sheets of each grit. You can get coarse sandpaper and fine grit sandpaper at once.
Sand paper Assortment : Featuring 21-sheet 9 x 3.6 Inch 1000 grit, Other grits such as coarse, medium, and Medium Very fine Super fine Ultra fine are also available for your selection.polishing and finishing—meets every sanding need from rough prep to professional results.
Sanding Engineered Floors Without Damaging the Veneer

When screening and recoating isn’t quite enough—say your floors have deeper scratches or uneven color that surface renewing won’t fix—sanding becomes your next option.
I’d recommend these steps for veneer preservation:
- Use a lightweight orbital sander with 100–120 grit to remove the finish without cutting through the veneer
- Sand with the grain in smooth, overlapping passes to avoid cross-grain scratching
- Vacuum thoroughly between passes and wipe with a tack cloth to prevent dust embedding
- Limit removal to roughly 1–1.5 mm to protect the wear layer
For edges and corners, I use a handheld orbital sander to prevent over-sanding. Sanding engineered floors requires patience—you’re working with a thin veneer layer, so aggressive techniques backfire fast. Take your time, and your floors will reward you.

Maple Veneer: Made from natural maple wood, offering a smooth, lightweight, and flexible finish with beautiful grain patterns.
Natural and beautiful: Wood veneer is a thin wooden sheet material produced by rotary cutting or sawing of logs, Has a natural woody feel,Different wood textures and tones can meet various design styles and aesthetic needs.

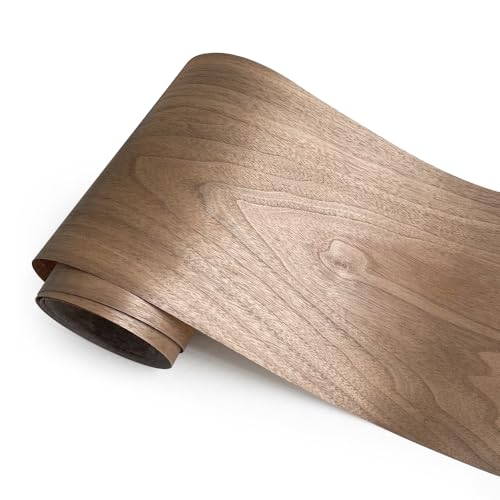
ELEGANT NATURAL BLACK WALNUT VENEER: Enhance your woodworking projects with the exquisite beauty of our Natural Black Walnut Thin Wood Veneer. Its rich and sophisticated appearance adds a touch of elegance to any piece.Each sheet measures 11.81 inches in width and 98.43 inches in length (30cm x 250cm)Thickness:0.2mm(8 mils)
Staining for Color Changes: Testing Before Commitment

Before you commit to staining your entire floor, I’d recommend testing your chosen stain on a hidden area—maybe inside a closet or behind a door—to see how your specific wood species absorbs the color. Different engineered woods take stain differently, and what looks perfect on the sample board might differ once it hits your actual floor. This small upfront effort prevents you from discovering mid-project that the color doesn’t match your expectations.

10 - Precut screens for any 12" x 18" buffer - square buff, Clarke, deva, silver line. For hardwood or concrete


{Basic Information}-----17" diameter screen discs. 120 grit. Designed for a floor buffer or rotary floor machine.
Test Stain In Inconspicuous Spots
Why rush into staining your entire floor when a simple test can save you from disappointment? I’ve learned that testing matters because engineered wood behaves differently than solid hardwood, and you need to see how your specific floor reacts.
Here’s what I do before committing:
- Find a hidden corner — closets, under furniture, or behind doors work perfectly
- Apply your chosen stain — use the same application method you’ll use for the full floor
- Check veneer thickness — verify the stain doesn’t penetrate too deeply or show through
- Evaluate the color — wait 12–24 hours to see the true final shade
This small step prevents costly mistakes and confirms your color goals will actually work on your floors.
Gauge Wood Species Reactions
Once you’ve tested your stain in that hidden spot, you’ve learned something valuable about your particular floor—but here’s what many people miss: the wood species itself plays a significant role in how stain actually behaves.
Why Species Matter for Stain Absorption
Different wood types absorb stain unevenly. Oak soaks it up quickly, while maple resists absorption. Your engineered wood’s veneer responds differently depending on its species, so identical stain and application methods produce varying results across floors.
What You’ll Notice
Some species darken dramatically. Others barely shift color. I’ve watched the same stain look rich on one sample yet pale on another—predictable once you understand your wood’s nature.
This is why testing matters: it reveals your specific wood species’ reactions before you commit to the entire floor.
Applying Polyurethane and Other Durable Finishes

How do you create a durable floor from raw engineered wood that lasts decades? You’ll apply polyurethane, the standard finish that protects your investment. Here’s what works:
- Choose water-based polyurethane for faster drying and no yellowing, or oil-based for deeper amber tones and better durability
- Use a lambswool applicator, applying thin, even coats following the wood grain direction
- Lightly sand between finish coats with 220-grit sanding formulation to boost adhesion
- Remove all dust thoroughly before each coat application
Most floors need 2–3 coats for real durability. Control your environment—temperature and humidity matter substantially. After your final coat, wait 24–72 hours before walking on it. Your patience now prevents problems later.

Instant & Accurate Readings – Measures up to 12mm deep for precise wood moisture results. Save readings with the convenient Hold function

Pinless & Non-Destructive Testing: Safely measure moisture content without damaging surfaces, perfect for wood, wall, concrete, and more.

Accurate Pin-Type Measurement: Designed with 2 high precision pins. For an accurate test read, stick the stainless steel pins into the surface of what you're measuring. penetrate into the test surface and quickly know the moisture level in your walls, Remove all of the guesswork with this moisture detector
Professional Refinishing: When It’s Worth the Investment

If you’ve ever grabbed a sander and wondered whether you’re about to ruin your floors, you’re facing the moment when professional refinishing starts looking smart—because one wrong pass on a thin veneer can cause damage that you can’t fix. A professional will assess your veneer thickness (checking whether you’ve got those protective 2–4 mm or more) and handle the precise orbital sanding that keeps your wear layer intact, which means you’ll actually know how many refinishes you have left in your floors. You’re also getting warranty protection and expertise that costs less overall than replacement, making the investment worthwhile when DIY risks are high.
When DIY Risks Exceed Savings
Why does refinishing your engineered floor yourself sometimes cost you more than hiring a professional? The answer lies in what happens when you underestimate the risks. Here’s what I’ve learned:
- Veneer thickness matters – If yours is 2–4 mm or thinner, one wrong move with your sander damages the core irreversibly
- Dust control is necessary – Without specialized equipment, you’re spreading fine particles everywhere, creating cleanup costs and health concerns
- Mistakes multiply expenses – Sanding through the veneer means replacement, which exceeds professional refinishing costs entirely
- Repeated refinishing limits exist – Most engineered floors handle only 1–3 cycles, so botching your attempt wastes future options
Professional refinishing protects your investment through equipment and expertise you can’t replicate at home. Sometimes, paying professionals upfront saves you thousands later.
Veneer Thickness Assessment Matters
The real culprit behind most DIY disasters isn’t ambition—it’s not knowing what’s underneath your floor’s surface. Your veneer thickness determines refinishing viability more than anything else.
Here’s what I’ve learned: a 2mm wear layer typically allows one refinish, while 3mm or thicker enables two to three. Thicker veneers—4–6mm—can handle 10+ refinishes. Anything under 2mm? That’s unsafe territory.
Get manufacturer specs. An 1/8″ (3.2mm) veneer and 3/16″ (4.8mm) veneer offer vastly different sanding potential. Don’t guess.
A professional assessment confirms whether your floor’s past refinishes, current wear layer thickness, and overall condition support another round. That consultation costs far less than replacing damaged floors. You’re protecting your investment by measuring twice.
Warranty Protection and Expertise Value
Ever wonder what separates a refinished floor that lasts five years from one that lasts fifteen? The answer often comes down to warranty protection and professional expertise.
When you hire a pro, you’re investing in:
- Warranty coverage that shields you from defects and premature wear
- Specialized knowledge about your specific veneer thickness and refinishing cycles
- Tailored techniques using orbital sanding and dust control designed for thin veneers
- Documentation of your floor’s condition and refinishing potential
Pros assess your wear layer—typically 2–4 mm—to determine how many refinishing cycles remain. They’ll provide estimates that include veneer evaluation and realistic projections. That assurance? You won’t get it with DIY attempts. This expertise turns refinishing from a risky gamble into a strategic investment protecting both your floor and your peace of mind.
Refinishing vs. Replacement: Which Costs Less?

When faced with worn engineered wood floors, most homeowners ask themselves the same question: should I refinish what’s already there, or pull it all up and start fresh?
The Cost Reality
Refinishing saves you 60–80% compared to replacement, since you’re keeping the existing structure intact. You’ll avoid buying new materials and paying full installation labor, which can easily run into thousands of dollars.
Refinishing engineered wood floors saves 60–80% versus replacement by preserving existing structure and avoiding costly material and labor expenses.
Veneer Thickness Matters
Your decision hinges on veneer thickness. A 2mm veneer allows roughly one refinishing, while 3mm+ supports 2–3 refinishes. Premium 4–6mm wear layers handle 10+ refinishes. Paper-thin veneers, though, may be unsafe to sand.
When Replacement Makes Sense
Severe water damage, warping, or multiple past refinishes typically necessitate replacement. For most homes, though, refinishing remains the economical long-term winner.

Fine grit sandpaper : Featuring 5-sheet 9 x 11 Inch 2500 grit, Other grits such as coarse, medium, and Medium Very fine Super fine Ultra fine are also available for your selection.polishing and finishing—meets every sanding need from rough prep to professional results.
Sand paper Assortment : Featuring 10-sheet 9 x 11 Inch 500 grit, Other grits such as coarse, medium, and Medium Very fine Super fine Ultra fine are also available for your selection.polishing and finishing—meets every sanding need from rough prep to professional results.

ENGINEERED WITH PREMIUM ZIRCONIA: Our 36 grit 6 inch sanding discs come in a pack of 100 and feature a durable blend of zirconia and aluminum oxide designed for aggressive material removal. Ideal for leveling wood floors, prepping metal, or smoothing rough surfaces, these hook and loop sandpaper discs fit orbital sander tools to ensure steady performance and a consistent finish across every pass.
Maintaining Your Refinished Floor: Protecting Your Investment

How do you keep that fresh, newly refinished floor looking pristine for years to come?
I’ll share the protective measures that’ll safeguard your investment. First, you’ll want to understand that your refinish finishes need consistent care to perform their best.
Here’s what I recommend:
- Allow 24–72 hours for curing before using the space, and place protective padding under furniture
- Sweep or vacuum regularly and wipe spills immediately with a damp cloth
- Use felt pads under furniture legs to avoid scratches and gouges
- Schedule periodic maintenance inspections to catch wear early
The periodic maintenance habit you develop now prevents costly damage later. Your engineered wood floors can last decades when you follow manufacturer guidelines faithfully. That investment deserves the attention it’s earned.


