
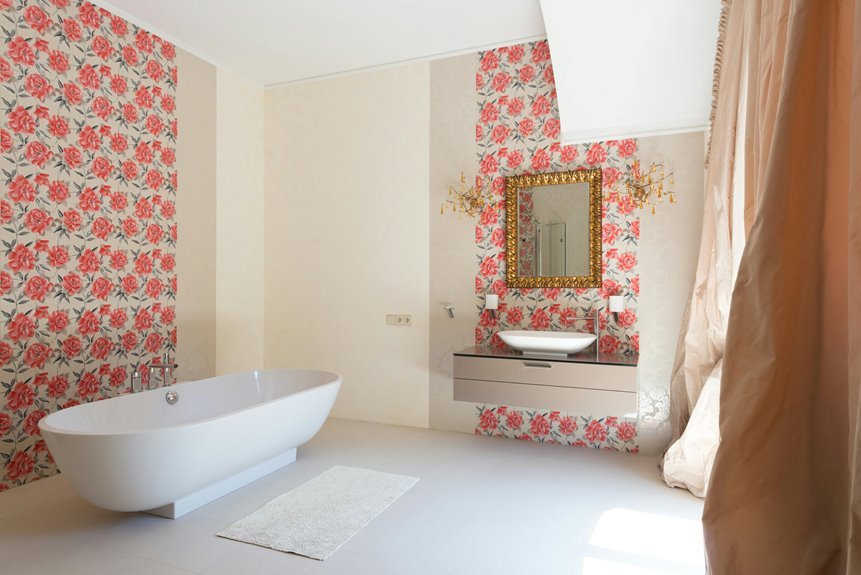
Bathroom wallpaper succeeds when you plan strategically. Start by choosing moisture-resistant wallpaper designed for humid spaces—skip standard options that’ll peel. Prepare walls by cleaning and priming thoroughly, then measure your dimensions and budget extra rolls for mistakes. Install using a plumb line, match patterns carefully, and smooth out bubbles within fifteen minutes. Finally, seal with decorator’s varnish and allow a full 48 hours drying time.
Placement matters too—avoid splash zones near sinks and favor upper walls instead. The specific techniques that prevent peeling and maintain durability warrant careful attention.
Evaluate Bathroom Moisture and Select Humidity-Resistant Wallpaper

Why does bathroom wallpaper peel away so easily? Moisture is the culprit. I’ve learned that humidity gradually degrades standard wallpaper, especially on ceilings where steam collects. That’s why I now evaluate my bathroom’s moisture levels before selecting any wallpaper.
Moisture is the culprit behind peeling bathroom wallpaper. Evaluate humidity levels before selecting wallpaper for your space.
Choose the Right Material
I recommend moisture-resistant wallpaper specifically designed for bathrooms. These options withstand splashes and steam better than traditional varieties. Look for washable or wipeable finishes that handle moisture without deteriorating.
Skip These Choices
I avoid overly glossy finishes or very bold patterns—they show water damage more obviously. Ceiling wallpaper? I’ve learned to skip it entirely in bathrooms.
Add Protection
I apply clear decorator’s varnish as an extra shield against water and stains. This simple step extends my wallpaper’s lifespan significantly.

Clear Texture and Strong Texture: 15.7″ x 78.7″ Roll (8.5 sq ft/roll) Marble wallpaper is strongly textured, waterproof and easy to clean. Simple jazz white, easy to match with home style. It is made of vinyl material. The surface is smooth and easy to wipe. Removable wallpaper comes with self-adhesive can be easily removed

Unique Design: The flowers are depicted using watercolor hand-painting techniques, with the colors using a gradient of blue tones. The blue color starts from the center of the flower and gradually transitions to light blue or aqua blue towards the edges of the petals. There is also a natural effect of watercolor pigment spreading out on the edges, creating a transparent and light visual texture. The overall appearance is fresh, elegant, and it creates an artistic, natural, and peaceful atmosphere for your space

Kitchen Wallpaper--【SIZE & MATERIAL】--11.8In x 78.7In = 6.46 sq.ft/roll. The material is a FLAT contact paper similar to the 3D effect, under Different light, the 3D effect is Different. Quality upgraded, Thickened, Strong coverage, Easy to clean, Oil-proof and Heat resistant.
Prepare Bathroom Walls: Cleaning, Priming, and Sizing

Before you hang a single strip of wallpaper, you’ve got to prep your bathroom walls—and this step is important because it’s the difference between wallpaper that lasts for years and wallpaper that peels within months.
Here’s what I do before wallpaper installation:
- Clean walls thoroughly with soapy water and a sponge to remove dirt and oils
- Remove towels, hooks, light fixtures, outlets, and mirrors that aren’t bolted down
- Patch any holes you find along the way
- Let everything dry completely before priming
Once your walls are clean and dry, apply primer for optimal adhesion. This step matters more than you’d think. The primer creates a smooth foundation that helps your wallpaper stick around, especially in moisture-prone bathrooms where humidity threatens your work.

Self-Priming formula - requires no sanding

Tips before installing wallpaper:Please check whether the received products are damaged before use. In addition,please ensure that the covering surface is clean, dry and smooth,otherwise the stickiness of wallpaper may be affected

Easy to Use:Quick and easy to install - Just peel and stick! No water, no paste, no mess! Textured material, matte finish, washable and repositionable, this shiplap design can paste by either vertically or horizontally, both ways are very easy to handle. There have grid and measurement on the backing paper, you can easily cut for your needed size
Measure Bathroom Dimensions and Calculate Wallpaper Rolls
Once your walls are primed and ready, you’ll need to figure out exactly how much wallpaper to buy—and I’ll be honest, this is where I’ve made mistakes in the past.
Measure Your Space
Start by measuring each wall’s height and width, then multiply to get square footage. Add all walls together for your total area. Don’t forget about vertical coverage—if you’re wallpapering multiple sections, multiply accordingly.
Account for Wallpaper Patterns
Here’s what I learned the hard way: wallpaper patterns require extra material for alignment and matching. Check your roll’s coverage per unit, then compare it against your total area needed.
Budget Extra Rolls
I always buy one or two additional rolls beyond my calculation. This accounts for trimming, mistakes, and future repairs. It’s a practical safeguard that pays off.
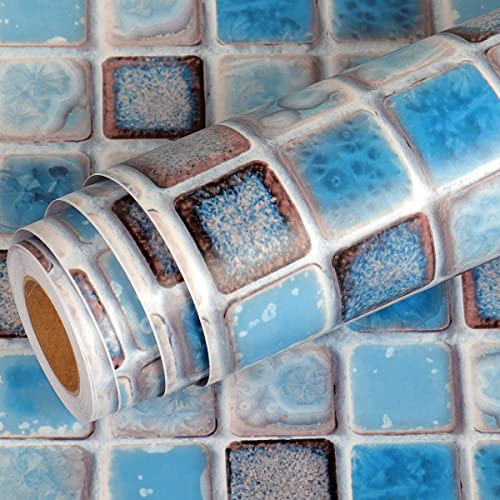
🏠Details: 15.8x78.8 Inch, total 8.65 sq.ft (40cmX2m). 1.3x1.3in per mosaic tile. self adhesive(no extra glue needed), Made of durable vinyl. Blue tile wallpaper peel and stick waterproof. Oil proof. Fully removable.

When you open the tile:If you see wrinkles or bubbles, don't worry, they won't affect the adhesive effect. You can easily use your hands or a scraper to solve the problem during use..(The surface of these Wall Panels is not hard, but made of PVC composite material, which is lighter and easier to cut and use.)

🏠Details: 15.8 X 394 Inch, total 43.3 sq.f (40cmX10m). 1.3x1.3in per mosaic tile. Self adhesive (no extra glue needed)Made of durable vinyl, peel and stick blue tile wallpaper. Oil proof. Waterproof. Fully removable.
Gather Your Tools and Materials Before Starting
Before you unroll that first strip of wallpaper, I’ve found it’s worth gathering everything you need in one spot—because halfway through, you won’t want to hunt for your level or an extra blade. You’ll want your essential tools (level, pencil, spray bottle, scraper, X-acto knife with extra blades, scissors, and a towel) ready, plus any brand-specific adhesive or activator your wallpaper requires. Having your materials organized beforehand means you can focus on the actual application instead of scrambling around your bathroom.

Ideal for use on emulsion paint and decorative paintwork

Ideal for use on emulsion paint and decorative paintwor
Ideal for use on emulsion paint and decorative paintwor
Essential Tools And Equipment
Essential Tools And Equipment
Success with bathroom wallpaper starts with gathering the right tools before you even unroll that first sheet. Having everything ready prevents frustration mid-project, and it’s the difference between a polished finish and a patchy result.
Here’s what you’ll need for successful wallpaper installation:
- Measuring and marking tools: level, pencil, and ruler
- Preparation supplies: tarp, spray bottle, towel, and scraper
- Cutting instruments: X-acto knife with extra blades and scissors
- Smoothing equipment: plastic scraper and squeegee
Beyond these basics, decide whether you’re using peel-and-stick or pre-pasted wallpaper. Each requires different activation methods—some need water spraying, others need submersion. Keep spare blades accessible; you’ll trim edges constantly. When you’ve got everything organized nearby, you’re not hunting for tools while adhesive dries. That’s when the actual work becomes manageable and straightforward.
Materials And Supply Checklist
What’s the one thing that separates a smooth wallpaper project from one where you’re scrambling halfway through? Preparation. I’ve learned that gathering everything beforehand makes the entire experience better.
Before you begin, I gather these essentials: a level, pencil, tarp, spray bottle, towel, scraper, X-acto knife with extra blades, and scissors. I also assess my wall condition to determine if sizing’s needed and verify surfaces are clean and dust-free.
Here’s where I make an important decision: peel-and-stick wallpaper versus pre-pasted options. Peel-and-stick wallpaper offers easier repositioning if I make mistakes—something I appreciate. Pre-pasted requires water activation following brand instructions.
I clean my walls with soapy water and a sponge to remove dirt and oils, then let everything dry completely. This foundation matters tremendously.
Create a Plumb Line and Install Your First Strip

Getting your first strip perfectly straight sets the tone for everything that follows, and I’ll admit—this is where I used to mess up most. A crooked first strip cascades into misalignment throughout your entire bathroom, so let’s nail this together.
Start by establishing your foundation with these steps:
- Use a level to create a perfectly vertical plumb line, marking it lightly with pencil
- Measure your wall height and add 4 inches extra for trimming flexibility
- Mark your guideline a specific distance from the corner for seamless wrapping
- Pre-unfold your second wallpaper length beforehand to flatten it completely
Keep your wallpaper pattern-side up and ready. This methodical approach prevents frustration and sets a solid foundation for your bathroom wallpaper installation.

【𝐁𝐢𝐫𝐝 𝐖𝐚𝐥𝐥𝐩𝐚𝐩𝐞𝐫】🌺 Size: 17.5in x 39ft(44.5cm x 12m)covers 57.4 sq.ft per wallpaper roll. Material: Durable PVC. The bird wallpaper stick and peel features a textured beige william morris birds and floral pattern. Affordable/ Waterproof / Removable / Renter friendly / Straight match.

【 𝐂𝐡𝐢𝐧𝐨𝐢𝐬𝐞𝐫𝐢𝐞 𝐖𝐚𝐥𝐥𝐩𝐚𝐩𝐞𝐫】Size: 17.5in x 23ft(44.5cm x 7m)covers 33.5 sq.ft per wallpaper roll. Durable Vinyl – Featuring a dark green Chinoiserie peacock and floral, this peacock wallpaper provides a waterproof, removable, easy-to-apply solution for walls or furniture.

🌟 【Peel and Stick Wallpaper 】 No glue, no mess, no stress! Our stick on is beginner-friendly and renter-approved. Just peel, stick, and smooth – that’s it! Perfect for those who crave a dramatic makeover without damaging the wall or spending hours with paste
Activate Adhesive and Fold Your Wallpaper to Set

Activating Your Adhesive
The adhesive activation step is where your wallpaper transitions from dry material to a permanent wall fixture—it’s the bridge between these two states. This moment determines whether your strips stick properly or peel away months later.
Adhesive activation bridges dry wallpaper to permanent fixture—determining whether strips stick or peel months later.
Follow your wallpaper brand’s specific instructions, whether that means spraying the back with water or submerging the entire strip. Don’t skip this step.
Once you’ve activated the adhesive, fold both ends toward the middle in what we call “booking.” This accordion-like fold lets the adhesive soak in evenly for 2–3 minutes. You’re giving the glue time to become tacky and ready to grip your wall.
This waiting period serves a purpose. The chemical reaction during these minutes prepares your wallpaper for a secure, lasting installation.

LARGE FLORAL PATTERN: This wallpaper features delicate beige lines that define the contours and textures of the flowers and leaves. The flowing, varied line thickness adds depth and dimension, while the minimalist color scheme creates a fresh, understated aesthetic

Fashion appearance: Simple and classic white color, coupled with the texture design of the surface, makes it more unique and simple, elegant, versatile and minimalist

1、【Generous Coverage】Each panel measures 118 inches x 15.75 inches, providing 13 square feet of coverage for walls and ceilings in bedrooms, bathrooms, living rooms, and more
Align Patterns Across Strips During Installation
I’ll walk you through the critical step of matching your wallpaper patterns so each strip flows smoothly into the next—this is where your installation either looks polished or noticeably off. You’ll want to position the first strip along a plumb line (a vertical reference that keeps everything straight), then carefully slide each subsequent strip so the pattern aligns perfectly at the joints where two pieces meet. Taking time to match these patterns now prevents frustrating misalignment later, and using a plastic scraper to smooth out bubbles as you work helps you see the final result distinctly.

This tapestries are made from imported premium supersoft 100% polyester fabric,Thin as sheet, The fabric surface has been lightly polished and edges are hemmed.

Unpasted non woven material

Gives the look of a wood wall with this faux grassloth look
Pattern Matching Techniques
Pattern Matching Techniques
I’ve learned that seamless pattern matching requires precision and patience. Here’s what I do to keep everything aligned:
- Start your first strip along a true vertical plumb line—this prevents the domino effect of misalignment
- Pre-unfold your second length to flatten it, keeping the pattern side up for easier edge preparation
- Allow booked strips to sit 2–3 minutes after spraying adhesive; this activates the adhesive properly
- Position subsequent strips methodically, confirming alignment before pressing them permanently
The key is working deliberately rather than rushing. When you take time matching patterns across joints, your bathroom becomes a coordinated space. You’re not just hanging wallpaper—you’re creating visual harmony that demonstrates thoughtful attention to detail.
Seamless Strip Positioning
Once you’ve got that first strip anchored to your plumb line, the real coordination begins—because every strip that follows depends on matching the pattern perfectly at the seams. I overlap the edges slightly, checking that motifs align before I smooth anything down. This overlap technique lets me see exactly where the pattern matches, maintaining continuity across your walls.
Here’s my rhythm: I book each strip by folding the ends after spraying adhesive, then let it sit 2–3 minutes. This pause activates the glue and softens the paper, making it easier to position. When I press wallpaper to the wall, I work deliberately—adjusting edges until the design flows smoothly. I leave small excess at the top for trimming later, keeping edges neat throughout installation.
Remove Air Bubbles With a Smoothing Tool

Why do air bubbles matter so much? They’ll wreck your bathroom’s polished look and cause peeling down the road. Catching bubbles early is important.
Here’s my approach:
- Work from the center outward using your smoothing tool within 10–15 minutes of placing each strip
- Press firmly so the wallpaper adheres smoothly against the wall surface
- Lift edges gently if bubbles persist, then re-smooth toward the outer edges
- Use a plastic scraper for creases and ceiling transitions
If stubborn air pockets appear, I gently lift that section and smooth it flat again. After you’ve eliminated all bubbles, wipe away excess adhesive with a damp sponge. This prevents sticky residue that’ll compromise your finish. Take your time and stay methodical.
🏠Details: 15.8x197 Inch, total 21.65 sq.ft (40cmX5m). 1.3x1.3in per mosaic tile. Self adhesive(no extra glue needed). Made of durable vinyl, Blue tile wallpaper peel and stick waterproof. Oil proof. Fully removable.

✅ Self-Adhesive & Hassle-Free Installation:1. Clean the wall surface clean, keep it dry and flat (if there are uneven areas on the wall surface, they can be ground flat before use for better overall effect). 2. Tear off the backing paper at one corner of the wall panels, confirm the pasting position, and use your hand to smooth out the peel and stick wallpaper while tearing off more backing to paste (convenient for timely adjustment to avoid excess loss). 3. Then use a manual knife to cut off the excess part. 4. After pasting, press the edges and corners of the connection with your hand to make the fluted wall panels more adhesive to the wall surface.It's done. Thank you for your hard work.

When you open the tile:If you see wrinkles or bubbles, don't worry, they won't affect the adhesive effect. You can easily use your hands or a scraper to solve the problem during use..(The surface of these Wall Panels is not hard, but made of PVC composite material, which is lighter and easier to cut and use.)
Seal Your Wallpaper and Let It Dry (48 Hours)

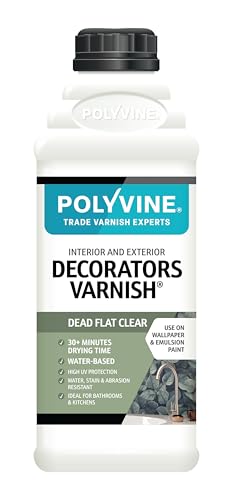
Now that you’ve smoothed out those stubborn air bubbles, it’s time to protect your hard work by sealing the wallpaper and giving it the full 48 hours it needs to dry properly. I’ve learned the hard way that rushing this step—or worse, taking a shower before the adhesive sets—can undo everything you’ve accomplished, so patience really pays off here. Once everything’s completely dry, you can apply a decorator’s varnish to lock in moisture resistance and guard against the stains and scuffs that come with bathroom use.

Ideal for use on emulsion paint and decorative paintwork

Off-white concrete wallpaper use back-sticking technology with strong adhesion, no additional adhesive needed, just peel and stick,even beginners can do it, it's an economical and easy way to quickly upgrade walls and old furniture.

🏠DETAILS: Size 15.8 X78.8 Inch, total 8.65 sq.ft(40cmX2m), Self adhesive (no extra glue needed). Made of durable vinyl, embossed woven grasscloth white textured peel and stick wallpaper, paintable, thick, waterproof, oil-proof. removable.
Protective Varnish Application
How’d you like your wallpaper to stay looking fresh for years instead of getting dingy from bathroom moisture and daily wear?
I’ve found that applying a clear decorator’s varnish protects your wallpaper surface. You can choose from several finishes:
- Dead flat (matte) for a subtle, elegant look
- Satin for balanced protection and sheen
- Gloss for maximum durability in wet areas
- Satin plus dead flat layers for high-traffic zones
The varnish shields against moisture, stains, scuffs, and fading—providing your walls with lasting protection. I apply it with proper ventilation, then wait the full 48 hours before heavy use. This patience pays off. Countless homeowners have discovered this practical upgrade. Your bathroom wallpaper will benefit from it.
Drying Time Requirements
Once you’ve applied that protective varnish and let it cure properly, you’re ready for the next critical phase: giving your entire installation the full drying time it needs.
I can’t stress this enough: 48 hours is non-negotiable. Your drying time requirements are the foundation of a successful, long-lasting installation. During this window, resist the urge to shower, splash water, or even turn on your exhaust fan—I know it’s tempting, but moisture will sabotage your adhesive’s bonding process.
Keep your bathroom door closed and maintain stable temperature and humidity levels. Avoid running humidifiers or ventilation systems; they’ll prematurely disrupt the adhesive’s cure. Think of these two days as your wallpaper’s essential healing period. You’re part of a community of patient installers who understand that rushing leads to bubbling, peeling, and regret. Your restraint now results in a bathroom you’ll enjoy for years.
Identify the Best Placement Zones in Your Bathroom
Where you hang wallpaper matters just as much as which pattern you choose. Strategic wallpaper placement protects your investment while maximizing visual impact.
Strategic wallpaper placement protects your investment while maximizing visual impact in bathroom design.
Consider these zones when planning your bathroom design:
- Away from splash zones – Keep wallpaper behind the sink, beside the bath, or near showers where water sprays constantly
- Upper wall areas – Reserve wallpaper for spaces above tile or paneling for protection and visual interest
- Small bathroom features – Use bold wallpaper on a single wall where just a couple rolls create a noticeable effect
- Well-ventilated spots – Position wallpaper where air circulates freely, preventing moisture damage
Proper ventilation guides everything. Combining wallpaper with protective finishes—like tiling the lower half—gives you the best of both worlds. This balanced approach lets you enjoy beautiful design without constant worry about water damage.

【𝐏𝐞𝐞𝐥 𝐚𝐧𝐝 𝐒𝐭𝐢𝐜𝐤 𝐖𝐚𝐥𝐥𝐩𝐚𝐩𝐞𝐫】🛠️ No glue, no stress—our tropical wallpaper is self-adhesive and renter-approved. Just peel and stick to walls, shelves, or cabinets for an instant makeover that’s easy and satisfying.

【𝐁𝐢𝐫𝐝 𝐖𝐚𝐥𝐥𝐩𝐚𝐩𝐞𝐫】🐦 Size: 17.5in x 23ft(44.5cm x 7m)covers 33.5 sq.ft per wallpaper roll. Material: Durable PVC. The bird floral wallpaper features a textured beige birds and floral pattern. Affordable/ Waterproof / Prepasted / Removable/ Renter friendly / Straight match.

【𝐂𝐨𝐚𝐬𝐭𝐚𝐥 𝐖𝐚𝐥𝐥𝐩𝐚𝐩𝐞𝐫】🔺 𝐀𝐭𝐭𝐞𝐧𝐭𝐢𝐨𝐧: 𝐓𝐡𝐞 𝐜𝐨𝐚𝐬𝐭𝐚𝐥 𝐰𝐚𝐥𝐥𝐩𝐚𝐩𝐞𝐫 𝐢𝐬 𝐩𝐫𝐢𝐧𝐭𝐞𝐝 3𝐃, 𝐟𝐥𝐚𝐭 𝐬𝐮𝐫𝐟𝐚𝐜𝐞. ‼️Size: 17.5in x 10ft(44.5cm x 3m)covers 14.3 sq.ft per wallpaper roll. Material: PVC. The coastal peel and stick wallpaper is Matte finish/ Waterproof / Prepasted / Removable/ Renter friendly / Straight match.


