
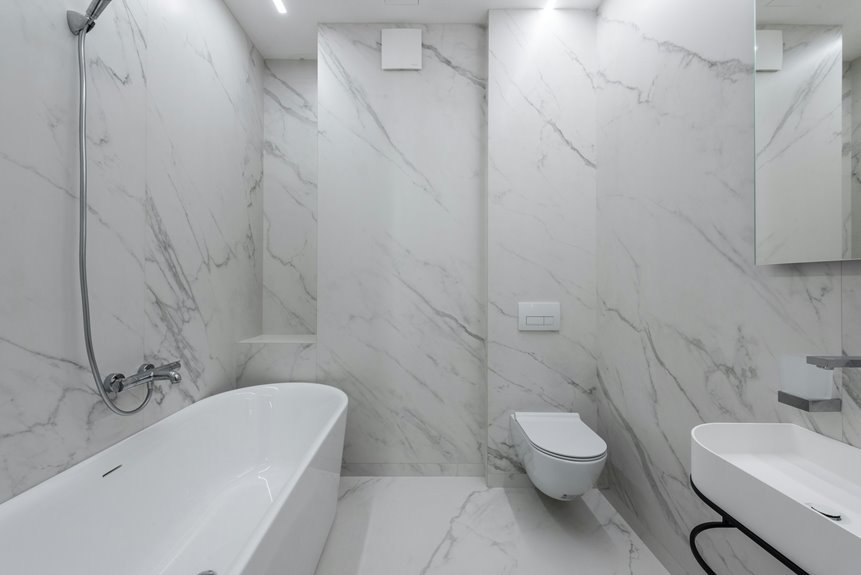
Bathroom tile installation typically costs $400–$10,000 total, though most projects land around $2,700–$7,000 depending on your bathroom size and material choices. You’ll pay $5–$15 per square foot for professional labor, with ceramic tiles running $6–$15 per sq ft and natural stone climbing to $18–$65. Regional rates vary markedly—urban areas charge $12–$15 while rural zones run $5–$8. Factor in prep work, waterproofing, and old tile removal, which add another $1–$5 per sq ft. Understanding these variables helps you budget accurately.
Average Bathroom Tile Installation Costs

How much should you actually expect to spend on bathroom tile? Most bathroom tiling projects range from $400 to $10,000 total, depending on your choices and square feet of space. Here’s what typically factors in:
Material and Labor Breakdown
Your material costs depend heavily on tile type. Ceramic runs $6–$15 per square foot, while porcelain climbs to $8–$40. Labor costs usually add $5–$15 per square foot for professional installation.
For a modest bathroom project, budget around $2,700 for a shower. A 129 square feet project might cost roughly $266–$370 in basic materials and labor combined.
What Affects Your Final Price
Surface prep, waterproofing, old tile removal, and intricate patterns all increase expenses. Understanding these variables helps you plan realistically.

Includes 12 Pieces per Case | 5.16 Square Ft. Per Case | Case Weight 34.8 lb |TILE SIZE: 8 in. W x 8 in. L x 0.55 in. T

Nexus Vinyl Tiles: Refresh your home for a low cost and no hassle with the Nexus Vinyl Floor Tiles. Our tiles can be used in any room in your home including the kitchen, dining room, bedrooms, bathrooms, foyers, and basements. No messy glue or adhesives needed. Includes 20 vinyl tiles.
Cost Breakdown by Bathroom Size

What’s your bathroom actually worth in tile? Your bathroom size determines your tile installation costs significantly. Here’s what I’ve discovered:
- Small bathrooms: $3,000–$4,500
- Medium bathrooms: $4,500–$7,000
- Large bathrooms: $7,000–$12,000+
- Shower tiling alone: typically $2,700
- Total range across all sizes: $400–$10,000
Your actual expense depends on bathroom dimensions and material choices. A compact bathroom will cost less than a sprawling master bath. Material matters too—ceramic runs $8–$15 per square foot, while porcelain costs $12–$25 per square foot. Prep work and design complexity push larger spaces higher in cost. Understanding your bathroom size helps you estimate accurately before contractors arrive. You’re making an informed decision that reflects your space and budget.


Includes 15 Pieces per Case | 14.4 Square Ft. Per Case | Case Weight 37.35 lb |TILE SIZE: 11.63 in. W x 12.75 in. L x 0.24 in. T

Easy DIY, Just Peel & stick, cut with tin snip, utility knives or hand saws, saving large amount on labor
How Tile Material Affects Installation Cost

How Tile Material Affects Installation Cost
Your choice of tile material makes one of the biggest differences in your final bill—sometimes doubling or tripling your costs.
Tile material selection is one of the most impactful factors on your installation costs, potentially doubling or tripling your final bill.
Budget-Friendly Options
Ceramic tiles run $8–$15 per square foot, making them ideal if you’re watching expenses. They’re forgiving during installation, so labor costs stay reasonable.
Mid-Range Choices
Porcelain tiles cost $12–$25 per square foot but demand specialized cutters and careful subfloor prep, bumping up labor expenses. Glass tiles start around $20 per square foot and require intricate, time-intensive installation.
Premium Materials
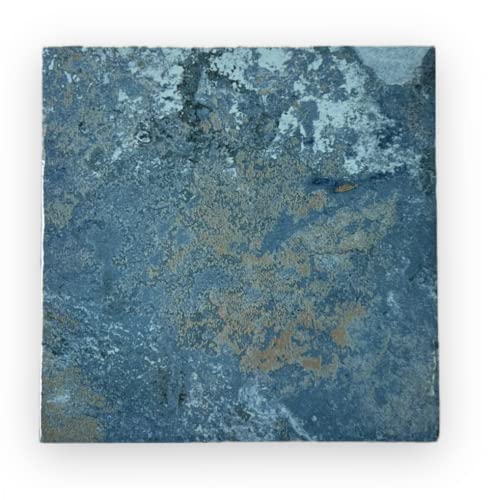
Natural stone tiles range from $18–$65 per square foot, needing expert handling and sealing. Mosaic and penny tiles, costing $30+ per square foot, involve countless grout joints and painstaking placement.
Your tile choice directly impacts both material and labor costs, so consider your budget carefully before deciding.

Fewer Seams, Faster Install: The waterproofing membrane measures 3.77 ft X 33 ft. The Total spread area is 125 square feet, which is WIDER than the traditional 3.3 ft X 33 ft (108 sq), Less cutting and taping means quicker coverage for your bathroom or basement

Complete Waterproofing Kit: This waterproofing seal kit includes 6 inside waterproofing membranes and 4 outside waterproofing corner membranes, delivering reliable waterproof performance for your bathroom requirements

【High-density PE waterproof membrane】 - Product size: 3.3 FT x 33 FT; Total spread area: 108 Sq Ft. Made from high-density polyethylene, our waterproof membrane for Shower offers superior durability and long-lasting protection.ensuring your shower, bathroom, sauna, and wet areas stay protected from moisture.
Labor Costs: A Major Installation Expense

Labor costs often catch homeowners off guard because they fluctuate significantly based on your location and tile pattern complexity. A straight layout in a basic bathroom might cost $5 to $15 per square foot, but intricate patterns like herringbone or work in a high-cost region will drive prices up. Knowing how your installer charges and what factors affect their rates helps you plan your budget more effectively and avoid unexpected expenses.

【Sophisticated Marble Design】:Transform your space with these peel and stick wall tiles featuring a sophisticated marble-inspired design (not real marble tiles). Perfect for enhancing washroom walls, kitchen backsplashes, or accent walls, these tiles deliver a high-end look without the high cost.(Not suitable for use on floors and in high humidity shower rooms.)
【Realistic Marble Look】Enjoy the elegant appearance of high-end polished marble without the weight, cost, or complicated installation. Our marble wall panels feature a thickened PET surface for enhanced scratch and heat resistance, paired with a realistic marble design that adds luxury to any space—perfect for a stylish yet practical upgrade.(not real marble)

Hourly Rates by Region
How much you’ll actually pay for labor varies markedly depending on where you live, and that’s one of the biggest factors in your total installation cost. Regional variation in labor costs can swing your project budget significantly. Here’s what influences your local rates:
- Urban areas typically charge $12–$15 per square foot
- Suburban regions fall around $8–$12 per square foot
- Rural locations may offer $5–$8 per square foot
- Coastal cities often exceed $15 per square foot
- Midwest communities generally stay mid-range at $7–$10 per square foot
Your specific bathroom size, tile complexity, and surface prep needs also shape these numbers. When you’re comparing quotes from local contractors in your area, you’ll notice these regional patterns emerge clearly. Getting multiple bids helps you understand what’s fair for your neighborhood.
Complexity Affects Labor Pricing
When you’re choosing between a simple subway tile pattern and an intricate herringbone design, you’re really choosing between two very different labor bills.
Here’s what I’ve discovered: intricate patterns demand more of your installer’s time and skill. A herringbone layout requires precise angle cuts and careful alignment, which takes considerably longer than straightforward rows. Chevron designs? Even trickier. Your installer must plan the layout meticulously, measure twice, cut often, and account for waste.
Design Complexity Matters
Simple patterns might run $5 to $8 per square foot in labor. But intricate designs can push toward $12 to $15 per square foot. You’re paying for expertise and patience—both necessary when tile placement directly impacts your bathroom’s visual appeal. The labor investment has real value when your design matches your preferences.
DIY vs. Pro Installation: Where to Save

I’ve found that deciding between DIY and professional installation really comes down to two big questions: Can you honestly do the work yourself, and will the money you save actually be worth your time? When I compare costs, professionals charge $5 to $15 per square foot for labor, but I can eliminate that expense if I’m willing to invest the hours learning proper techniques and avoiding mistakes that’d cost me way more to fix. Your skill level matters just as much as your budget, because rushing through layout or improper prep work might save you a few hundred dollars upfront but leave you with cracked tiles or water damage down the road.

Keep a clean, NATURAL APPEARANCE and improve the DURABILITY of your grout in your shower, kitchen, bathroom, and tile flooring

For use inside or out on a variety of surfaces including sanded grout, ceramic tile, porcelain tile, glazed tile, stucco, travertine, marble, slate, granite, terrazzo and more to protect against water, stains and slippage
EXCELLENT ADHESION: Adheres to all types of ceramic & mosaic tile
Cost Comparison Analysis
Your Budget Breakdown
Professional installation runs $5–$15 per square foot, while DIY saves labor costs but demands tool access and expertise. Here’s what matters:
- Professional ceramic tile installation averages $3,000–$4,500 for small bathrooms
- DIY reduces costs but increases mistake risk and rework expenses
- Removal and surface prep add $1–$5 per square foot to either approach
- Labor costs spike with larger showers and complex patterns
- Bigger projects easily exceed $12,000 with professional installation
Going pro means expertise and warranty protection. DIY means savings—if you’ve got the skills. Consider your comfort level honestly; mistakes cost more than labor ever would.
Skill Level Assessment
Knowing whether you can handle tile yourself—or should hire someone—comes down to honest self-assessment. If you’ve successfully completed home projects before, DIY tiling might save you significant labor costs—potentially $300 on a small shower. However, this route demands proper tools, waterproofing knowledge, and grout expertise.
Consider these factors:
- Do you own tile cutters and spacers?
- Can you prep surfaces correctly?
- Will mistakes cost more in materials than hiring pros?
Professional installation ($10–$15/ft²) provides quality adhesive application and lasting results. For intricate patterns or small spaces where precision matters, professionals justify their expense. If you’re uncertain about waterproofing standards or have limited experience, hiring someone prevents costly repairs later. Weigh your confidence against project complexity honestly.
Old Tile Removal and Subfloor Repair

Before you can lay down beautiful new tile, you’ve got to deal with what’s already there—and that’s where old tile removal and subfloor repair come in.
Removing old tile costs vary, and understanding these expenses helps you budget smartly:
- Removal costs range from $1 to $5 per square foot, depending on adhesive type and tile condition
- Surface prep includes leveling floors or patching damaged areas after removal
- Debris disposal covers hauling away old materials separately
- Labor minimums of 2 hours may apply to other tasks if you choose removal
- Project impact means removal influences your timeline, especially on larger surfaces
I’ve seen poorly installed tiles complicate everything, but tackling subfloor repair upfront prevents headaches later. You’re investing in a solid foundation for your bathroom renovation.

【Color and Size Specifications】:1.5IN/38mm(Width), 10.5FT/3.2m(Length), 0.04IN/1mm(Thickness) Color: White caulk tape waterproof sealant caulk strip has a crease in the middle. CDFYREC caulking strip with crease design can be folded to 90 degrees for tightly sealing gaps between walls.

Capture the elegance of marble available in two colors

Powerful grout & tile cleaning formula: Goo Gone Grout & Tile Cleaner effectively removes tough stains, dirt, mold, mildew, soap scum, and hard water stains from bathroom and kitchen surfaces. Perfect for deep cleaning shower tiles, bathroom floors, tub surrounds, and countertops without harsh scrubbing.
Why Waterproofing Costs Extra (and When It’s Worth It)

I’ll be honest—waterproofing might feel like an extra cost you’re tempted to skip, but it’s actually one of those investments that saves you thousands in water damage repairs down the road. When I learned that moisture behind shower tiles can silently rot your subfloor for years before you even notice, I realized that installing a proper moisture barrier upfront is far cheaper than replacing rotted wood or battling mold later. Let me show you both what this protection costs and why it’s worth every penny.
Exquisite Marble Design: Elevate your space with these peel-and-stick wall tiles that boast an exquisite marble design. These tiles are perfect for decorating shower walls, kitchen backsplashes, or accent walls, providing a high-end look without the high cost.

POWERFUL MULTI PURPOSE CLEANER Tackle grease, grime, stains, and buildup with The Pink Stuff Cleaning Paste. Designed for high performance cleaning across kitchens, bathrooms, and household surfaces.
Moisture Barrier Installation Costs
Why does waterproofing seem to add so much to your bathroom tile budget? I’ll tell you—it’s because moisture barriers require specialized installation that goes beyond basic tiling.
Here’s what drives those costs up:
- Membrane materials (liquid or sheet-based products)
- Labor for proper application alongside tile work
- Surface leveling and subsurface prep before installation
- Sealants and flashing around fixtures
- Additional time for correct moisture barrier placement
You’re investing in protection, not just aesthetics. When I install these barriers in showers and wet zones, I’m preventing leaks that’d cost thousands later. The membrane acts as your insurance policy—keeping water from seeping behind tiles where it causes hidden damage.
Factor waterproofing into your estimate upfront. It’s worth the investment.
Long-Term Damage Prevention Benefits
What happens when water sneaks behind your tiles? You’re looking at mold, rot, and structural repairs that’ll drain your wallet fast. I’ve seen homeowners skip waterproofing to save a few hundred dollars, then face thousands in remediation costs later.
Here’s the reality: waterproofing membranes upfront prevent moisture intrusion that destroys everything behind your walls. In frequent-use showers, this protection matters.
| Scenario | Upfront Cost | Future Damage Cost | ROI |
|---|---|---|---|
| With waterproofing | $500–$800 | Minimal risk | High |
| Without waterproofing | $0 | $3,000–$10,000+ | Negative |
| Shower area | $400–$600 | Prevented damage | Excellent |
| Backsplash | $200–$400 | Reduced risk | Strong |
Waterproofing extends tile longevity and cuts maintenance headaches. You’re not just buying peace of mind—you’re investing in your home’s durability.
How Custom Tile Designs Impact Your Budget

Custom designs and labor costs go hand-in-hand. When you want those fancy patterns, you’re paying more—sometimes 20–50% extra—because installers need specialized skills and extra hours. Here’s what impacts your wallet:
- Intricate patterns require precise layout planning
- Material waste increases with complex designs
- Custom shapes demand additional cuts and specialized tools
- Waterproofing and surface prep become more involved
- Decorative trim and accents add separate expenses
Deciding your design direction early is practical. This choice influences everything downstream, from prep work to final touches, so it’s worth budgeting honestly upfront.

✅Strongly Waterproof: With excellent waterproof performance, the seam tape prevents moisture from permeating your shower wall, dry wall, tiles, curb, niche, pan, flooring, and any other surfaces that need to be waterproof.

DIMENSIONS: Each roll measures 5 inches wide by 100 feet long, providing ample coverage for a variety of waterproofing projects.
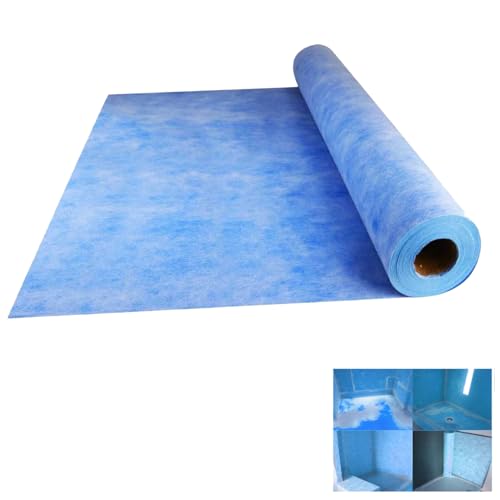
WATERPROOF MEMBRANE FOR SHOWER TILE INSTALLATION – 3.3FT x 98.5FT roll, 323 Sq Ft total coverage, 23.6 Mil (0.6mm) thick. Blue HDPE waterproofing sheet creates a moisture barrier between tile assemblies and substrate in shower floors, bathroom walls, sauna rooms, steam rooms, and wet areas. Suitable for new construction and bathroom renovation projects.
Six Ways to Cut Costs Without Compromising Quality

Now that you understand how custom designs can inflate your budget, there’s good news: you don’t need fancy patterns to get a bathroom that looks great and lasts.
I’ve found that strategic choices make real differences. Choose ceramic or porcelain tiles in the $8–$25 per square foot range instead of premium options. Skip intricate herringbone layouts; simple grid patterns cut labor time significantly. If you’re handy, DIY installation saves $5–$15 per square foot on labor costs.
Plan ahead for tile installation by handling surface prep yourself, which eliminates expensive contractor markups. Get removal quotes early so ancillary costs don’t blindside you later. These cost-saving moves aren’t sacrifices—they’re smart planning that lets your bathroom work well without the high price tag.

Interlocking & No-Glue: With user-friendly interlocking system, tiles can be easily installed and removed without any tools. Innovative interlocking buckle eliminates the hassle of using or cleaning glue compared to peel and stick floor tiles

【Size】20 Pieces 23.6x11.8in (38.7 Sq. Ft. Coverage)

Easy DIY peel-and stick installation with no glue or extra tools. These self adhesive vinyl tiles adhere tightly to clean flat surfaces for quick room upgrades without professional installers.
Five Pricing Mistakes That Blow Your Budget

they make decisions without understanding the real costs hiding beneath the surface.
I’ve watched countless budgets derail because people overlook critical expenses. You’ll want to sidestep these common pitfalls:
- Skipping multiple contractor quotes hides a 13–22% markup you’d otherwise pay
- Underestimating surface prep and old tile removal balloons costs beyond material and labor cost estimates
- Forgetting waste and future repairs leaves you short when calculating tile quantity
- Choosing premium materials without adjusting for increased labor cost complexity
- Ignoring regional differences causes actual expenses to diverge dramatically from national averages
The tile costs you see online rarely account for your specific situation. Waterproofing requirements, site conditions, and local labor rates shift everything. You’re not just buying tile—you’re investing in proper installation. Understanding these mistakes beforehand keeps your project grounded in reality, not surprise invoices.

Convenient applicator bottle included; applicator tip

KEEP A CLEAN, NATURAL APPEARANCE: Our grout sealer offers excellent water and stain resistance, penetrating deep into joints to help preserve their natural color and texture while significantly improving durability in showers, kitchens, bathrooms, and tile floors. It effectively reduces stain accumulation for a long-lasting, clean surface

Efficient Grout Restoration: Say goodbye to worn-out, discolored grout lines with our Magic Chems Grout Repair Kit. Specifically formulated for grout repair and tile grout, this kit efficiently restores grout lines, rejuvenating the appearance of your bathroom tiles. Elevate your DIY game with professional results. The Magic Chems Grout Repair Kit empowers you to achieve a polished finish without the need for costly professional assistance. Enjoy a bathroom or kitchen makeover on your terms.
What to Ask Local Contractors Before You Quote

Getting those pricing mistakes under control starts with asking the right questions upfront. I recommend requesting a detailed line-item estimate breaking down materials, labor, underlayment, fasteners, and debris disposal separately. This transparency prevents surprises later.
Request detailed line-item estimates breaking down materials, labor, underlayment, fasteners, and debris disposal to prevent pricing surprises.
Next, clarify your contractor’s scope of work. Does the base price include backer board prep, layout, thinset application, and grout? Ask whether they charge differently for wall versus floor tiles, since labor varies greatly by space type.
Pay attention to regional rate differences and minimum labor blocks. Some contractors apply a two-hour minimum to additional tasks, which could increase your costs unexpectedly.
Finally, discuss how tile choice—ceramic, porcelain, or natural stone—affects both material expenses and installation time. Stock availability matters too.
Getting Accurate Quotes From Multiple Installers

How do you know if you’re actually getting a fair price?
Getting multiple quotes isn’t just smart—it’s necessary. When you reach out to different installers, you’ll want to keep things consistent so labor costs and quotes are actually comparable.
Here’s what I provide each contractor:
- Square footage of your bathroom space
- Specific tile type and quality level
- Prep work needed, including waterproofing requirements
- Old tile removal and disposal expectations
- Complete scope of basic labor (measuring, layout, thinset application, grout work, cleanup)
I typically use a standardized sample area—around 129 square feet—to benchmark costs across contractors. This approach reveals true pricing differences rather than confusion from varying scopes. Remember, quotes often exclude sales tax and permits, which can add 13–22% more. Always verify what’s included before deciding.


