
I’ve found that matching your cleaner to the stain works well. Black mold needs alkaline cleaners like Tilex; rust stains need acidic ones like Bar Keepers Friend. Start with a baking soda paste and old toothbrush on grout lines, scrubbing gently in circles. For stubborn spots, try diluted bleach with ventilation. Rinse thoroughly, dry completely, and seal grout afterward. Weekly maintenance with a damp mop prevents most buildup. There’s more specific guidance for each stain type ahead.
Essential Tools and Cleaners for Different Stain Types

What works best for tackling bathroom tile stains without causing more damage in the process? Matching your tile cleaner to your specific stain type is important.
For Soap Scum and Mineral Deposits
Alkaline cleaners like Tilex or Scrubbing Bubbles work on grout and surfaces effectively when you let them sit before scrubbing.
Alkaline cleaners like Tilex or Scrubbing Bubbles work effectively on grout—just let them sit before scrubbing.
For Rust and Lime Buildup
Bar Keepers Friend targets hard water stains without harsh acids that damage porcelain.
Your Essential Toolkit
A medium grout brush penetrates stubborn lines, while microfiber cloths apply cleaners gently. A steam cleaner offers optional but powerful results. Avoid metal brushes—they scratch tiles—and natural stone requires specialty products to prevent damage.

What You'll Get: One 32oz trigger bottle of Scrubbing Bubbles Rainshower Mega Bathroom Spray. Bottle Made from 100% recycled content (excluding dye, trigger, and label)

KILLS 99.9% OF BACTERIA AND VIRUSES when used as directed. Also kills the virus that causes Covid-19 (SARS-Related Coronavirus 2) on hard, non-porous surfaces making this bathroom cleaner ideal for cleaning and sanitizing.

EWG VERIFIED: This shower cleaner is formulated with clean ingredients and certified by the Environmental Working Group to meet their strict health and safety standards. Free from concerning substances like , chlorine, and glycol solvents.
How to Identify Mold, Rust, Lime, and Soap Scum

Can you tell the difference between that grimy buildup in your shower corner and the stain creeping across your grout lines? I couldn’t either—until I learned what to look for.
| Stain Type | Appearance | Location |
|---|---|---|
| Mold/Mildew | Black or green spots | Damp corners, grout |
| Rust | Reddish-brown | Porous grout areas |
| Lime | Chalky-white or pale green | Tile surfaces |
| Soap Scum | White film, sticky | Tile faces |
What you’re seeing matters. Mold thrives on soap, dust, and skin cells in poorly ventilated spaces. Rust indicates hard water mineral deposits accumulating over time. Lime buildup appears when minerals precipitate on surfaces. Soap scum creates that dull coating from fatty acids reacting with hard water.
Each requires different cleaners—alkaline formulas for mold, acidic solutions for mineral deposits, specialized rust removers for stains. Identifying correctly prevents neutralizing cleaners that cancel each other out.

EVAPO-RUST RUST REMOVER: Evapo-Rust effortlessly removes rust from automotive parts, hardware, tools, cookware, and antiques without any scrubbing or sanding.

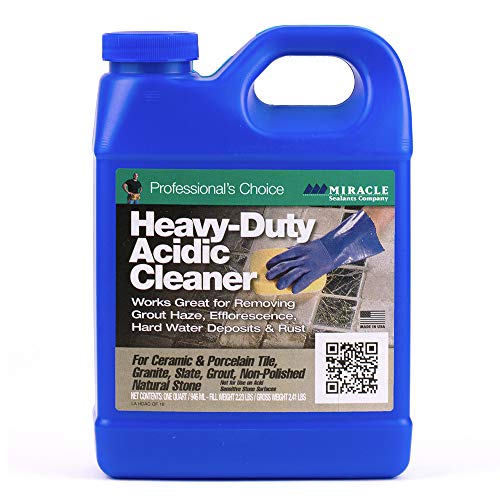
POWERFUL NON-ACID CLEANER: Effectively removes grout haze, grease, and dirt from ceramic, porcelain, glass, grout, and natural stone surfaces without harsh acids
How Long Does Deep Cleaning Take?

The time you’ll spend cleaning your bathroom tiles depends on what you’re working with, and planning realistically helps avoid surprises. You might finish a standard shower in about 15 minutes, but stubborn stains, larger tile areas, and product dwell time (that waiting period while cleaner sits on the surface) can stretch things out considerably. Here’s what affects your timeline so you can schedule your deep clean accordingly.
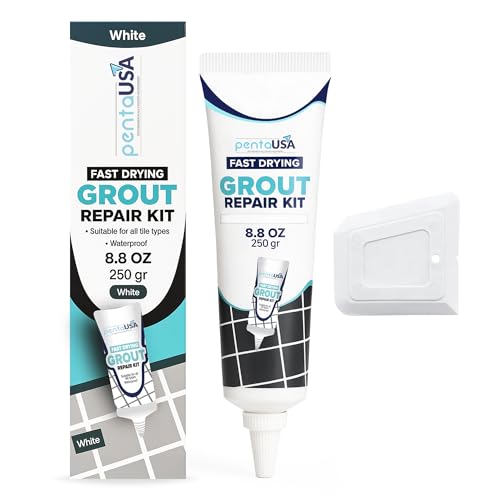
Acrylic Sanded Grout Filler That Cures Into Solid Grout - This premixed tile grout repair contains acrylic sanded grout material in a clean white tone that fills cracks, missing sections, and damaged joints, curing into solid grout-like material that bonds to existing grout and tile for durable structural repair on floors, walls, and countertops. Designed for DIY tile grout repair, suitable for first-time users, homeowners, and handyperson-level work.

POWERFUL & NATURAL ALL-PURPOSE TILE GROUT CLEANER BUNDLE. Remove tough grout stains on bathroom floors, soap scum & hard water buildup on shower glass, and grease on kitchen surfaces with our heavy-duty, non-toxic multi purpose power paste cleaner.

Restore Tile Joints with Ready-Mixed Grout: ISPAR grout repair kit helps renew old, stained, cracked, or worn tile joints with a smooth pre-mixed grout filler paste. Ideal for refreshing bathroom, shower, kitchen, wall, and floor tiles.
Time Required Per Area
How much time you’ll actually spend scrubbing depends on your shower’s size and how stubborn those stains are. A full-size shower setup typically takes about 15 minutes, though your cleaning duration varies significantly based on tile area and stain severity.
| Area Size | Cleaning Duration |
|---|---|
| Small bathroom (50 sq ft) | 10-12 minutes |
| Medium bathroom (75 sq ft) | 15-18 minutes |
| Large bathroom (100+ sq ft) | 20-25 minutes |
| Heavy stain removal | Add 5-10 minutes |
| Grout-focused work | Add 3-5 minutes |
Dwell time matters most here. Let your cleaning solution sit for the product’s minimum stated time before you scrub and rinse. Targeting grout specifically requires extra attention since its porous nature holds stains deeper. Don’t rush this phase—patience during scrubbing improves stain removal results.
Factors Affecting Cleaning Duration
Several variables determine whether your deep cleaning session takes 15 minutes or closer to 45, and understanding them helps you plan realistically.
Stain severity matters most. Light soap scum differs vastly from stubborn grout stains requiring multiple attempts. I’ve learned that darker discoloration demands longer dwell time—sometimes 10-20 minutes instead of five—for the cleaner to penetrate effectively.
Your tile area influences timing. A small bathroom corner cleans faster than a full shower surround, naturally extending your cleaning duration.
Maintenance history changes everything. When you’ve skipped weekly vinegar sprays, that deep cleaning demands extra scrubbing. Conversely, consistent maintenance shortens sessions significantly.
Product recommendations require respect. Following dwell time instructions produces effective results without shortcuts. Sometimes persistent grout stains need colorant or sealer afterward, adding time but delivering lasting cleanliness.
Scheduling Your Deep Clean
Once you’ve understood what affects your cleaning timeline, you can actually plan your deep clean without guessing. Scheduling matters just as much as the work itself.
| Task | Time Needed |
|---|---|
| Spray & dwell time | 5–10 minutes |
| Scrubbing grout | 5–8 minutes |
| Rinsing thoroughly | 2–3 minutes |
| Drying surfaces | 2–4 minutes |
Your bathroom cleaning schedule works best when you build it into your maintenance routine. Most full-size showers need about 15 minutes total, though mold and mildew prevention might require repeating cleaning steps if buildup’s heavy. Schedule deep cleaning monthly—it prevents stubborn stains from settling permanently. Set a bathroom cleaning schedule that fits your life, not against it. Consistency beats intensity every time.
Step-by-Step Cleaning Process for Tiles and Grout

I’ve found that the best way to get your tiles sparkling is following a straightforward method: spray your surfaces with a suitable cleaner, let it sit for the recommended time, then scrub those grout lines with a small brush or old toothbrush using targeted pressure. After you’ve worked through all the crevices, rinse thoroughly with clean water and dry everything completely to prevent water spots and mold growth. When you’re facing stubborn stains that won’t budge, that’s when hydrogen peroxide or a diluted bleach solution (mixed 1:10 in a well-ventilated space) becomes your best option—just let it dwell, scrub, and watch the discoloration fade away.

Powerful Steam Cleaner: This steam cleaner heats up in just 15 seconds, releasing high-temperature steam at 221°F (105°C) and 3 bar of pressure, instantly dissolving stubborn grease, grime, stains, and bacteria. With a power output of 1500 watts, it effortlessly removes dirt and is a reliable helper for everyday household cleaning

【Powerful 230°F Pressurized Steam – No Water Spitting, Deep Clean in Seconds】Tired of weak steam or messy water leaks? This handheld steam cleaner delivers consistent 230°F high-pressure steam with no water spitting, instantly cutting through grease, soap scum, and grime. It features a 350ML large-capacity tank( recommended fill level of up to 280ML). Enjoy 7–10 minutes of continuous steam for deep cleaning without endless scrubbing

Powerful Steam Mop Cleaner: Steam cleaner is your reliable assistant for home cleaning or Mother's Day gift; Utilizing high-pressure steam effectively, heating up in just 10 seconds, reaching temperatures of up to 248°F to swiftly convert water into steam, equipped with 2 adjustable steam modes, effortlessly eliminating dirt, grease, and tough stains on various indoor and outdoor surfaces
Spray, Dwell, Scrub
What makes tiles sparkle instead of just looking “less dirty”? Follow three straightforward steps that work on even grimy backsplash areas.
The Process:
First, spray the cleaning solution directly onto the wall or dampen your sponge, letting it sit for the product’s recommended time—usually five to ten minutes. This dwell period matters; it breaks down stubborn grime.
Next, target grout lines with a medium bristle brush, working the cleaner into those porous crevices where dirt hides. The scrubbing action loosens embedded buildup.
Finally, rinse thoroughly with clean water and dry completely. This prevents soap scum and mold from returning.
For stubborn spots, apply an alkaline cleaner like baking soda paste, then repeat the process. Persistent discoloration? A grout sealer protects future staining.
Rinse And Dry Thoroughly
Why does rinsing feel like it takes forever, yet skipping this step guarantees streaky tiles and moldy grout?
This final stage matters. Here’s what I do:
- Rinse twice with clean water to extract moisture and remove all cleaner residue completely
- Dry immediately using microfiber towels or a squeegee to prevent water spots from forming
- Focus on grout lines last, ensuring no pooled moisture remains where mildew thrives
- Never leave wet surfaces overnight, as this compromises tile color and grout integrity
I grab my trusty microfiber cloth and work systematically across the entire surface. The grout lines demand special attention—I make sure they’re completely dry since that’s where mildew loves to hide. Skipping this step means redoing everything later, so I stay committed until surfaces gleam.
Addressing Stubborn Stain Persistence
When standard cleaning leaves behind discolored grout or stubborn marks that won’t budge, you’ll need to shift strategies and dig deeper—literally.
Try a Baking Soda Paste First
Mix baking soda with water to create a thick paste, then apply it directly to stained grout. Using a small nylon brush or old toothbrush, scrub in circular motions to lift embedded stains from grout lines. This gentler approach works well for many stains.
Move to Stronger Solutions
If that doesn’t work, apply hydrogen peroxide or a diluted bleach solution (1:10 ratio) to mold and mildew. Provide adequate ventilation while treating, then follow with a vinegar rinse to break down mineral deposits. Finally, seal grout after deep cleaning to prevent future staining and maintain those results.
Choose the Right Cleaner for Each Stain Type

grabbing whatever cleaner’s under the sink won’t cut it if you want truly clean bathroom tiles.
Different stains need different approaches, and I’ve figured out which cleaners tackle each problem best:
- Mold & mildew: Use alkaline cleaners like Tilex or Scrubbing Bubbles to disrupt fungal growth effectively
- Rust and mineral deposits: Reach for lower-pH cleaners such as Bar Keepers Friend to dissolve hard water buildup
- Natural stone surfaces: Choose stone-safe products that avoid bleach, preventing etching or discoloration
- Stubborn stains: Apply hydrogen peroxide (3%) or diluted bleach (1:10 ratio) with ventilation, scrubbing grout lines thoroughly
Understanding pH levels changes everything. I’ve discovered that matching the right cleaner to your specific stain type—whether you’re battling alkaline or acidic buildup—saves time and preserves your tile’s appearance. You’re investing in results when you choose intentionally.

10x GRIP-ROOT WEAVE - TRAP MORE, WORK LESS: Ultra-absorbent microfiber towels for car Grip Root weave works like PLANT ROOT FOLLICLES, sucking up & LOCKING AWAY 8x to 10x its weight in liquid, particulates, moisture, grime and dirt in far LESS TIME than traditional ‘Heavy Duty’ Cleaning Rags. Each towel features a 2.5mm thick design, providing enhanced durability and better grip during use.

ULTRA SOFT MATERIAL & SCRATCH FREE - Ultra soft and highly absorbent microfiber cleaning cloths, great for cleaning windows, kitchenware, car or other delicate surfaces.
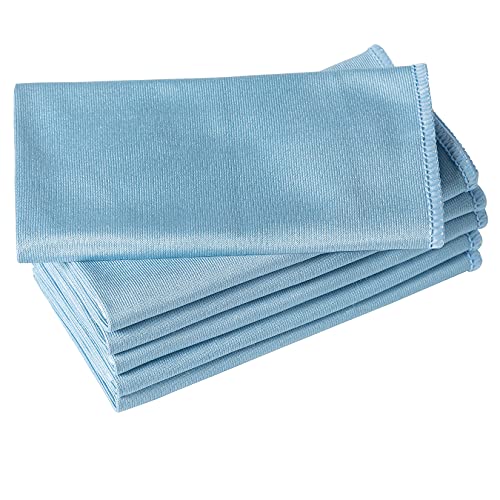
ABSORBENT & FAST DRYING - Microfiber material provides super absorbent water ability of the cloths makes quick drying large surface. They deliver extreme absorbency, so at the same time ensure quick drying.
Mistakes That Damage Tiles and Grout

Even after you’ve picked the perfect cleaner for your tile troubles, it’s easy to sabotage your results with the wrong tools and techniques.
I’ve learned this the hard way. Wire brushes and steel wool scratch glazed surfaces permanently. Instead, grab a medium-bristle brush or old toothbrush—gentler but effective.
Critical mistakes to avoid:
Never mix acidic cleaners like vinegar with alkaline ones; they neutralize each other, killing cleaning power. Skip harsh abrasive cleaners like Borax or Comet, which erode grout over time. With colored grout, bleach causes discoloration, so test any cleaner on a small test area first.
Your brushing method matters too. Let cleaners dwell for the recommended time, then use gentle motions. Aggressive scrubbing damages fragile grout irreversibly. Patience prevents costly repairs—follow the process, and your tiles stay beautiful longer.

Acid-free grout cleaner – Safely cleans grout without harsh acids. Will not degrade grout or damage tile, marble, granite, or natural stone surfaces.

EWG VERIFIED: This bathroom cleaner spray is formulated with clean ingredients and certified by the Environmental Working Group to meet their strict health and safety standards. Free from concerning substances like ammonia, alcohol, SLES and EDTA.

Simple & Easy to Use: wait 3-10 hours and rinse stains away without scrubbing required
Prevent Tile Buildup With Weekly Maintenance

Why do tiles that gleamed just months ago suddenly look dull and grimy? The answer lies in skipping consistent upkeep. I’ve learned that weekly maintenance prevents stubborn buildup that becomes exponentially harder to tackle later.
Here’s what I do each week:
- Clean floors with a damp mop using diluted dish soap in warm water
- Dry tiles immediately after cleaning and showering with a towel or squeegee
- Spot-clean grout monthly using a baking soda paste and white vinegar spray
- Schedule one full wet cleaning of walls and floors weekly, followed by a dry pass
This routine keeps my tile cleaning manageable and grout looking fresh. By establishing this weekly maintenance habit, I prevent the grime accumulation that makes bathrooms feel neglected. You’ll notice tiles stay brighter longer when you stay consistent.


Powerful Rust Stain Remover for Concrete and other Hard Surfaces – Specially formulated to eliminate rust stains on concrete, asphalt, pavers, and other hard surfaces like tile, stone, or grout without causing damage.


