

Start by removing everything—doors, drawers, hardware—then clean surfaces with a degreaser and sand with 120-grit, then 220-grit paper. Next, choose acrylic enamel or alkyd paint in satin finish, applying bonding primer twice for dark-to-light changes. Apply at least two paint coats with light sanding between each. Once dry, reinstall doors and hardware carefully, checking plumbing connections for leaks. Let the final coat cure several days before using your vanity. Each step builds on the last, and there’s plenty more technique to discover.
Prep and Clean Your Vanity Surfaces
Ready to refresh that bathroom vanity? I’ll walk you through cabinet prep that actually works.
First, remove everything—sink, hardware, doors, and drawers. This exposes all surfaces you’ll be painting.
Clean thoroughly. I use a degreaser like TSP to cut through soap buildup, hairspray, and lotion residue. Rinse twice with fresh water, then dry completely. This step matters more than you’d think.
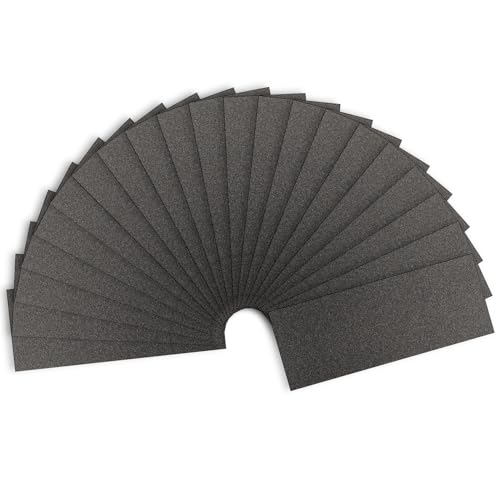
Sand your surfaces. Start with 120-grit sandpaper to dull the finish, then switch to 220-grit for smoothness. Wipe away every speck of dust—it’ll ruin your priming and painting.
Patch imperfections. Fill holes and gouges with wood putty, smoothing everything level.
Finally, vacuum and wipe with a damp microfiber cloth. Let surfaces dry fully before priming. You’re creating the perfect foundation for quality results.

Ideal for transforming old, outdated cabinets in kitchens, bathrooms, offices and more
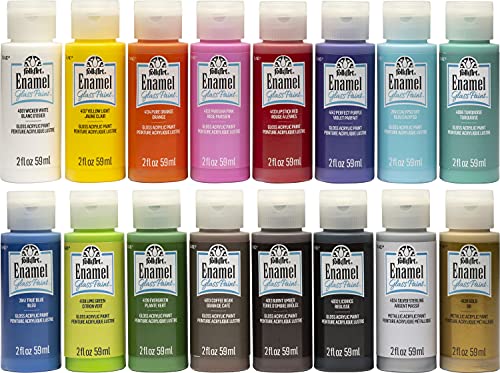
CONVENIENT SIZE - This enamel acrylic paint set includes 16 - 2 oz bottles of enamel craft paint. The colors in this paint set include: Wicker White, Yellow Light, Pure Orange, Parisian Pink, Lipstick Red, Perfect Purple, True Blue, Calypso Sky, Turquoise, Lime Green, Evergreen, Coffee Bean, Burnt Umber, Licorice, Silver Sterling, and Gold

Highly pigmented for opaque coverage
Choose the Right Paint and Primer for Bathroom Cabinets

What makes the difference between a bathroom vanity that looks great for years and one that starts peeling in months? Your paint and primer choices.
I’ve learned that acrylic enamel and alkyd paints work best for bathroom cabinets. Acrylic enamel offers low fumes and easy cleanup, while alkyd provides superior durability in moist environments. Here’s what I recommend: choose a satin or semi-gloss finish for moisture resistance that’ll protect your investment.
For primers, I trust shellac or oil-based options like BIN Shellac Primer and KILZ Adhesion Primer. They maximize adhesion and minimize brush marks. If you’re transitioning from dark to light colors, consider INSL-X STIX primer—applying it twice improves coverage and consistency. After sanding, you’re ready to topcoat with confidence.

Includes 30 featured and newest released color card. Sprayed on color to see our colors in your homes lighting for more accurate color choices.

Includes 30 featured and newest released color card. Sprayed on color to see our colors in your homes lighting for more accurate color choices.

The ultimate acrylic cabinet paint for a “factory-like” finish when refurbishing kitchen and bathroom cabinets, shelving, furniture, trim, and crown molding.
Remove Doors, Drawers, and Hardware
Before you crack open that paint can, you’ll need to strip your vanity down to its bones. I start by removing all cabinet doors and drawers, unscrewing each piece carefully. Next, I unscrew drawer fronts separately when possible—this lets me paint them off the cabinet body, saving time and mess.
Hardware Removal Steps:
- Remove knobs or handles with a screwdriver
- Place all bulkhead screws and hardware in a labeled hardware bag
- Seal the bag to prevent losing pieces
I label the backs of doors and drawers with masking tape, noting their original positions. This reassembly labeling prevents confusion later. Finally, I clear my workspace and protect surrounding surfaces with drop cloths. Proper paint preparation and masking protection prevents costly mistakes during your vanity renovation.

Ready to use, pre-mixed door and trim paint offers a fresh new look on interior or exterior metal, wood and fiberglass

ALL-IN-1 PAINT & PRIMER: A hardy multi-purpose and multi-surface one-coat paint and primer in one for almost any indoor or outdoor surface. A wall, ceiling, floor, skirting board, cabinet, furniture and door paint for your bathroom, kitchen, home and garden.

All-surface uniquely formulated paint solution: Easily refinish furniture, cabinets, countertops, doors, trim, floors and more
Sand, Prime, and Paint in Multiple Coats

Now that your vanity’s stripped down, it’s time to prepare the surfaces—and this step is important for the final result.
Get the Surfaces Ready
I start by sanding with 120-grit sandpaper, then progress to 220-grit for a dull, keying finish. This helps primer stick better.
Apply Bonding Primer
I apply two thin coats of bonding primer (STIX), allowing full dry time between applications. If I’m jumping from dark to light, I’ll prime twice for maximum coverage.
Paint in Layers
After priming, I cut in cabinet doors with brush strokes along edges, then roll remaining surfaces. I apply a light base coat, then at least two additional coats, sanding between coats lightly. This approach creates that smooth, durable finish you’re looking for.


As The Original, Shellac-Base Primer-Sealer, Nothing Is Better At Permanently Blocking Stains, Odors And Wood Knots

Superior odor sealing
Reassemble Your Vanity and Wait to Use It

Once that final coat’s dried to the touch, you’re ready to put your vanity back together—but here’s where patience really pays off.
Once the final coat dries to the touch, reassembly begins—but patience during this stage truly determines your project’s longevity.
Reassemble with Care
Start by reinstalling doors and drawers in their original spots. If you’ve upgraded your hardware, drill or pre-fit holes before reattachment to maintain proper alignment and smooth operation. This prevents frustrating misalignment that’ll bug you every time you open a drawer.
Connect and Check
Next, reconnect your faucet plumbing and sink components carefully. Verify all joints are secure by checking for leaks—turn the water on and inspect underneath for any drips.
The Waiting Game
Here’s the hardest part: let your vanity fully cure for several days before heavy use. Avoid placing items on newly painted surfaces during this time. This patience keeps your hard work in good condition for years, not months.
【PREMIUM MATERIAL】: Sandpapers Made Made from aluminium oxide for longer life; electro coated technology make grit distributed evenly; Will not fall apart, tear or crumble off during using。

120 Grits: Includes 8 sanding blocks (120 grit, medium), our sanding sponge is reusable, washable, and suitable for all your sanding needs

High-Precision Abrasive: Featuring 12-sheet 9 x 11 Inch 120 grit sandpaper, this abrasive set provides extended usability for high-volume operations, ensuring cost-effective material efficiency


