
You can install wood flooring over tile, but moisture and prep work determine your project’s success. I’d recommend engineered hardwood—it handles moisture better than solid wood. Start by testing moisture beneath the tile using calcium chloride or humidity tests. Clean the tile thoroughly, level any high spots, and choose either floating or glue-down installation depending on moisture levels. Don’t skip transition strips at doorways; they prevent tripping and protect edges. Get these basics right, and your floor stays stable for years.
Can You Install Wood Flooring Over Tile? (And When You Shouldn’t)

So you’ve got tile floors, but you’re dreaming of something warmer underfoot—maybe the natural beauty of wood grain or that real hardwood brings to a room.
You can install wood over tile, but it’s not always wise. I’d recommend engineered hardwood for its superior stability and moisture tolerance. Before you start, your tile must be completely flat, secure, and crack-free. Uneven or damaged tile? Skip this project entirely.
What matters most:
- Get manufacturer approval first—it’s non-negotiable
- Perform moisture testing; improper levels cause bonding failures
- Use only approved adhesives or underlayment
- Keep your surface clean and dry
If your tile shows moisture problems, loose spots, or you can’t guarantee the right adhesive, honestly, don’t proceed. Proper preparation prevents costly future headaches.

Multi-purpose HARD FLOOR PROTECTOR: Our chair Mat can protect your floor surface to avoid scratch and abrasion from the wheels or casters of chair .Extend the life of hardwood floor, Floor mat also helps reducing the noise of rolling chair.it doesn’t bother other people when working or playing game at night. It could be used as office chair mat, wood floor protector mat, computer mat, table mat and children pet mat. It is suitable for hard floors including vinyl, stone, tile, wood, laminate and concrete

✅ HEAVY DUTY HOLD, INDOOR AND OUTDOOR - Reinforced web mesh double sided carpet tape heavy duty install your carpet tiles, rugs, runners, vinyl, laminate, turf, indoor outdoor carpeting, rubber or carpet squares so they will have a long lasting hold. One 2 in x 90 ft (30 yd) covers up to 220 square feet.

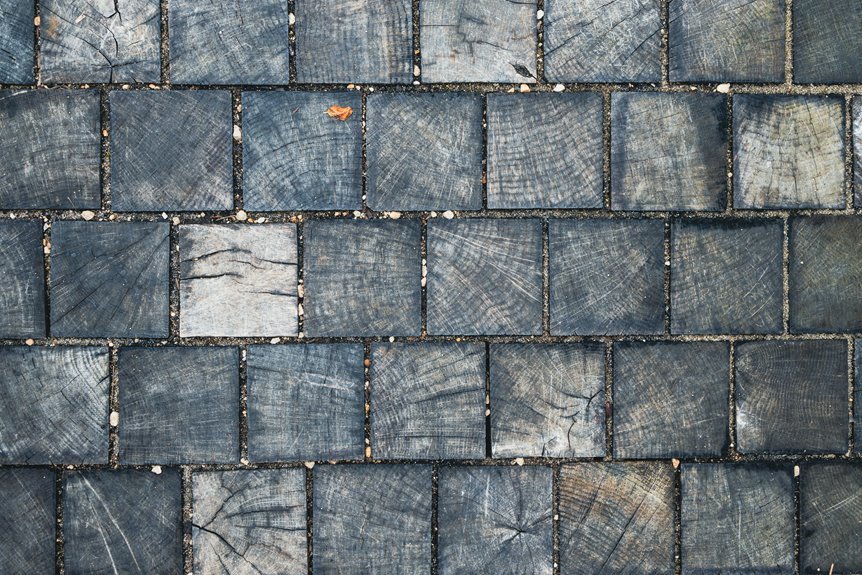
Inspect Your Tile for Cracks, Levelness, and Moisture
Before you lay down a single board, what’s hiding beneath your tile surface matters just as much as what you see. I’ve learned that skipping this inspection step leads to costly problems later.
The Four Critical Checks
- Cracks and damage – Examine tiles for breaks or loose pieces that’ll transfer movement into your new wood
- Levelness – High spots and uneven grout lines create instability; use a straightedge to identify problem areas
- Moisture testing – Follow NWFA guidelines to check for moisture beneath the tile; water damage ruins wood flooring
- Cleanliness – Remove dust, oils, and contaminants so underlayment bonds properly
Each inspection task protects your investment. You’re not just checking tile—you’re safeguarding your wood floor’s longevity. Take your time here, and you’ll avoid problems that surface months later.

ASTM 1869 Certified Accuracy: Reliable moisture vapor emission testing for concrete slabs to meet ASTM F1869 standards; helps prevent adhesive failures, warping, and mold issues before flooring or coatings installation.

Keep Rugs in Place: This versatile non-slip rug pad securely anchors your area rugs on any floor type, including hardwood, tile, and carpet, preventing slipping and bunching. It's the ideal solution for safety and maintaining a tidy, polished look in your home.

Pinless & Non-Destructive Testing: Safely measure moisture content without damaging surfaces, perfect for wood, wall, concrete, and more.
Choose Between Engineered Hardwood, Laminate, and Luxury Vinyl

Now that your tile is ready, let’s help you select the right flooring material—and it’s not a one-size-fits-all decision. You’ve got three main options: engineered hardwood (which professionals favor for its stability), laminate (the budget option), and luxury vinyl planks (the moisture-resistant choice). Each has different strengths, so let’s review what matters most for your specific situation.

Reinforced Mallet: Constructed of cast iron with bright chrome plating, the hammer is equipped with the hardness of 90±5 HAS. The double-faced solid PVC head delivers a softened, positive strike. The mallet head is 1-3/8 inch in diameter. The handle is made of American hickory which is lightweight but tough. The whole mallet is 10-3/4 inch long and weighs 1.036lb.

ENHANCED PULL BAR: The floor pry bar is made of high premium A3 steel with a black matt coating for added strength, corrosion resistance, and rust resistance. The soft felt backing protects floors from scratches during installation.

【UPGRADED DESIGN】 Providing a 1/4 inch & 1/2 inch gap of the floor from the wall. Only one set of tools can meet different gap requirements. The special triangle design is stable and doesn’t need to be taped to the wall during your installation, also assures less damages on Floors because it provides the proper expansion spacing for most wood flooring.
Engineered Hardwood Advantages
When you’re converting tile to wood flooring, engineered hardwood is the practical choice because of how it’s built—a real wood veneer layered over a plywood or high-density fiberboard base that resists warping and moisture better than solid hardwood.
Here’s why engineered hardwood works for over-tile installations:
- Stability matters – The layered construction accommodates minor substrate imperfections without buckling
- Moisture tolerance protects your investment – It adapts better to environmental changes than solid wood
- NWFA guidelines recommend it – When you follow manufacturer approval and use proper adhesive or underlayment, you’re following industry standards
- Authentic appearance persists – You get genuine wood look and feel while enjoying floating or glue-down flexibility
This combination makes engineered hardwood your reliable choice for tile-to-wood conversions, particularly in moisture-prone areas.
Laminate vs. Luxury Vinyl
How do you choose between laminate, luxury vinyl, and engineered hardwood when you’re installing over tile?
Understanding each option’s strengths helps with your decision. Here’s what matters most:
| Material | Moisture Resistance | Installation Ease | Durability |
|---|---|---|---|
| Laminate | Moderate | Very Easy | Good |
| Luxury Vinyl Planks | Excellent | Very Easy | Excellent |
| Engineered Hardwood | Good | Moderate | Very Good |
Why Laminate Works
Laminate gives you that wood aesthetic quickly and affordably. Its straightforward installation is a key advantage, though it won’t handle moisture like LVP does.
Why LVP Wins
Luxury Vinyl Planks perform well over tile because they resist moisture effectively. They float without extensive leveling, reducing subfloor prep work. Choose LVP when moisture concerns are your priority.
The Bottom Line
Your choice depends on your budget, moisture environment, and how much surface prep you’re willing to tackle.
Prepare Your Tile: Cleaning, Leveling, and Underlayment

Before you lay down that new wood floor, the prep work on your existing tile is what’ll make or break your project. You’ll need to tackle three essential tasks: getting that tile surface spotlessly clean, fixing any uneven spots that’ll cause problems later, and choosing the right underlayment to protect your investment. Let me walk you through each one so you can do this right the first time.

LUXURY VINYL FLOOR TILES: For use indoors and in temperature-controlled environments only, MSI brings adhesive flooring up a notch with Glue-Down floor planks – stylish at the surface with the authentic look of real wood plank flooring

Grip Design: the original Gorilla Grip grippers for hard floors help to keep your rugs in place and prevent corner and side curling; easy to apply to the underside of carpet corners and floors to help rugs stay in place and flat against the floor

LUXURY VINYL FLOOR TILES: For use indoors and in temperature-controlled environments only, MSI brings adhesive flooring up a notch with Glue-Down floor planks – stylish at the surface with the authentic look of real wood plank flooring
Cleaning Tile Surface Thoroughly
Why does that glossy tile shine seem to disappear the moment you try to install new flooring over it? The answer lies in proper tile cleaning—it’s your foundation for success.
I’ve learned that removing dirt, grease, and debris isn’t optional; it’s required for adhesion prep. Here’s what I do:
- Sweep thoroughly with a stiff brush to capture loose particles
- Mop with degreaser to eliminate stubborn buildup that blocks adhesion
- Scrub grout lines where grime hides and prevents contact
- Allow complete drying—a moisture-free surface prevents adhesive failure
This moisture-free surface and level base work together. I use a damp cloth for final wiping, then wait until everything’s completely dry. Your future flooring depends on this groundwork. Don’t rush it; take your time creating that clean foundation.
Leveling Uneven Areas Effectively
Even the cleanest tile surface won’t guarantee success if it’s got high spots and dips underneath your new wood flooring. I’ve learned this the hard way—uneven tile creates problems that compound over time.
Finding and Fixing Imperfections
You’ll want to inspect your tile carefully, tapping across the surface to identify loose or uneven areas. Use a straightedge to locate high spots and low spots that need attention.
Leveling compound is your solution here. I apply it to low spots, allowing it to dry completely before sanding smooth. For high spots, I carefully grind them down.
This creates that flat surface your wood flooring needs. Skip this step at your peril—moisture considerations matter too. An uneven base traps moisture underneath, which warps wood flooring. Take time getting this right.
Installing Underlayment Properly
Once you’ve leveled your tile surface, you’re ready to add underlayment—the protective layer that prevents your new wood floors from moisture and sound problems.
Choosing the right underlayment is important. Here’s what to focus on:
- Select moisture-control underlayment that matches your wood flooring product’s requirements
- Measure and cut the material to fit your tiled area precisely
- Verify manufacturer guidelines for installation over tile with leveling compound
- Provide full coverage across the entire tile surface preparation zone
The underlayment acts as your defense against water damage and noise. Always check compatibility between your chosen wood and the underlayment before installing. Following these steps carefully protects your investment and keeps your floors performing well for years.
Floating vs. Glue-Down: Installation Methods for Wood Over Tile

When you’re standing in front of that tile floor deciding how to lay wood on top of it, you’ve got two main paths forward: floating or glue-down installation.
Floating Installation lets your engineered hardwood move freely above the tile. This method accommodates subfloor imperfections, requires no messy residue, and installs faster. You’ll still need underlayment for sound and moisture control, plus an expansion gap around edges.
Glue-Down Installation permanently bonds your wood to tile. This demands a perfectly flat, dry surface and manufacturer-approved adhesives. Plank placement requires precision, and you’ll need proper curing time before walking on it.
Before choosing either method, perform moisture testing—calcium chloride, relative humidity, or CM tests determine whether you need moisture barriers. Both approaches work with engineered hardwood, which handles moisture better than solid wood over tile over wood projects.

【Durable Material】The floor transition strip is made of high quality PVC material, durable and flexible. The size of laminate floor joining strip is approx. 39.4in long, 2in wide and 0.13in thick, which is not easy to trip over with its suitable size and proper height.

SEAMLESS TRANSITIONS WITH MAXIROC - Effortlessly bridge the gap between different flooring types with our advanced adhesive technology. No more tripping hazards or unsightly gaps. Achieve a professional finish.

High Quality Materials: The threshold strip is made of premium PVC, designed to be scratch-resistant and wear-resistant, ensuring long-term use with minimal maintenance.
Handle Height Changes, Doorways, and Transition Strips

You’ve decided on your installation method—floating or glue-down—and now you’re ready to start laying wood. But here’s where many installers stumble: managing the height differences that tile creates.
When wood goes over tile, your floor rises. This affects door clearances immediately. I’ve learned that measuring twice prevents cutting doors later—an expensive mistake.
Consider these steps:
- Measure tile thickness plus wood thickness to calculate total height gain
- Install transition strips at doorways to bridge height differences safely
- Use bullnose or threshold pieces for smooth, gradual transitions
- Check baseboards and trim fit before permanent installation
Transition strips aren’t cosmetic—they’re functional. They prevent tripping hazards and protect floor edges. You’re building something that will last, so take time with transitions now.

Streak-Free - Specifically formulated to clean finished hardwood floors without streaking or dulling
Specialized Designed: The office mat is designed with a unique rattan-like woven pattern. It is easy to lay flat. This specially designed mat could be matched your surroundings. Perfect for a variety of environments including offices, computer rooms, gaming rooms, bedrooms, and study spaces.

Specialized Designed: The office mat is designed with a unique rattan-like woven pattern. It is easy to lay flat. This specially designed mat could be matched your surroundings. Perfect for a variety of environments including offices, computer rooms, gaming rooms, bedrooms, and study spaces.
Test for Moisture and Install Protection Barriers

Why do so many wood floor installations fail years later? Usually, it’s because moisture got trapped underneath. I’ve learned that moisture testing isn’t optional—it’s foundational.
Moisture trapped underneath is why most wood floor installations fail years later—moisture testing isn’t optional, it’s foundational.
Before you proceed, run calcium chloride, relative humidity, or calcium carbide tests on your tile substrate. These reveal hidden moisture levels that’d otherwise cause cupping and warping down the road.
If moisture is present, don’t panic. You’ve got options. Vapor barriers and quality underlayment work together as your protection system. The key? Follow manufacturer requirements exactly. Different products have different specifications, and skipping this detail invites problems.
A flat, clean, dry tile surface matters too. Level any high spots or grout lines first. This substrate preparation supports reliable bonding and long-term stability.
Keep Rugs in Place: This versatile non-slip rug pad securely anchors your area rugs on any floor type, including hardwood, tile, and carpet, preventing slipping and bunching. It's the ideal solution for safety and maintaining a tidy, polished look in your home.

Easy to Read with Large LCD Screen: This wood moisture meter is easy to get an accurate reading from the surface of materials and displays accurate moisture readings on the 2.25" big screen. Use this handheld meter to check the moisture content in firewood or drywall, it can stand up on the table, the moisture content is displayed with a bar graph and percentage (_%RH) on the screen. Date Hold and Max/Min function is used to freezes readings, useful for writing down data
Keep Rugs in Place: This versatile non-slip rug pad securely anchors your area rugs on any floor type, including hardwood, tile, and carpet, preventing slipping and bunching. It's the ideal solution for safety and maintaining a tidy, polished look in your home.


