
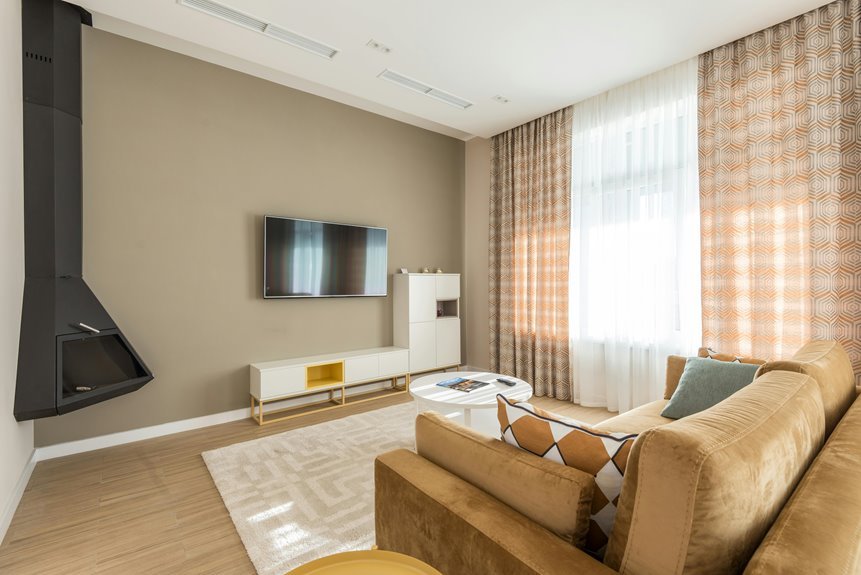
Mounting a TV above your wood-burning fireplace is doable—but heat is your enemy. Test your fireplace first by burning it for 30 minutes and measuring wall temperature at your TV’s planned spot; if it exceeds 90°F, you’ll need heat protection.
Install a mantel hood or heat shield, maintain 6–12 inches clearance from the firebox, and use a tilting or full-motion mount for flexibility.
Choose your bracket based on wall type (studs or masonry), level everything carefully, and route cables away from heat sources.
The specifics of protecting your investment depend on your fireplace’s output and your TV model.
Is It Safe to Mount a TV Above a Wood-Burning Fireplace?
How much heat does your fireplace actually produce? Wood-burning fireplaces generate serious warmth—enough to damage electronics if you’re not careful. Mounting a TV above one requires genuine planning, not just hope.
You’ll need adequate heat clearance between your fireplace and screen. I recommend using heat shielding materials and maintaining at least 6–12 inches of space from the firebox. Your mounting hardware must withstand temperature fluctuations, so choose sturdy, heat-resistant options.
Before committing, test actual wall temperatures with a thermometer after several hours of burning. Check both your TV and fireplace manuals for specific requirements. If uncertainty lingers, consult a professional installer who can verify that your setup is safe and your investment protected.
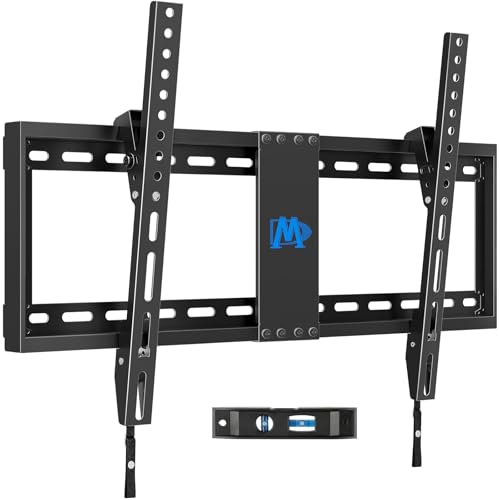
[TV Wall Mount and Suitability] The Mounting Dream TV wall mount is suitable for TV of 37-75 inches holding a weight of 132lbs with MAX VESA 600 x 400mm supporting 24 inches wood stud spacing. For better feel, you can check the weight of TV, VESA, wood studs spacing and blocked input. Kindly note that TV is just for reference. Patent no. 29/639, 502
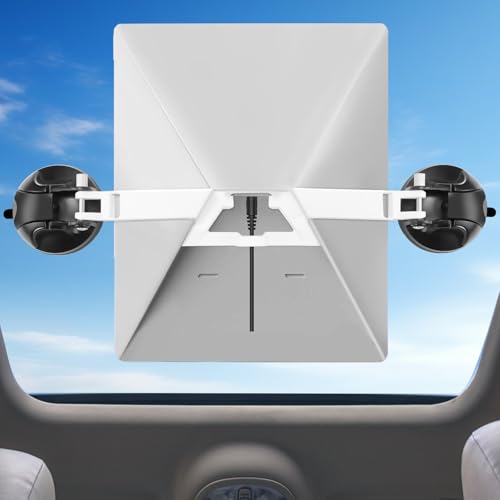
SUPER-STRONG VACUUM HOLD — Dual 90 mm lever-lock cups purge air to form a deep, long-hold seal that won’t creep or rattle over bumps—so your Starlink Mini stays planted and quiet, ready the moment you park.

Universal Design: This full motion TV mount fits for most of 42-90 inch TVs up to 132lbs with VESA size 200*100mm to 600*400mm available and max 16" Wood Stud space. Not perfect fit your TV? Please contact us and we'll do our best to solve the problem for you!
Assess Heat Rise Before Installing
Before you drill a single hole into your wall, you need to understand what you’re actually dealing with—and that means testing your fireplace’s heat output at the exact spot where your TV will live.
I recommend burning your wood-burning fireplace for several hours, then measuring temperatures at your intended TV height using a thermometer. You’re looking for readings below 90°F (32°C). If heat rises quickly toward the wall, a heat shield becomes necessary.
| Test Phase | Temperature | Action |
|---|---|---|
| Initial burn | Below 90°F | Safe to proceed |
| 30 minutes in | 90-110°F | Consider heat shield |
| Sustained fire | Above 110°F | Rethink placement |
Monitor how radiant heat channels along your mantel and surrounding areas. This assessment protects your investment and keeps your setup safe long-term.

Watch the videos in the Image Gallery to See the MM340 In Action. Enhance your home entertainment experience with a TV mount that offers full-range motion plus vertical travel.

MOTORIZED FIREPLACE TV MOUNT: The MOUNT-IT! Motorized Fireplace TV Mount isn’t just any fireplace TV mount pull down; it's a sleek, modern solution to elevate your viewing experience. With its whisper-quiet motor, it effortlessly lowers and raises your TV to the perfect viewing height, blending seamlessly with your living space aesthetics. Ideal for those seeking a harmonious balance of style and functionality, especially above the fireplace.

[Sturdy and Safe] You can relax knowing your TV is securely mounted to the wall with this UL-certified TV wall mount, which holds up to 132 lbs without a hitch. Its solid design keeps your TV steady, no wobbling or slipping here! Plus, we’ve got you covered with 10 years of support for this product.
Determine Your Fireplace Clearance Zone
Before you mount that TV, establish a clearance zone—the safe distance between your fireplace’s heat and your television. You’ll check this zone by measuring from your firebox opening upward and outward, then comparing those distances against both your TV’s heat tolerance (usually found in the manual) and your fireplace’s actual heat output. Think of it like creating an invisible safety bubble around your fireplace where heat won’t damage your equipment.

Universal Design: This TV Mount fits most 37"-95" LED/LCD/OLED/Plasma TVs up to 132 LBS, TV Bracket fits VESA patterns from 150 x 100 to 600 x 400mm. And This Tilt TV Wall Mount can be installed on 8" to 24" wood stud walls and concrete/brick walls conveniently. Warm Tips :Please confirm your TV VESA before order

WIDE DESIGN: The tilted TV wall mount is compatible with most 23" - 60" TVs up to 115lbs / 52 kg, fits 60 inch, 55 inch, 50 inch, 43 inch, 42 inch, 40 inch TVs, etc. with VESA mounting patterns 75x75mm up to 400x400mm. Please check VESA, TV weight, wall stud location and possible blocked cable/input. The tilting TV mount can be installed on 8″, 12″ or 16″ wood studs, concrete, or brick walls. Do not install the mount on drywall alone.
ENHANCED FLEXIBILITY: The Mount-It! Advanced Tilt TV Wall Mount extends up to 5.3 inches from the wall, offering a tool-less tilt adjustment of up to 5 degrees up and 12 degrees down, plus a swivel of 5 degrees both left and right for the perfect viewing angle. This TV mount provides optimal flexibility for your viewing pleasure.
Understanding Clearance Requirements
Why does clearance matter so much when you’re planning to mount a TV above your wood-burning fireplace? I’ll tell you—heat rises, and it rises *fast*. Without proper clearance, your TV could overheat, malfunction, or worse, create a fire hazard.
Here’s what I’ve learned matters most:
- Fireplace manuals specify exact clearance distances from the firebox to combustibles
- Heat tolerance varies by TV model, so check yours too
- A heat shield or mantel deflects radiant heat, protecting your equipment
- Professional assessment confirms your mounting zone before you drill
Think of clearance as your safety foundation. I can’t stress this enough: don’t guess. Measure twice, consult both manuals, then mount once. Your family’s safety depends on getting this right, and honestly, it’s worth the extra effort.
Measuring Safe Distance
Test Your Heat Exposure
Light a fire for several hours and grab a thermometer. Measure the temperature exactly where your TV will sit. If it climbs above 90°F (32°C), you’ve got a problem—heat will damage your screen over time.
Know Your Numbers
Wood-burning fireplaces typically need more clearance than electric ones. I recommend positioning your TV at least 4–5 feet above the firebox opening, though your specific setup might vary.
Monitor Real-Time Heat
Don’t just assume it’s safe once. Check temperatures during actual use. Keep monitoring throughout the heating season. This ongoing observation keeps your clearance zone protective, letting you catch issues before they damage your investment.
Choose Your Mount Type (Fixed, Tilting, or Full-Motion)

Now I’ll walk you through the three main mount types so you can pick what works best for your setup. Fixed mounts give you a streamlined, stable look—they’re affordable and don’t wobble, though they lock your TV into one position permanently. If you want more flexibility at a reasonable cost, tilting mounts let you angle the screen downward (perfect for above-fireplace setups), while full-motion mounts give you maximum adjustment power with swiveling and extending capabilities to achieve your ideal viewing angle.

FIREPROOF WALL SHIELD KIT: Provides a safe, heat-resistant spacing solution between the wall shield and wall surface, ideal for wood, pellet, and coal stove installations.

High Temperature Resistant: Grill heat shield is made of fiberglass with a heat-resistant silicone coating evenly coated on both sides, it can be used within a temperature range of 900°F with a melting point temperature of 2000°F, preventing damaging deck and fence from the falling hot embers and hot oil.

1/2" tall stainless standoffs
Fixed Mount Stability
Since a fixed mount offers no angle adjustment after installation, I’d recommend treating it as your most straightforward—yet least forgiving—mounting option. Getting it right the first time matters tremendously.
Reliable Fixed Mount Stability
Here’s what I prioritize for a dependable installation:
- Stud anchoring: Use lag bolts or screws matched directly to stud type—this prevents any slippage under your TV’s weight
- Levelness check: After mounting, test with gentle pressure; fixed mounts can’t correct misalignment afterward
- Heat clearance: Maintain at least 12 inches between your mantel and TV to protect against heat shifts from wood-burning flames
- Capacity verification: Confirm your TV’s weight sits well within the mount’s rated capacity
Once secured into studs properly, your fixed mount becomes dependable. That stability gives you confidence during every viewing session, knowing your installation won’t shift or drift.
Full-Motion Flexibility Benefits
Full-motion mounts represent the most versatile option available when mounting above a fireplace, and they’re worth considering if you want genuine comfort during those long viewing sessions. I’ve found that the ability to both tilt and pull your TV down toward eye level improves how you experience viewing. You’re not stuck staring upward anymore—you adjust the angle to match your seating position perfectly.
| Feature | Benefit |
|---|---|
| Full tilt range | Reduces neck strain significantly |
| Extension capability | Pulls TV closer for better viewing angle |
| Flexible positioning | Adapts to different room layouts |
| Heat shield compatible | Works with protective barriers |
| Adjustable comfort | Customizes experience for your needs |
Pairing your full-motion mount with a heat shield redirects radiant heat away from components, protecting longevity while you enjoy superior viewing angles from any spot in your room.
Calculate Optimal TV Height Above Your Fireplace

Where should your TV actually sit above that fireplace? I’d measure from your usual seating spot first—this determines everything. Here’s what I’d consider:
- Eye level alignment: Your TV’s center should match your eyes when seated, preventing neck strain
- Mantel height impact: A high mantel pushes your TV up awkwardly, so I’d lower it proportionally
- Tilting mount advantage: If exact eye level isn’t possible, a tilting mount angles the screen downward comfortably
- Viewing height range: Generally 42–48 inches works, but your seating distance matters most
I’d mark where eye level hits your wall, then use a level to confirm placement. Before drilling, double-check measurements—this prevents costly mistakes. If your fireplace mantel is particularly high, I’d honestly consider a full-motion mount instead. This flexibility keeps comfortable viewing angles achievable, even in tricky spaces.

Re-mounting, but lost your old hardware? Don't buy another mount! This kit includes everything you'll need for wood or concrete installs.

Packed in a Box:Store and organize mounting accessories in one place. Not only does this box keep screws, washers, and spacers neatly categorized, it also ensures that they are protected, dust-free, and ready to use

UNIVERSAL COMPATIBILITY: This product is a whole package of screws with washers and spacers. It includes M4, M5, M6, and M8 TV screws and spacers up to 80" TV, including curved TVs.
Locate Wall Studs and Plan Your Bracket Placement

Once you’ve nailed down your TV’s height, the real work begins—finding what’s actually holding up that wall. I grab my stud finder and scan horizontally across the wall, marking each vertical stud with pencil. These wooden frames are your anchors—skipping them means your bracket won’t hold securely.
| Task | Tool | Purpose |
|---|---|---|
| Locate studs | Stud finder | Find structural framing |
| Mark locations | Pencil | Identify mounting points |
| Check alignment | Carpenter’s level | Keep bracket square |
Next, I use my carpenter’s level to mark exact mounting locations, double-checking that everything’s perfectly square. This leveling step prevents your TV from tilting—nobody wants a crooked screen. I also plan my cable routing now, identifying where power outlets and HDMI connections sit relative to my bracket placement, keeping adequate heat clearance from the firebox.

TV Wall Mount Compatiblity: This full motion TV mount fits for most of 26-65inch TVs with VESA size 75*75mm to 400*400mm available and perfect center design.

No Drill TV Wall Mount: Tired of the hassle of drilling big holes or finding studs in your wall? This Perlegear renter friendly TV mount does not require any drilling or installation experience at all. Simply use a hammer to secure the wall plate onto drywall with nails.

FULLY DIY NO-STUD PATENTED SOLUTION: HangSmart TV offers a complete DIY no-stud mount experience, making it a perfect choice for homeowners and renters who prefer a no-fuss, easy-to-handle installation process for their flat screen TVs
Secure the Mounting Bracket Into Studs or Masonry

Before you drill a single hole, I verify that my bracket’s weight rating actually exceeds what I’m hanging—that is, the TV’s weight plus any hardware I’m adding.
Verify your bracket’s weight rating exceeds the TV’s total weight plus any additional hardware before drilling.
Now comes the installation itself. Here’s how I secure everything properly:
- For studs: I use a stud finder, then anchor with lag screws into those vertical supports for maximum stability
- For masonry: I drill pilot holes with a masonry bit, then install masonry anchors rated for my bracket’s weight
- Leveling: I position the mounting bracket and check alignment with a carpenter’s level before tightening fasteners completely
- Double-checking: I recheck everything after all fasteners are tight—sagging brackets aren’t my style
If studs are sparse or I’m uncertain about wall material, I don’t hesitate calling professionals. This TV’s staying put safely.

FULL MOTION TV WALL MOUNT: Experience ultimate flexibility with a TV wall mount that swivels +/-90°, tilts +10°/-10°, and extends up to 22.4". Whether you need to adjust for glare, optimize viewing from multiple seating areas, or pull your TV out for a better angle, this articulating TV mount adapts effortlessly to your space, delivering an immersive viewing experience every time.

EXTRA-LONG 38" EXTENSION TV WALL MOUNT – MAXIMUM REACH FOR ANY SPACE: This full motion TV wall mount extends up to 38 inch—longer than standard long arm mounts—making it perfect for corner TV mounting, large rooms, and open layouts. Easily pull your TV out for flexible viewing or retract it to a slim low profile for a clean, space-saving setup.
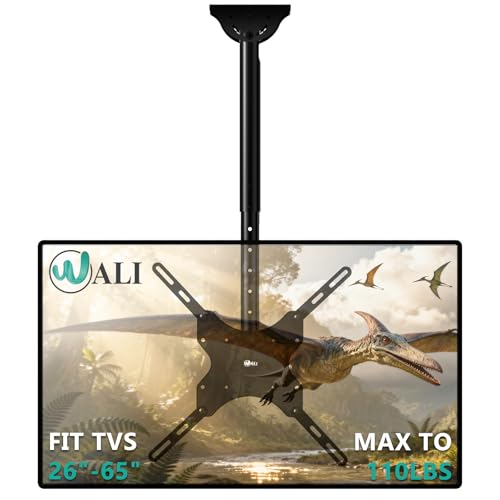
Universal Compatibility:WALI ceiling tv mount fits most displays up to 65 inches and 110 lbs. Supported mounting hole patterns: 400×400 mm (16"×16"), 300×300 mm (12"×12"), 200×200 mm (8"×8"), 200×100 mm (8"×4"), and 100×100 mm (4"×4"). Please check if the VESA and TV weight are suitable before purchase.
Hang Your TV and Level It Properly

How do you know when your TV’s hanging at just the right height? When you’re sitting comfortably without craning your neck upward or downward.
| Step | Action | Goal | Result |
|---|---|---|---|
| 1 | Sit in your favorite spot | Find your natural eye level | Mark the wall |
| 2 | Use a level tool | Check horizontal alignment | Prevent tilting |
| 3 | Tilt down if needed | Reduce glare and strain | Comfortable viewing |
| 4 | Test the angle | Verify proper positioning | Adjust as necessary |
After securing your TV mounting bracket into the studs, carefully hang your TV. Center it at eye level—this means the middle of the screen aligns with where your eyes naturally rest when seated. Use a level to check your work; even slight tilts become noticeable during extended viewing. If glare appears, tilt down gradually until it disappears.

Glare Reducing Tilt- This wall mount tv bracket features 12 degrees of advanced tilt, making it perfect for TVs mounted above eye level, like fireplaces. The tilt can also significantly reduce screen glare, ensuring an optimal view from any seat in the room.

Universal Compatibility: Our tilting TV wall mount fits most 24" to 65" TVs weighing up to 99 lbs. Features a universal VESA plate compatible with patterns from 100x100mm (4"x4") up to 400x400mm (16"x16"). Always verify your TV's VESA pattern, weight, and wall type before purchase.

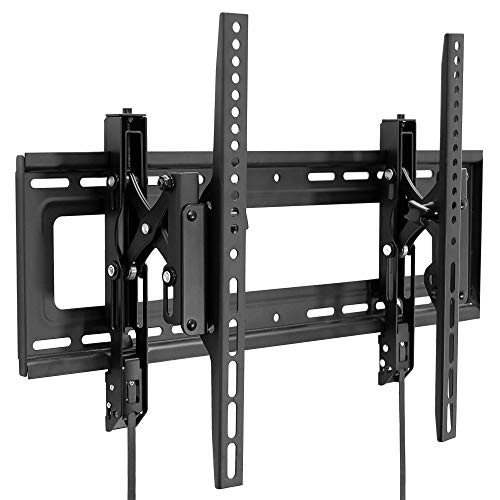
Universal TV Wall Mount - The tilting TV wall mount is compatible with most 37-82 inches flat screen or curved TVs up to 132lbs. Fits VESA 100x100mm to 600x400mm mounting pattern. Design for wood studs spacing up to 24 inches. NOTE: Not for alone drywall application.
Route Cables Safely Away From Heat

Now that your TV’s mounted and level, you’ll want to plan out where those cables go before they get anywhere near your fireplace’s heat zone. I learned this the hard way—routing power and signal lines thoughtlessly can damage them faster than you’d think, so you’ll need to use cable raceways, conduit, or in-wall kits to shield everything from radiant heat. The key is separating your cables into different channels when possible, keeping HDMI and AV lines especially distant from the fireplace’s heat plume.

🏎️【Durable Material 】The Adhesive Backed Aluminized Heat Barrier made up of woven silica with a flexible aluminized finish, can withstand continuous high temperatures of 2000 Degrees. Its reflective surface can screen off the heat and provide utmost protection.

【Fireproof Heat Shield】The heat shield for grill is made of fiberglass with silicone coating on both sides, which can be used within a temperature range of 900°F with a melting point temperature of 2000°F.

✓ HANDCRAFTED CRUSADER SHIELD – Made from mild steel with the iconic red Templar cross for an authentic medieval appearance.
Cable Routing Planning
Once you’ve decided where your TV will mount, planning your cable routes becomes just as important as the bracket itself—because even the sturdiest installation fails if your cords melt or fray from heat exposure.
I learned this the hard way. Before running cables, I map out exactly where power, HDMI, and data lines need to travel:
- Use in-wall power solutions like a Power Bridge to eliminate surface cords near heat sources
- Install conduit or raceways to organize wires while maintaining airflow around the firebox
- Keep cables away from the mantel and firebox to reduce dust and temperature damage
- Consider professional installation if in-wall routing seems complicated—code compliance matters
Planning ahead prevents costly mistakes and keeps your setup running safely for years.
Heat Protection Methods
While routing your cables keeps them organized and out of sight, protecting them—and your TV—from the intense heat radiating off a wood-burning fireplace requires a different kind of planning altogether.
Heat protection starts with strategic mounting height. Install a mantel or hood above your firebox to deflect radiant heat away from your screen, creating a barrier between flames and electronics. This shield reduces heat dissipation effectively.
Next, consider your TV above fireplace positioning carefully. Test actual temperatures at your intended mounting height using a thermometer, especially when burning wood. If heat remains high, explore alternatives: electric fireplaces generate minimal heat, or add ventilation near the mounting area.
A full-motion mount lets you pull your TV down and away when needed, reducing direct heat exposure and extending your equipment’s lifespan.
Test Mount Stability Before You Finish

Before you declare your TV mount complete, it’s important to verify that everything you’ve installed can actually handle the weight and movement that comes with real use. I’ve learned this the hard way—skipping this step invites regret.
Here’s what I do:
- Apply slight, controlled pressure to the TV while it’s loosely secured, checking for wobble or movement
- Verify your studs and wall anchors can support your TV’s combined weight with the motion kit
- Use a level to confirm the TV stays plumb after testing
- Tighten all screws and recheck everything once more
If you notice looseness or instability, stop immediately. Reinforce with appropriate masonry anchors or relocate to studs with higher weight ratings. This extra caution protects your investment and your home.
STRONG FIXED ABILITY - Our concrete wall anchors are made of high quailty plastic. Combined with lag bolt sturdily on the concrete or brick wall.
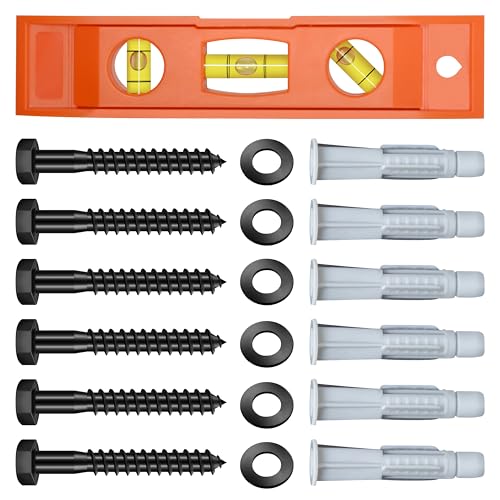
PRODUCT NAME - This tv mounting screw kit contains 6x M8x65mm lag TV mount bolts, 6x washers, 6x 10x60mm wall anchors, and 1x bubble level. All components are individually labeled and organized for straightforward identification, supporting efficient setup for TV wall mount installations.

Universal hardware pack contains M4, M5, M6, and M8 TV screws and spacers for mounting virtually all TV's up to 80". It'll ensure you aren't screwed when it comes to mounting your TV.
Adjust Viewing Angle to Reduce Glare

How can you watch your TV comfortably when you’re fighting glare from the fireplace and overhead lights?
Position Your TV at Eye Level
TV mounting height matters significantly. You’ll want to center your screen at 42–48 inches from the floor, which aligns with most people’s seated eye level. This positioning naturally reduces glare angles from both the fireplace glow and ceiling fixtures.
Tilt for Maximum Comfort
If you’re mounting above the mantel, tilting downward becomes necessary. A full-motion mount lets you angle the screen slightly, minimizing reflections that’d otherwise distract you during viewing. The adjustment is subtle but noticeable.
Choose the Right Screen
Consider investing in an anti-glare or matte-finish screen. These surfaces absorb light rather than reflect it, significantly cutting down on that annoying fireplace shimmer. Pair this with proper seating distance—larger screens positioned farther away reduce perceived glare substantially.
Add Heat Protection (Shield or Mantel Hood)

I’ve learned that a mantel or hood acts as your TV’s best friend when it comes to blocking radiant heat from the firebox below. You’ll want to choose between wood, steel, or concrete materials for your shield—each deflects heat differently, and a depth of at least 6–12 inches provides real protection. The right barrier keeps your electronics safe while you enjoy the warmth and ambiance without worry.
Heat Shield Installation Methods
Why does your TV keep getting warm when you’ve got a cozy fire going? Installing a heat shield properly is important. I’ve learned that mounting protection requires careful planning and precision.
Here’s what you’ll need to do:
- Measure your wall space and choose a shield compatible with your mounting system
- Follow manufacturer guidance exactly—don’t skip steps or improvise
- Secure the shield firmly to prevent shifting during temperature fluctuations
- Test temperatures at your intended TV height after installation
A quality heat shield redirects hot air away from your wood-burning fireplace setup. I recommend measuring temperature before and after installation to confirm effectiveness. If readings exceed 90°F, you’re protected. If not, you may need additional ventilation or repositioning.
Mantel Hood Design Options
Ever noticed how heat rises straight up from a fireplace? That’s where a mantel hood becomes your TV’s best friend.
I’ve found that mantel hoods work by redirecting hot air upward and outward, away from your screen. You’ll choose from wood, steel, or concrete—each offering different heat resistance levels. Steel handles intense temperatures best, while concrete provides durability at a reasonable cost.
A properly sized mantel hood extends several inches above and in front of your firebox, creating a protective barrier. I recommend measuring at least 12-18 inches, depending on your fireplace’s heat output.
Pairing your mantel hood with a heat shield or mantel shelf amplifies protection substantially. Before mounting your TV, I’d run a heat clearance test: light the fire, wait 30 minutes, then measure temperature at your planned TV location. This keeps your above-fireplace mounting safe.
Material Selection For Protection
Three primary materials stand out when you’re choosing a mantel hood or heat shield for your fireplace setup: wood, steel, and concrete. Each offers distinct advantages for heat deflection and material protection around your TV area.
Consider these options:
- Wood – Visually appealing but requires fire-rated treatment to withstand radiant heat safely
- Steel – Durable and excellent at redirecting heat away from your screen effectively
- Concrete – Highly heat-resistant and provides substantial material protection with minimal maintenance
- Composite materials – Blend multiple properties for balanced performance and customization flexibility
Test your chosen material with a thermometer before finalizing installation. A mantel hood should be at least 6–12 inches deep to provide adequate heat deflection. This depth allows your heat shield to properly redirect flames’ energy downward, keeping your TV protected and your setup reliable.
Three Installation Mistakes That Destroy TVs

When I see folks eagerly mount their TVs above fireplaces, I notice they often skip the planning steps that’d actually keep their screens safe—and that’s where problems start.
Mistake #1: Ignoring Heat Testing
Before mounting your TV above a fireplace, burn your fire for hours and measure the heat at your TV’s intended height.
I’ve watched people install wall-mount brackets without measuring temperatures first. Burn your fire for several hours, then check the heat at your TV’s intended height. If it exceeds 90°F, you need heat shielding.
Mistake #2: Skipping Proper Clearance
Installing too close to the firebox is common. You’ll want at least 6–12 inches between the box and your TV’s bottom. This distance matters for protection.
Mistake #3: Using Wrong Anchors
Brick and stone demand masonry anchors or lag screws, not standard drywall fasteners. I’ve seen TVs tumble because folks grabbed whatever anchors they had lying around.
When Professional Installation Is Worth the Cost

Avoiding those three mistakes I mentioned—heat testing, clearance spacing, and proper anchors—gets you halfway there, but it doesn’t guarantee your setup’ll stay safe for years.
Here’s where professional installation earns its cost:
- Heat shielding assessment: Pros verify whether your fireplace needs protective barriers, preventing costly TV damage from radiant heat
- Mounting height optimization: They factor in mantel clearance, firebox distance, and comfortable viewing angles using full-motion mounts
- Secure cable routing: Installers keep wiring away from heat zones through low-profile raceways or in-wall power solutions
- Stud anchoring verification: They confirm weight capacity for your TV plus mount, addressing masonry brittleness in wood-burning setups
Professionals also coordinate with fireplace specialists about venting behavior, protecting your warranty. I’ve seen DIY installations fail when hidden heat issues emerged months later. That coordination prevents regret.
Final Safety Checklist Before Your First Fire

Run Your Heat Test
Before lighting that first fire, burn for several hours and measure the temperature at your TV’s level with a thermometer. If it exceeds 90°F, you’ll need heat shielding or reconsider your mounting position.
Verify Your Clearances
Check distances between your TV, the firebox, and mantel. Your mantel should deflect rising heat effectively, protecting your screen and equipment.
Adjust Your Mount
Position your full-motion mount to bring the TV down when the fire’s running. This reduces neck strain and keeps your viewing angle comfortable.
Contact Your Professional Installer
If something feels uncertain, reach out to your professional installer. You’ve invested in safety—honor that commitment.


