
Yes, silicone sticks to wood—but here’s the catch: the bond’s strength depends almost entirely on surface prep. I’ve seen silicone fail when applied to dusty or damp wood, and work well when properly prepared. You’ll need a clean, completely dry surface free of oils and debris.
The real challenge isn’t initial adhesion; it’s long-term durability under moisture and wood movement. There’s more nuance to choosing between silicone and alternatives worth exploring.
Silicone Sticks to Wood: But With Conditions

How well does silicone really stick to wood? I’ve learned it’s not a straightforward yes or no—it depends on what you do beforehand.
The Initial Bond Works
Silicone sealant on wood does adhere when conditions are right. I clean the surface thoroughly, remove dust and dirt, and make sure everything’s completely dry. That dry, clean surface is your foundation. Without it, you’re fighting an uphill battle from the start.
A dry, clean surface is your foundation for silicone adhesion—without it, you’re fighting an uphill battle.
The Catch
Here’s where I’ve made mistakes: initial adhesion doesn’t guarantee long-term durability. Wood expands and contracts with temperature and moisture changes. That movement stresses the silicone bond. Add moisture behind the sealant, and degradation happens faster.
Your Best Approach
Choose the right silicone formulation for your specific project—exterior or interior matters. Consider alternatives if moisture exposure is significant.

Professional Formula - This Clear Silicone Adhesive Sealant is a Sensor-Safe, General Purpose Clear RTV Sealant that can be used inside or outside for all your jobs

Waterproof: Multipurpose clear silicone sealant creates a permanent waterproof, protective seal that is ideal for metal, glass, rubber, tile and porcelain

Premium Mult-Purpose Caulk: Ideal for sealing joints, repairing cracks, and filling gaps in a wide range of construction and home improvement projects.
Why Wood Surface Prep Matters for Silicone Caulk

Why does surface prep feel like the unglamorous part of any silicone project? I’ll tell you—it’s tedious, but it’s absolutely necessary. When I skip this step, I regret it later. Wood preparation determines whether your silicone truly bonds or eventually fails.
Here’s what I focus on during wood preparation:
- Remove dirt and debris with a dry brush or cloth
- Eliminate moisture by allowing wood to dry completely
- Wipe away oils using a clean, lint-free rag
- Sand rough spots lightly for better adhesion
Think of prep work as building trust between silicone and wood. Without it, moisture sneaks behind the sealant, causing bond failure over time. I’ve learned that thirty minutes of thorough preparation prevents months of frustration. You’re joining a community of people who understand: done right, silicone sticks remarkably well.

Each spray, in all its lovely non-toxic glory delivers a mighty cleaning punch

BEST USED FOR: cleaning up wet and uncured messes from surfaces; such as wet/uncured paints, stains, caulking, adhesives, colorants. Product works best when used immediately after messes occur.
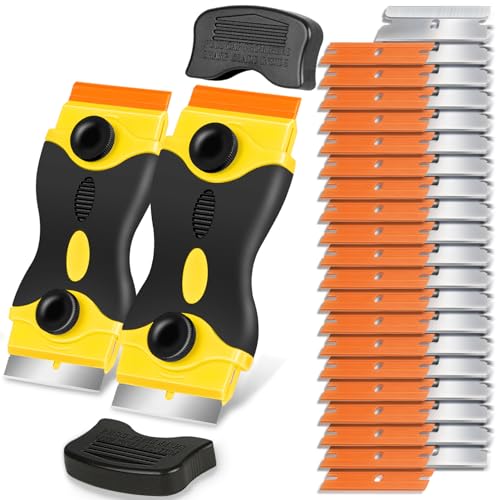
2 plastic scraper with 40 replacement blades (20 plastic blades and 20 metal blades), 2-in-1 plastic razor scraper can be used on soft and hard surfaces without scratches
Silicone vs. Polyurethane Caulk: Which Bonds Better?
When you’re deciding between silicone and polyurethane caulk for your wood projects, I’ll walk you through how each one actually performs—because what works well in one situation might disappoint you in another. Silicone’s easier to apply and cleans up faster, but polyurethane creates a stronger, more reliable bond that holds up better when wood shifts and moisture changes. Understanding these trade-offs helps you pick the right caulk for whether you’re prioritizing flexibility and ease or durability and staying power.

Complete Spice Jar Value Set: Set includes 12pcs 4oz square empty glass spice jars with acacia wood lids, 12 shaker lids, 108 black round labels (80 preprinted+28 blank), 112 white square labels (98 preprinted+14blank), 48 date labels, 2 markers, a collapsible silicone funnel and 1 cleaning brush

DISCREET LUXURY BLEND: Experience the softness of 18.5-micron Merino wool. Our 60.5% wool blend offers a premium silk-like touch that elevates your daily footwear experience.

☛【Universal Fit】 - Fits rectangular furniture legs with widths of 0.6" - 0.8" (15.2–20.3 mm) and lengths of 0.9" - 1.3" (22.9–33 mm).
Adhesion Strength Comparison
Which caulk truly sticks better to wood—that’s the question I hear most often when folks are deciding between silicone and polyurethane.
I’ve found that polyurethane generally wins when adhesion to wood matters most. It forms stronger, more durable bonds and handles wood’s natural expansion and contraction well. Silicone, while easier to clean up, can struggle with long-term durability, especially under moisture or movement.
Here’s what sets them apart:
- Polyurethane: Creates robust adhesion to wood; paintable; tolerates seasonal shifts
- Silicone: Fast cleanup; lower initial tack; weaker performance on damp surfaces
- Surface prep: Both need clean, dry wood for optimal adhesion to wood
- Application: Polyurethane suits structural sealing; silicone works for flexible roles
Choose polyurethane when durability matters. Pick silicone for flexibility-focused projects where adhesion demands aren’t as critical.
Ease Of Application Differences
| Feature | Silicone Caulk | Polyurethane Caulk |
|---|---|---|
| Cleanup | Easier, water-soluble | Requires solvents |
| Spreadability | Smoother application | Thicker, more demanding |
| Drying Time | Faster initial set | Slower, needs patience |
Silicone caulk works better when speed matters. You can apply it, clean your tools with water, and continue without difficulty. Polyurethane requires more attention—you’ll need mineral spirits for cleanup, and the thicker consistency demands deliberate technique. That said, polyurethane’s demanding nature often rewards careful application with superior bonding. For beginners seeking confidence and speed, silicone feels forgiving. For experienced applicators prioritizing lasting results, polyurethane’s extra effort delivers measurable benefits.
Long-Term Performance Durability
How do these two caulks actually hold up when real life—moisture, temperature swings, wood movement—tests them over months and years?
I’ve found that silicone adhesion to wood performs differently depending on conditions. Here’s what you’ll encounter:
- Silicone excels in wet environments but struggles when wood expands and contracts seasonally
- Polyurethane bonds more durably under shear stress, resisting peeling better over time
- Moisture exposure weakens silicone’s grip, particularly on exterior joints where water penetrates regularly
- Proper surface prep matters—clean, dry, primed wood significantly improves long-term performance for both
The reality? Polyurethane typically wins for demanding situations requiring lasting adhesion. Silicone maintains flexibility longer, preventing cracks. Your choice depends on your specific environment and whether movement or moisture poses the bigger challenge to your project.
How to Apply Silicone Caulk on Wood
When you’re ready to seal gaps and joints on your wood surfaces, applying silicone caulk correctly produces better results between a job that lasts for years and one that fails within months.
Preparation Matters Most
I’ve learned that silicone will adhere well to wood only when surfaces are genuinely clean and dry. Wipe down your wood with a damp cloth, then let it dry completely—moisture is your enemy here.
Application Technique
Load your caulking gun and cut the tube tip at a 45-degree angle. Apply steady pressure to create an even bead along the joint. Smooth it immediately with a damp finger or caulking tool for a professional finish. Choose exterior-grade silicone formulated for wood to maximize durability against weather and temperature shifts.

VERSATILITY AND QUALITY IN ONE - Sometimes simply called Sika 221 aluminum gray, this one-component urethane caulk bonds to a range of substrates, including metals, plastics, and metal primers and coatings

Premium Mult-Purpose Caulk: Ideal for sealing joints, repairing cracks, and filling gaps in a wide range of construction and home improvement projects.

Protects indoor wood surfaces such as furniture, windows, cabinets, trim and more
Common Mistakes That Cause Silicone to Fail

Why does silicone fail so often, even when you’ve followed the basic steps? I’ve learned that small oversights during preparation and application compromise your adhesion results faster than you’d expect.
Small oversights during preparation and application compromise adhesion results faster than you’d expect.
Here’s what I see happening most:
- Applying silicone to dirty, damp, or oily wood surfaces that block proper bonding
- Choosing interior-grade silicone for exterior projects, which doesn’t hold up to weather
- Rushing the job with uneven application and skipping adequate curing time
- Trapping moisture behind the seal because silicone resists cleanup and cures slowly in cold conditions
Wood moves constantly with temperature and humidity changes. If your joint isn’t designed for that movement, the silicone peels and cracks. I’ve watched careful work fail simply because someone skipped surface prep or picked the wrong product type. Prevention beats frustration.

100% Waterproof and Weatherproof: This 100% silicone formula offers protection from water damage, providing a reliable seal in areas exposed to harsh weather

100% Silicone Caulk Protection: This silicone caulk clear provides ultimate waterproof protection, ensuring a reliable seal against water damage. Ideal for areas with consistent exposure, keeping your surfaces safeguarded and pristine under any weather condition.

100% Waterproof and Weatherproof: 100% silicone formula offers protection against water damage, providing a reliable seal in areas prone to harsh weather
Choose Silicone Only When These Conditions Exist

I’ve learned that silicone works best on wood when you nail down two factors: getting your surface absolutely right and understanding what your environment will throw at it. You’ll want to start with wood that’s dry and clean—I’m talking genuinely dust-free, not just a quick wipe—because moisture and grime are silicone’s worst enemies. The conditions where silicone works well are when you’re sealing stable wood surfaces in moderate climates, not where wood’s constantly expanding and contracting with seasonal changes.

Waterproof sealant: This clear caulk seals out air, water, and moisture with 100% silicone as cured

Clear Silicone Sealant & Adhesive: Is A General Purpose Sealant Adhesive, Rtv (Room Temperature Vulcanized)Silicone Designed For Use In Household Or Mechanical Assembly Applications.

MARINE SILICONE SEALANT: Available in black, white, and clear, this superior heavy-duty adhesive bonds to fiberglass, wood, glass, metal, and plastics for above and below the waterline applications
Surface Preparation Requirements
How much difference does prep work really make? I’ll tell you—it’s the difference between silicone that holds for years and silicone that peels away in months.
Here’s what I’ve learned about getting wood ready:
- Clean thoroughly: Remove dust, oils, and debris with a damp cloth, then let it dry completely
- Sand lightly: A quick pass with fine-grit sandpaper creates texture that helps adhesion grip better
- Avoid moisture: Never apply silicone to damp wood or freshly treated surfaces—trapped water weakens the bond
- Choose the right formulation: Select silicone specifically designed for wood, whether interior or exterior
When I skip these steps, I regret it. You won’t. Proper preparation isn’t tedious—it’s your insurance policy for durability.
Environmental Conditions Matter
Even the best surface prep won’t save your silicone bond if the environment works against you.
I’ve learned that wood adhesion depends heavily on where and when you’re applying silicone. You’ll want dry conditions—ideally below 85% humidity—because moisture behind the sealant undermines everything you’ve worked toward. Temperature matters too; I avoid applying silicone when it’s below 50°F or above 90°F, as these extremes prevent proper curing.
What I’ve discovered works best:
- Apply silicone during mild, dry weather
- Allow adequate curing time before exposure
- Choose exterior-grade formulas for outdoor wood
- Protect fresh sealant from rain for 24 hours
Heat exposure particularly concerns me on exterior applications. Prolonged warmth softens silicone, reducing its sealing effectiveness. By respecting environmental conditions, you’re protecting your wood adhesion investment from invisible enemies.


