

Your bathroom mold action plan: Start by evaluating whether you can handle it yourself—small patches are DIY territory, but black mold needs professionals. Grab an N95 mask, gloves, and goggles, then spray vinegar on affected areas, scrub with a stiff brush, and dry thoroughly. Don’t forget grout lines and caulk, which need special attention. The key to preventing mold’s return? Kill the moisture problem through ventilation and dehumidification. Stick around for the specific techniques that actually work.
Assess Your Mold: When to DIY vs. Call a Professional

Assess Your Mold: When to DIY vs. Call a Professional
How do you know if that bathroom mold is something you can handle yourself, or if it’s time to call in reinforcements?
Evaluate the Mold Size
Small patches—think a few square inches—you can tackle. If mold spans more than a few square feet or appears black, professionals handle it better. I learned this the hard way: underestimating containment needs spreads spores everywhere.
Know Your Limits
You should hire professionals if you have asthma, COPD, or immune compromises. Black mold demands expert help too.
DIY vs Professional
Start by honestly assessing what you’re facing. Small, surface-level mold? Handle it yourself. Anything larger or suspicious? That’s when calling professionals makes sense—and prevents your bathroom from getting worse.

DESTROYS MOLD, MILDEW AND SOAP SCUM BUILDUP: This bleach spray cleans and whitens bathroom surfaces in seconds.
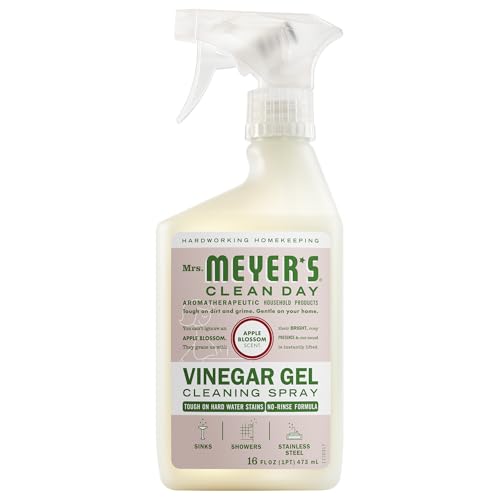
Mrs. Meyer's Vinegar Gel Cleaning Spray not only breaks down everyday grime, but also lifts dirt from surfaces leaving a cleaner surface

Contains (1) 28oz spray bottle of bathroom cleaner.
Gear Up: Protective Equipment for Mold Removal

Gear Up: Protective Equipment for Mold Removal
Once you’ve decided mold removal is something you can handle, don’t skip the protective gear—I’ve seen too many people rush into cleanup without it and end up sick for weeks.
Don’t skip protective gear during mold removal—I’ve seen people rush cleanup and end up sick for weeks.
Respiratory Protection
A NIOSH-approved N95 respirator shields you from mold exposure during basic cleanup. For larger affected areas, I’d recommend upgrading to a half-face or full-face respirator for more comprehensive protection.
Skin and Eye Defense
Wear nitrile or vinyl gloves—never bare hands—and goggles that completely cover your eyes against dust and particles.
When to Suit Up
Consider a disposable hazmat suit for extensive black mold removal. This preventative approach keeps contamination contained and protects your respiratory system from harmful spores you’d otherwise breathe in.

NIOSH-APPROVED N95 for at least 95 percent filtration efficiency against certain non-oil-based particles and aerosols
NIOSH-APPROVED N95 for at least 95 percent filtration efficiency against certain non-oil-based particles and aerosols

NIOSH APPROVED for at least 95 percent filtration efficiency against certain non-oil based particles
Clean Mold: Vinegar, Bleach, and Hydrogen Peroxide

Now that you’re suited up with protective gear, it’s time to tackle the mold itself—and I’ll let you in on something: you don’t need harsh chemicals to handle most bathroom mold situations.
Your Mold Removal Arsenal
I’ve found distilled white vinegar works well as a first-choice solution. Spray it undiluted directly on moldy areas and let it sit for 10 minutes to an hour, depending on your material. For stubborn stains that won’t budge, hydrogen peroxide becomes your ally—apply it undiluted, wait 10 minutes, then wipe away.
The Process That Works
- Spray your chosen cleaner using a bottle for even coverage
- Scrub with a stiff nylon brush to break up mold
- Wipe residue with a damp microfiber cloth
After cleaning, rinse surfaces with warm water and dry thoroughly. This prevents regrowth and keeps your bathroom healthier for everyone.

V Shape Design: V grout cleaner brush fits precisely into each groove, and reaches deeply into narrow joints. The three-row design also cleaning the area next to the grout

Ideal for cleaning grout, shower door tracks, sink fixtures and more

V Shape Grout Brush Cleaner: V shape bristle can slide along narrow grout lines and scrub the hidden dirty. Its three-row design also clean around tile seam
Target Grout, Caulk, and Hard-to-Reach Spots

I’ve found that grout and caulk need special attention because mildew loves hiding in those tight spaces where your regular cleaning tools can’t reach. You’ll want to use targeted techniques—like a simple toothbrush and a vinegar-lemon-baking-soda paste—to get into those hard-to-reach spots and actually eliminate the fungus at its source. Once you’ve tackled the visible mold, I’ll show you how to restore your caulk and keep these problem areas from becoming moldy again.

✔ EASY TO USE: This mini dehumidifier is spill and mess free. Just hang and go! Non-toxic, child and pet safe! Your small rooms will be dry and odor free. Works for areas up to 333 cubic feet.

EFFECTIVELY ELIMINATE MOISTURE: ZARPAX's moisture absorber with activated charcoal eliminates the problem of excess dampness and unpleasant odors in the home. Our convenient and easy-to-use moisture absorbers allow you to capture and lock away moisture from the air effectively. Perfect for small, enclosed spaces prone to high humidity including closets bathrooms, and kitchens, our moisture absorbers will free your home of excess moisture and odor.

1,500 SQ. FT. DEHUMIDIFIER – Removes up to 22 pints of moisture per day with an adjustable humidity setting from 35% to 85%. Perfect for use in basement, bathroom, bedroom, office, kitchen, cellar, or crawlspace. Maintain a healthy 45%-55% humidity range.
Grout Cleaning Techniques
Why does grout seem like a mold magnet? I’ve learned it’s because failed grout sealant can’t protect against humidity and water exposure. Here’s my approach that actually works:
Creating Your Cleaning Paste
I mix equal parts vinegar, lemon juice, and baking soda into a paste. Using an old toothbrush, I scrub directly into the grout lines where grout mildew loves to hide.
Your Action Plan
- Wait 5 minutes, then rinse thoroughly with warm water
- Apply undiluted 3% hydrogen peroxide if mildew persists, waiting 10 minutes before rinsing
- Reseal grout yearly and scrub lightly every few weeks to prevent recurrence
This routine keeps my bathroom looking fresh and prevents that stubborn fungus from returning.
Caulk Restoration Methods
While keeping grout clean gets you halfway there, the caulk around your tub, shower, and sink edges needs just as much attention—maybe even more, since it’s the first line of defense against water seeping into walls.
Start Fresh
I remove old, peeling caulk with a utility knife, then wipe the joint clean. This matters because new caulk won’t stick to deteriorating material.
Apply Mold-Resistant Caulk
I choose silicone-based, mold-resistant caulk designed specifically for bathroom sealing. I apply it smoothly into the gap, then dip my finger in water and glide it along the seam for a uniform finish.
Let It Cure
I wait the full 24 hours before showering. This prevents mildew growth and creates a watertight seal.
Stay Ahead
I inspect annually and re-caulk when I notice cracking or peeling. Caulk restoration keeps moisture out where it matters most.
Dry Your Bathroom and Repair Mold Damage

Once you’ve scrubbed away the visible mold, the real work begins—because moisture is mold’s best friend, and you’ll want to make your bathroom as inhospitable to it as possible.
Eliminate Excess Moisture
After cleaning, dry all surfaces thoroughly with towels. Run your exhaust fan for at least 30 minutes after every shower to reduce humidity levels. Consider placing a dehumidifier in particularly damp areas—this step prevents mold damage from recurring.
Key Prevention Actions:
- Inspect hidden spaces like crawl spaces and attics for water damage, then repair any leaks immediately
- Recaulk and reseal tiled surfaces and grout lines to block moisture intrusion
- Apply mildewcide-containing paint in shady bathroom corners where mold loves hiding
Proper ventilation combined with these repairs creates an environment where mold struggles to return. You’re building long-term protection, not just a temporary fix.

BREATHABLE MATERIAL - Constructed with a nonwoven multilayer design featuring a microporous film over spunbonded polypropylene, our coveralls offer exceptional durability and breathability

HIGH PROTECTION DESIGN: This chemical protective suit features a zipper on the front of the protective coverall is additionally secured with a Velcro strip. Together with the cover strip in the neck area, the suit offers maximum safety in hazardous environments

【360 Degree Overall Protection】With elastic hood, elastic wrists, and elastic ankles, the coveralls provide a snug fit and reliable protection from harmful particles. Each coverall has a front zipper for easy on and off.
Stop It From Coming Back: Fix the Moisture Problem

Stop It From Coming Back: Fix the Moisture Problem
You’ve cleaned away the mold, but this is the key—mold will return if you don’t address what brought it there in the first place: moisture.
Control Bathroom Moisture
Your bathroom is basically a mold paradise because of all that steam from showers. Install or use exhaust fans to vent moisture outside, running them during and 20 minutes after showers. This single step makes a difference.
Lower Humidity
Keep indoor humidity below 50% using air conditioning or dehumidifiers during humid weather. This prevents mold from gaining a foothold.
Fix Water Problems
Repair leaks immediately—in plumbing, roofs, and drainage systems. Water intrusion feeds mold growth. Regular inspections behind sinks and under fixtures catch problems before they worsen.
These ventilation and humidity control measures work together, creating an environment where mold simply can’t survive.

Contains (1) 28 ounce bottle of antibacterial bathroom cleaner

Designed as a powerful Moldstain remover gel, it effectively removes stubborn stain, black spots, and buildup on washing machine rubber gaskets, shower sealant, tile grout, and bathroom surfaces. As a reliable black stain remover, it works deep into porous areas and functions as a heavy-duty remover for tough stains.

Powerful grout & tile cleaning formula: Goo Gone Grout & Tile Cleaner effectively removes tough stains, dirt, mold, mildew, soap scum, and hard water stains from bathroom and kitchen surfaces. Perfect for deep cleaning shower tiles, bathroom floors, tub surrounds, and countertops without harsh scrubbing.
Prevent Mold: Ventilation and Moisture Control Tips

I’ve learned that keeping mold from returning isn’t just about cleaning—it’s about stopping the moisture that feeds it in the first place. You’ll want to address this through smart ventilation system installation and practical moisture control strategies that work together to keep your bathroom dry. When I started using these approaches, mold stopped coming back, which meant less scrubbing for me down the road.

NIOSH APPROVED: For at least 95 percent filtration efficiency against certain non-oil based particles

NIOSH-APPROVED: 3M Particulate Filter 2097, P100 provides at least 99.97% filtration efficiency against solids and liquid aerosols, as well as oil-based particulates

NIOSH-APPROVED N95 for at least 95 percent filtration efficiency against certain non-oil-based particles and aerosols
Ventilation System Installation
Why does your bathroom mirror fog up like a car window in winter? That moisture needs somewhere to go, and without proper exhaust fan installation, it’ll stick around and invite mold. I learned this the hard way after ignoring my foggy bathroom for months.
Installing a bathroom ventilation system isn’t complicated. Here’s what you need to do:
- Install a quality exhaust fan rated for your bathroom’s square footage (typically 50-100 CFM)
- Run the fan for 30 minutes after showers to actively remove moisture
- Direct air outdoors so humidity control actually works instead of recirculating damp air
When I installed mine, the difference was immediate. My walls stopped feeling clammy, and that musty smell vanished. Proper humidity control through exhaust fan installation is your first real defense against mold.
Moisture Control Strategies
Moisture Control Strategies
Getting that exhaust fan running is just the starting point—now comes the part that really keeps mold at bay: managing the moisture that’s still hanging around in your bathroom.
Reduce Humidity Levels
Running a dehumidifier and using air conditioning during humid weather helps control moisture levels. Keep indoor humidity below the threshold where mold thrives. This creates an environment where mold cannot develop.
Eliminate Standing Water
After you shower, squeegee those walls and doors, then dry the floor. Standing water provides conditions for mold and mildew to grow. This simple habit protects your bathroom’s surfaces.
Increase Natural Light
Open your blinds and doors when possible. Mold favors damp, dark conditions, so brightening your space naturally discourages growth.


