
Shake out loose dirt outside for 10-15 seconds, check your care label, inspect the backing for damage, then decide between hand or machine washing. Use cold water with gentle detergent—hot water warps rubber backing. Rinse thoroughly until suds disappear, then air-dry completely away from direct heat. Wash weekly for heavy use, every two weeks otherwise. Between washes, vacuum and hang outside daily to maintain freshness. Follow these steps to extend your mat’s life.
Step 1: Shake Out Loose Dirt and Debris
The first thing you’ll want to do is take your bathroom mat outside and give it a good shake. This simple step makes a real difference in how clean your mat actually gets.
What to do:
- Hold the mat firmly at two corners
- Shake vigorously for 10-15 seconds
- Beat it briskly against a railing or fence to dislodge embedded particles
This loosens dirt, hair, and dust before washing, which prevents debris from gumming up your machine’s cycles. Flip the mat over and repeat on the back side—dirt and debris often accumulate there.
While you’re at it, inspect the backing for wear or damage. Loose backing can shed during washing and harm your drum. Check pockets for coins or buttons too. Doing this promptly after use minimizes buildup and makes your actual wash easier.

Soft Chenille Comfort — Step onto thousands of soft chenille fibers in our high-pile design the moment you leave the shower, crafted for genuine everyday comfort. OLANLY's OEKO-TEX STANDARD 100 certified chenille delivers a cushioned, cozy feel underfoot — gentle on tired feet, certified safe for little ones, and friendly for furry companions. Minimal shedding means less lint, less maintenance — just shake to refresh the high-pile plush or toss it in the machine as needed. From the first step to the last, every single day — premium comfort at an everyday price.

ULTRA THIN BATH MAT - If you are looking for a bath rug that can fit under the door, here it is. Our bathroom mat features a thin enough rubber backing at the bottom that can fit under the door. With a thickness as low as 0.2 inches, you can place the non-slip bath mat behind a door without being entangled with fluff upon closing the door.

Soft Chenille Comfort — Step onto thousands of soft chenille fibers in our high-pile design the moment you leave the shower, crafted for genuine everyday comfort. OLANLY's OEKO-TEX STANDARD 100 certified chenille delivers a cushioned, cozy feel underfoot — gentle on tired feet, certified safe for little ones, and friendly for furry companions. Minimal shedding means less lint, less maintenance — just shake to refresh the high-pile plush or toss it in the machine as needed. From the first step to the last, every single day — premium comfort at an everyday price.
Step 2: Check the Care Label for Washing Instructions

Before you toss that mat into the washing machine, flip it over and locate the care label—it’s usually tucked on the backing and contains important information about temperature, cycle type, and drying methods. Check whether your mat needs a gentle cycle or can handle a regular wash, since rubber-backed mats can deteriorate if exposed to high heat or aggressive spinning. Special warnings about the backing material may also be present, so reading the label prevents accidental damage to a mat that could last for years.

Advanced Absorbency: Crafted with high-density, dual-tone chenille yarns, bath mat features a uniquely structure rapidly wicks away water—drying your feet within 3 seconds of stepping on bath rug. After shower, you feel difference as water disappears beneath your feet, while fibers stay luxuriously soft. No more puddles or slippery surfaces like ordinary bathmats.

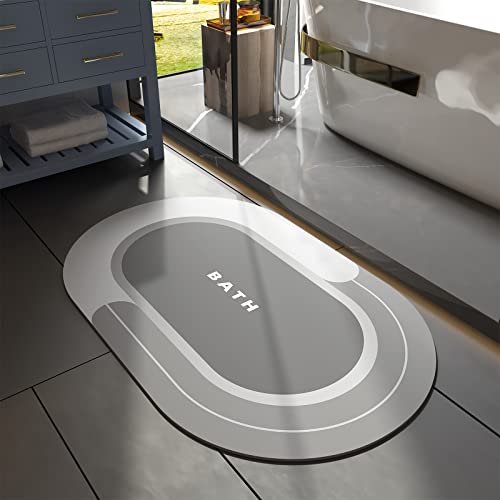
【Quick Absorbing & Fast Drying】 The stone bath mat for bathroom is a flexible stone bath mat made of diatom mud material, which is easier to dry than other normal plush bath mats. This water absorbing bath mat is designed to absorb water from wet feet immediately, watermarks will disappear within few minutes. Enjoy a dry and comfortable experience after your shower.
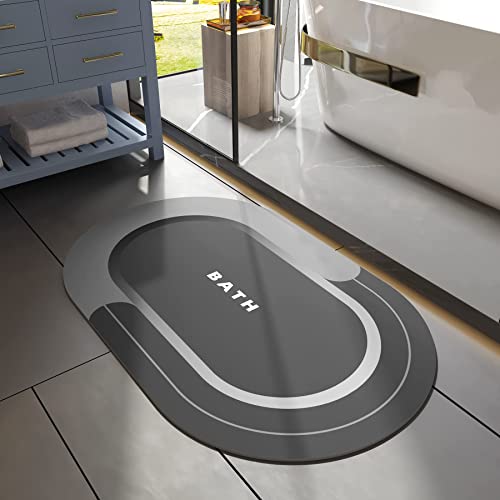
Super Absorbent & Stain Resistant: Innovative advanced nano porous PU leather surface can absorb dripping water instantly without leaving any watermarks or stains. Super absorbent bath mat in front of bathtub, shower door or sink to keep bathroom floor clean, dry and safe.
Material-Specific Temperature Guidance
Checking your mat’s care label isn’t just a suggestion—it’s your roadmap to keeping it looking fresh and intact. Different materials need different temperature approaches, and what works for cotton won’t necessarily work for memory foam mats.
Common Material Guidelines:
- Cotton and standard fabrics: Warm water (around 80-90°F) typically works best
- Memory foam or rubber-backed mats: Cold water only—heat damages the backing
- Delicate fibers: Cold water prevents color fading and fiber breakdown
Hot water might seem like the cleaning solution, but it’ll actually separate backings and warp your mats faster than you’d expect. When the label specifies temperature, follow it exactly. Your bathroom mats will last longer and maintain their appearance with proper care.
Hand Wash vs. Machine Wash
Once you’ve grabbed your bathroom mat to give it a proper cleaning, your next move is finding that care label—it’s the single most important step you’ll take.
That little tag tells you everything: whether you can toss it in the machine wash or need to hand wash it instead. I’ve learned this the hard way after shrinking a mat I loved.
| Care Label Says | Best Method | Water Temperature | Cycle Type | Detergent |
|---|---|---|---|---|
| Machine Wash | Washing machine | Cold water | Gentle cycle | Mild only |
| Hand Wash | Sink or tub | Cold water | Manual scrubbing | Mild detergent |
| Hand Wash Only | Tub method | Cold water | Gentle agitation | Mild soap |
| No Bleach | Your chosen method | Cold water | As specified | Bleach-free |
| Missing Label | Test first | Cold water | Conservative | Mild formula |
When you’re missing that label entirely, test a hidden corner before committing. Your mat deserves proper care.
Special Care Requirements and Warnings
What’s hiding on that tiny care label might just save your washing machine—and your favorite mat.
I’ve learned this the hard way. That small tag contains necessary information about your bath mats that determines everything. Here’s what you should check:
- Water temperature requirements – Cold, warm, or hot water specifications
- Backing material details – Rubber or latex backing that can degrade with improper washing
- Detergent and bleach restrictions – Whether oxygenated bleach is safe or forbidden
- Cycle recommendations – Gentle cycles versus standard washing options
When care instructions say hand wash, I follow that exactly. These aren’t suggestions—they’re protection. If your label’s damaged or unclear, replacing it prevents costly washer damage. Your bath mats deserve respect, and respecting their care instructions keeps both your mats and machine functioning properly. Always prioritize what the label says over any other guidance.
Step 3: Check Your Mat’s Backing Before Washing

Before you toss that bathroom mat into the washer, take a moment to flip it over and examine the backing—I’ve learned this the hard way after ruining a favorite mat years ago.
Identify Your Backing Material
Most mats have rubber, latex, or felt backing. Each requires different care. Check for peeling, looseness, or significant wear that signals replacement time before washing.
Choose the Right Washing Temperature
Heat damages sensitive backings. I now use cold or warm water when uncertain—it’s safer than risking warping or detachment in hot cycles. This simple choice protects your mat’s slip resistance and longevity.
Assess Overall Integrity
A compromised backing reduces traction after washing. If damage is visible, hand washing or line drying becomes your better option. Taking thirty seconds now prevents frustration later.
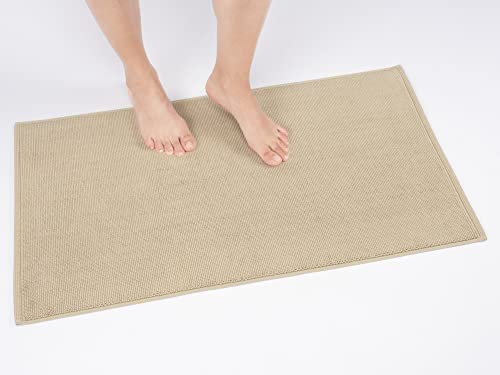
✔ Cotton Bathmat for Bathroom Floor is made of 100% Ringspun Cotton. This Product can also be Referred as "Soft, Absorbent and Floor Bat Mat Rug for Bathroom"

Heavy 3000GSM - This 100% cotton bath rug features a superior tufted top construction in a heavy 3000gsm weight, that creates an incredibly dense and plush look and feel

Luxurious Comfort: Experience the epitome of sophistication with the Luxury Hotel Style Collection, where meticulously curated pieces bring the opulence of a five-star hotel into your home, elevating your living spaces with unparalleled comfort and timeless elegance.
Step 4: Choose Hand Washing or Machine Washing

Once you’ve checked your mat’s backing, you’ll need to decide between hand washing and machine washing—and I’ll admit, I used to toss everything in the machine without thinking twice. The method you choose depends on your mat’s care label and how delicate its backing is, since some materials need the gentler touch that hand washing provides. Let me walk you through both approaches so you can pick what works best for your bathroom mat.

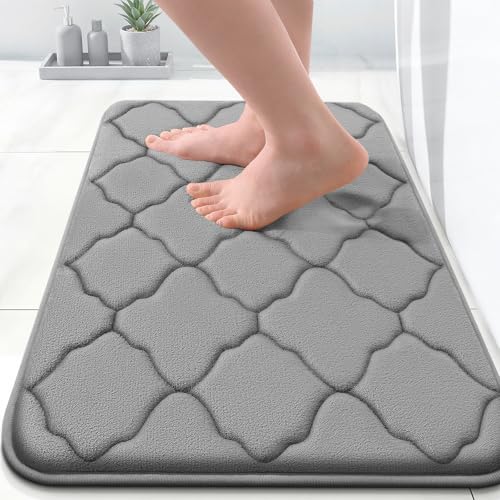
[Stylish and Cloud-Like Comfort] OLANLY's plain-colored bright-velvet memory foam bath mat enhances any bathroom aesthetic with elegant design. Well-suited for families with kids, pet owners, small apartment living, single dwellers seeking daily luxury, or thoughtful selections. The ultra-soft memory foam bright velvet outer layer plus thick cushion memory foam contours to your body, offering a cloud-like experience with every step.

SOFT & COMFORTABLE: Bath mats are filled with polyurethane memory foam and the microfiber velvet outer material, soft and cozy, skin-friendly, relieve pressure and fatigue on your feet

[OEKO-TEX STANDARD 100 CERTIFIED & CLOUD-LIKE COMFORT] Step onto OLANLY's premium memory foam bath mat for soft, cushioned comfort from the first step. The slow-rising foam gently conforms to your feet, then springs back to help maintain its plush feel and shape. Made with OEKO-TEX STANDARD 100 certified fabric, it offers added peace of mind for bathrooms, kitchens, and busy family spaces. Thoughtfully crafted for daily use, it delivers cloud-like comfort and a premium feel at an accessible price.
Hand Washing Method Overview
If your bathroom mat’s backing looks delicate or you’d rather avoid the spin cycle’s intensity, hand washing is your best option. This method gives me more control and confidence.
Here’s what I do:
- Soak the rug in cold water with detergent for 30 minutes
- Submerge it completely, distributing detergent evenly across the entire surface
- Gently agitate for about a minute to lift dirt without damaging the backing
- Rinse thoroughly until all soap residues disappear
After rinsing, I skip wringing and instead lay my mat flat or hang it to air-dry away from direct heat. This approach prevents stretching and keeps the mat’s integrity intact. Your bathroom mat will receive the careful treatment it deserves.
Machine Washing Best Practices
While hand washing works wonderfully for delicate mats, your bathroom mat might actually be tough enough for the washing machine—and honestly, that’s the route I take whenever I can.
Before tossing your mat in, always check the care label first. This tells you whether machine washing is even recommended and what temperature or cycle restrictions exist.
Here’s my approach: I beat the mat outside to remove debris, then wash it in cold water with regular detergent. For stubborn stains, I add oxygenated bleach if the label permits it.
The key is balancing the load by washing with towels or similar items. This prevents an unbalanced spin that could damage the backing. Avoid vinegar or bleach with rubber-backed mats—they’ll degrade over time.
Choosing Your Cleaning Approach
The decision between hand washing and machine washing comes down to your mat’s construction and condition. Checking your care label first prevents problems later.
Here’s how to approach this choice:
- Inspect the backing – If it’s rubber and warns against agitation, hand washing is your safest option
- Consider the debris – Machine washing requires beating your mat outside first to remove loose dirt
- Check water-resistant features – Use a low spin setting on machines to protect the backing from damage
- Assess stain severity – Tougher stains might need oxygenated bleach, which the care label must approve
Hand washing works well for delicate mats, while machine wash handles everyday bathroom mats efficiently. Your mat’s specific needs guide the right decision, keeping it fresh and intact for years.
Step 5: Wash With Cold Water and Gentle Detergent
Ever wonder why your bathroom mat starts falling apart after a few washes? I used to make this mistake constantly. The culprit? Hot water and harsh chemicals that degrade your mat’s backing and fade its colors.
I’ve learned that cold water is your mat’s best friend. It preserves fibers while protecting the rubber backing from warping. Pair cold water with a gentle detergent, and you’re treating your mat the way a professional would.
| Water Temperature | Effect on Mat |
|---|---|
| Hot water | Warps materials, weakens backing |
| Cold water | Preserves fibers, prevents fading |
| Detergent Type | Impact |
| Harsh chemicals | Breaks down adhesives, leaves residue |
| Gentle formula | Minimizes damage, cleans effectively |
| Pre-soak Option | When to Use |
| Brief soak | For heavily soiled mats only |
For stubborn stains, consider a quick pre-soak in cold water with detergent before washing. This simple step will help keep your mat looking fresh longer.

Comfort and Style: Our bathroom rugs are like a warm hug for your feet, crafted with a chic waffle texture and a geometric design. Stepping out of the shower feels like landing on a cloud, transforming your bathroom into a cozy, spa-like retreat
Super Absorbent & Stain Resistant: Innovative advanced nano porous PU leather surface can absorb dripping water instantly without leaving any watermarks or stains. Super absorbent bath mat in front of bathtub, shower door or sink to keep bathroom floor clean, dry and safe.

QUICK-DRY STONE SURFACE FOR A CLEANER FEEL – Made with a diatomaceous earth stone surface that absorbs water from wet feet quickly and helps the mat dry fast between uses. A great alternative to traditional fabric bath mats that can stay damp longer in busy bathrooms.
Step 6: Rinse Your Mat Thoroughly

Why does soap residue matter so much? I’ve learned the hard way—leftover detergent attracts dirt faster than you’d think, leaving your mat stiff and dingy within days. That’s why thorough rinsing is necessary.
Here’s my rinsing approach:
- Use cool to lukewarm water for the rinse cycle
- Run water until it runs clear and completely free of suds
- For hand washing, submerge and squeeze continuously until no detergent bubbles remain
- With machine washing, add an extra rinse cycle to fully clear cleaning agents
After rinsing, I gently wring or press out excess water without twisting—this protects the mat’s backing and texture. You’ll notice the difference right away. A properly rinsed mat feels softer and stays cleaner longer, keeping your bathroom fresher overall.

Absorb Water: Enjoy the comfort of standing on the clouds! Yimobra contour mat consists of soft velvet contact layer and thick memory foam filling, which makes it soak moisture instantly and dry quickly. It is super thick and cushiony keep your feet warm and cozy

Soft Chenille Comfort — Step onto thousands of soft chenille fibers in our high-pile design the moment you leave the shower, crafted for genuine everyday comfort. OLANLY's OEKO-TEX STANDARD 100 certified chenille delivers a cushioned, cozy feel underfoot — gentle on tired feet, certified safe for little ones, and friendly for furry companions. Minimal shedding means less lint, less maintenance — just shake to refresh the high-pile plush or toss it in the machine as needed. From the first step to the last, every single day — premium comfort at an everyday price.

BATHROOM RUG RUNNER - Use this oversized bathmat to add a touch of spa-like luxury to your home. The 24-inch-wide by 60-inch-long size of this bath rug is ideal for bathrooms with double vanities, claw foot tubs, or large walk-in showers.
Step 7: Select the Right Drying Method for Your Mat

Step 7: Select the Right Drying Method for Your Mat
Now that your mat is clean and rinsed thoroughly, drying it properly matters as much as the washing itself. Most mats need air drying to protect their suction cups and backing—something worth knowing to avoid damage.
Your Best Drying Strategy
Air dry your mat by hanging it over your bathtub or laying it flat in a well-ventilated space. Direct sunlight speeds up drying while naturally deodorizing your mat. For rubber or memory foam mats, line drying prevents warping that can ruin their shape.
The Golden Rule
Always check your care label first. Only use a dryer if it explicitly permits it—most don’t. Wait until your mat is completely dry before stepping on it; this prevents mold and mildew from developing underneath.

Advanced Absorbency: Crafted with high-density, dual-tone chenille yarns, bath mat features a uniquely structure rapidly wicks away water—drying your feet within 3 seconds of stepping on bath rug. After shower, you feel difference as water disappears beneath your feet, while fibers stay luxuriously soft. No more puddles or slippery surfaces like ordinary bathmats.

Super Absorbent & Stain Resistant: Innovative advanced nano porous PU leather surface can absorb dripping water instantly without leaving any watermarks or stains. Super absorbent bath mat in front of bathtub, shower door or sink to keep bathroom floor clean, dry and safe.

Advanced Absorbency: Crafted with high-density, dual-tone chenille yarns, bath mat features a uniquely structure rapidly wicks away water—drying your feet within 3 seconds of stepping on bath rug. After shower, you feel difference as water disappears beneath your feet, while fibers stay luxuriously soft. No more puddles or slippery surfaces like ordinary bathmats.
Step 8: Dry Your Clean Mat Completely

Since moisture left to sit breeds mold and mildew, getting your mat completely dry is just as important as the washing itself. I’ve learned this the hard way after discovering fuzzy growth hiding underneath a damp mat.
To dry your mat effectively, I follow these steps:
- Squeeze out excess water gently without wringing harshly
- Reshape the mat to its original form
- Hang it where air circulates freely—over a tub or shower works perfectly
- Position it in direct sunlight if possible for natural UV protection
I prefer line drying because it’s thorough and reliable. Every inch needs exposure to air for complete moisture removal. Before returning your mat to the bathroom, confirm it’s bone-dry. That extra patience prevents mildew troubles later.

Heavy 3000GSM - This 100% cotton bath rug features a superior tufted top construction in a heavy 3000gsm weight, that creates an incredibly dense and plush look and feel

Cotton Bathmat Set - COTTON CRAFT's fully reversible 2 piece step mat bath rug set is luxurious and super soft. Each bath rug measures an oversized 20 inches x 30 inches. Color - Linen

Soft and Plush Texture: Our bath rug is designed with your comfort in mind, boasting a plush and inviting texture that pampers your feet with every step. Sink into its luxurious softness after a bath or shower, transforming your bathroom into a spa-like oasis.
Step 9: How Often Should You Wash Your Mats?

Step 9: How Often Should You Wash Your Mats?
Getting your mat completely dry prevents mold, but keeping it fresh involves another important question: how often should you actually wash the thing? The answer depends on your situation. Washing frequency isn’t one-size-fits-all—it varies based on usage and environment.
| Usage Level | Washing Frequency | Environment | Recommendation |
|---|---|---|---|
| Heavy use | Weekly | Standard | Prevents grime buildup |
| Moderate use | Every 2 weeks | Standard | Maintains hygiene |
| Light use | Every 2-3 weeks | Standard | Still effective |
| Any use | Every 1-2 weeks | Humid | Moisture control necessary |
Between washes, I vacuum and hang my bath mats outside. This minimizes dirt accumulation. Always check your mat’s care label too—materials like memory foam need stricter guidelines.

SUPER SOFT Memory foam bath mat has thick soft memory foam, which can provide unique comfort for your feet. The carpet is specially designed to help you eliminate foot pressure and provide you with advanced support that other bath mats cannot provide.
[STYLISH AND CLOUD-LIKE COMFORT] OLANLY's Memory Foam Bath Mat boasts an elegant Moroccan design, infusing a touch of modern luxury into your space. Crafted from ultra-soft microfiber coral velvet outer material and thick cushion memory foam, our bathroom rug provides a cloud-like comfort that contours to the shape of your body, making every step a luxurious experience.

[Stylish and Cloud-Like Comfort] OLANLY's plain-colored bright-velvet memory foam bath mat enhances any bathroom aesthetic with elegant design. Well-suited for families with kids, pet owners, small apartment living, single dwellers seeking daily luxury, or thoughtful selections. The ultra-soft memory foam bright velvet outer layer plus thick cushion memory foam contours to your body, offering a cloud-like experience with every step.
Step 10: Keep Your Mat Fresh Between Washes

I’ve found that maintaining your mat between washes extends how long it stays fresh and hygienic. You’ll want to vacuum the mat regularly to remove dirt and debris that accumulates from daily use, then hang it outside daily to let air circulation reduce moisture and odors. By minimizing moisture buildup through these simple steps, you’re actually extending the time between washes and protecting your mat’s backing from unnecessary wear.
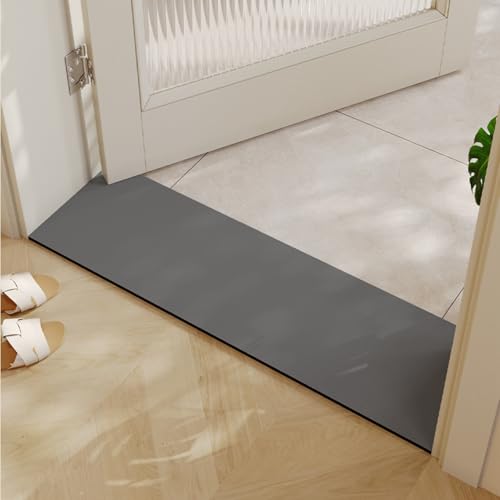
Perfect Fit for Tight Spaces – Ultra-narrow & extra-long design fits snugly in doorways, hallways, and bathroom entrances, preventing tripping hazards while keeping floors dry. No more bulky mats!

Super absorption and quick drying: The bathroom mat has super absorbent, added diatomaceous earth material, fast drying, with magical absorption and drying speed, can avoid water directly on the floor, keep the bathroom floor clean and dry.
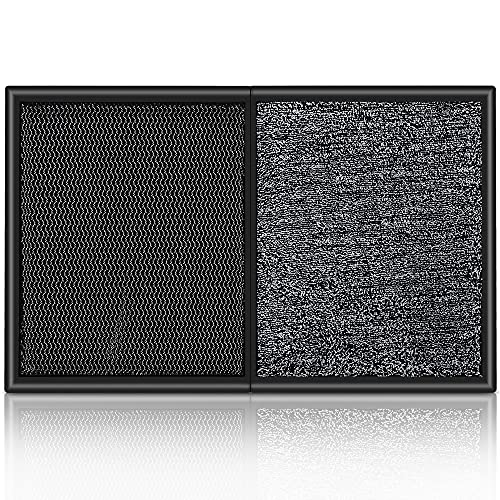
Spotless Floors. Our Lostronaut double action shoe mats are your ultimate doorway defenders. From muddy boots to messy paws, our welcome mat keeps your home’s entryways spick and span.
Vacuum Between Washings
You’ll want to vacuum your bathroom mat weekly—especially if it sits in a high-traffic spot—to pull out the dirt, dust, and hair that settle deep into the fibers between full washes.
Here’s how to vacuum effectively:
- Use a handheld or attachment vacuum on both sides of the mat
- Focus on edges and backing where buildup accumulates fastest
- Deploy a crevice tool along seam lines and underneath the mat
- Allow complete drying before reusing to prevent moisture trapping
This routine prevents grime from embedding itself, which means you’ll wash your mats less frequently. Weekly vacuuming cuts my washing schedule nearly in half. The debris you catch now won’t transfer to your laundry later. It’s the maintenance habit that keeps mats fresh-smelling rather than musty.
Hang Outside Daily
What keeps bathroom mats fresh and clean between washes? Hanging your mat outside regularly helps. After washing, remove it promptly and hang it to air-dry in direct sunlight—this deters mold growth naturally.
My drying strategy:
- Place the mat on a clothesline or drying rack in an outdoor area
- Allow ample space around it for even airflow
- Tilt it slightly so excess water drains away
- Keep it flat to avoid creases
Humidity matters. If rain threatens or weather turns too damp, bring it inside immediately to prevent prolonged dampness. This habit keeps your bathroom mat fresher longer between washes.
Minimize Moisture Buildup
- Shake it out daily to remove loose dirt and hair that traps moisture
- Vacuum or brush the mat to minimize dirt accumulation that holds dampness
- Spot-treat stains with appropriate removers, then rinse thoroughly to prevent moisture pockets
- Air dry completely by hanging the mat in a warm, well-ventilated space or direct sunlight
Sunlight works well—it evaporates moisture and suppresses mold spores naturally. Never place your mat back down until it’s fully dry. Damp fibers deteriorate quickly in humid bathrooms, so complete dryness before reuse keeps your mat fresher longer.


