
I’ll help you restore your bathroom rug to fresh, soft condition. Start by checking the care tag for material type and cleaning instructions. Next, shake out loose dirt and vacuum both sides thoroughly. Then test any cleaner on a hidden corner first—wait five minutes to confirm colorfastness. Machine-wash on delicate cycle with gentle detergent, using warm water. Finally, air-dry flat away from direct sun to prevent mildew and damage. Follow these straightforward steps to tackle stubborn soap scum and embedded grime.
Step 1: Check Your Bathroom Rug’s Care Tag & Material

Before you toss that bathroom rug into the washing machine, you’ll want to pump the brakes and do some detective work. I’ve learned this the hard way—rushing straight to the wash cycle without checking the care tag can turn your favorite rug into a shrunken mess.
Rushing to wash without checking your care tag risks turning your favorite bathroom rug into a shrunken disaster.
What you’re looking for:
- Care tag location: Usually sewn into the rug’s corner or underside
- Material type: Cotton, nylon, polyester, memory foam, or rubber backing each need different approaches
- Cleaning instructions: Machine wash, delicate cycle, hand wash, or air dry only
Here’s the thing: rubber backing requires gentle handling to prevent damage, while memory foam demands extra care. Your rug’s care tag and material determine everything about your cleaning strategy. Taking two minutes now saves you from replacing your bathroom rug later.

[Upgraded Waffle Design]:This waffle bath mat is meticulously woven with high-density yarns, combining modern aesthetics with long-lasting longevity. It also features an increased weight for solid structure—ensuring the waffle pattern stays clear and full, impervious to deformation and shrinkage!

Soft Chenille Comfort — Step onto thousands of soft chenille fibers in our high-pile design the moment you leave the shower, crafted for genuine everyday comfort. OLANLY's OEKO-TEX STANDARD 100 certified chenille delivers a cushioned, cozy feel underfoot — gentle on tired feet, certified safe for little ones, and friendly for furry companions. Minimal shedding means less lint, less maintenance — just shake to refresh the high-pile plush or toss it in the machine as needed. From the first step to the last, every single day — premium comfort at an everyday price.

OEKO-TEX Certified Microfiber Comfort — Step out of the shower onto OLANLY’s 100% microfiber bath mat, featuring nearly 1 inch of dense, plush pile to cushion your feet with cozy everyday softness. The thick surface helps take the chill off cold bathroom floors, while the signature gradient stripe design adds understated elegance to any bathroom style. OEKO-TEX STANDARD 100 certified, it’s a thoughtful choice for busy family bathrooms, guest baths, and homes with kids or pets. Plush comfort, everyday value, and softness you can feel from the very first step.
Step 2: Remove Loose Dirt With a Brisk Dry-Off

Why does it matter to remove loose dirt first? I’ll tell you—skipping this rug prep step means you’re basically washing dirt deeper into the fibers. A brisk dry-off prevents embedding debris and cuts your rinse time significantly.
Here’s my pre-wash prep approach:
| Action | Purpose | Benefit |
|---|---|---|
| Brisk dry-off | Remove surface dirt | Prevents embedding |
| Shake rug outside | Dislodge lint | Reduces wash time |
| Vacuum both sides | Capture remaining debris | Cleaner fibers |
Next, I shake my rug vigorously outside—this dislodges surface dirt and stubborn lint clinging to fibers. Then I vacuum both sides thoroughly, checking those hidden dirt pockets where debris accumulates. I detach the rug from backing and lay it flat to assess problem areas. This remove debris step improves everything that follows.
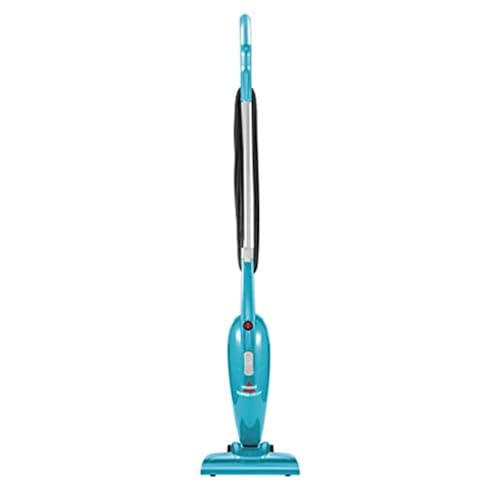
VERSATILE THREE IN ONE DESIGN. Easily converts from a corded stick vacuum to a hand vacuum or a stair vacuum. Powerful suction makes it the perfect electric broom for quick pickups on sealed hard floors and area rugs throughout your home.
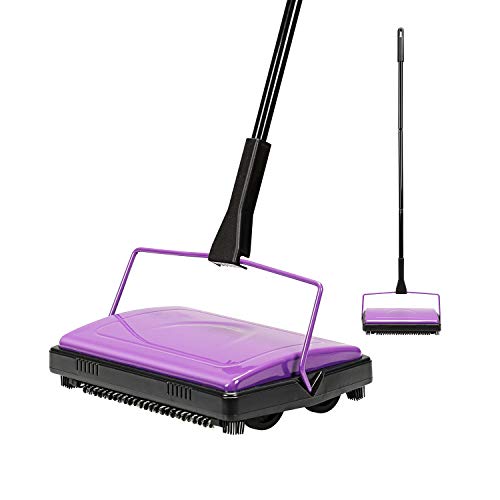
Carpet Sweeper MULTIFUNCTIONAL: Safe and efficient on low carpets, rugs, undercoat carpets. Please DON'T use it on floors like hardwood, ceramic, tile, laminate, marble or glass. It only works best on carpets
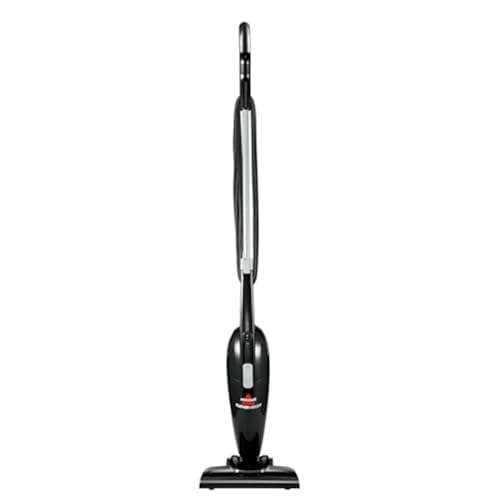
VERSATILE THREE IN ONE DESIGN. Easily converts from a corded stick vacuum to a hand vacuum or a stair vacuum. Powerful suction makes it the perfect electric broom for quick pickups on sealed hard floors and area rugs throughout your home.
Step 3: Pre-treat Stains-Test First on Hidden Areas

As soon as you spot a stain on your bathroom rug, your instinct might be to grab the nearest cleaning product and start scrubbing—but that’s actually when things can go wrong.
I’ve learned that testing first saves you from disaster. Before treating visible stains, I always perform a compatibility check on hidden areas:
- Apply your chosen mild cleaner to an inconspicuous corner
- Wait five minutes to check for colorfastness issues
- Verify the fibers don’t fade or the backing doesn’t weaken
- Confirm no unwanted reactions occur
Once I’ve verified material safety, I’m ready for stain pre-treatment. I apply my spot-cleaning solution directly to the stain, let it sit briefly, then blot gently. This approach prevents stain lifting from damaging your rug—something we all want when keeping our bathrooms clean and functional.

PERMANENTLY removes tough stains like red wine, fruit juice, make-up, food grease, vegetable oil, cola, soy sauce, grape jelly, blood, urine, and more.

ADVANCED CARPET PRETREATMENT SPRAY: Carpet Pretreat Spray is a Power Booster for Capture Carpet and Rug Dry Cleaner to lift out new and old stains, remove spots and spill & neutralize odors, leaving carpet soft and smelling fresh.
ADVANCED CARPET PRETREATMENT SPRAY: Carpet Pretreat Spray is a Power Booster for Capture Carpet and Rug Dry Cleaner to lift out new and old stains, remove spots and spill & neutralize odors, leaving carpet soft and smelling fresh.
Step 4: Machine-Wash Your Bathroom Rug on Delicate Cycle

Setting Up for Success
I always use the delicate cycle on my washing machine to protect the rug backing and fibers. Here’s what I do: I wash my bathroom rug separately or with bath towels, creating a balanced load that prevents damage. I fill the machine loosely—never overcrowding—because cramped rugs don’t get clean.
Water and Detergent Matters
I select warm water unless the care label says otherwise, then choose a gentle detergent formulated for delicate items. I use minimal detergent, avoiding chlorine bleach entirely since it damages rubber backing. I skip the spin cycle or run it gently, preserving the rug’s integrity throughout the wash.

Absorbent Bath Mat: This mat is engineered to swiftly absorb water,ensuring that your bathroom floor remains dry and puddle-free.This significantly minimizes the hazards of slips and falls,offering added safety and peace of mind after showers or baths

𝗖𝗹𝗼𝘂𝗱‑𝗟𝗶𝗸𝗲 𝗖𝗼𝗺𝗳𝗼𝗿𝘁: This ultra‑soft bath mat is made of 1.25‑inch‑long ultra‑fluffy microfiber, offering a soft touch underfoot. Not only does it provide a comfortable and luxurious experience, but it also turns your bathroom into an enjoyable and relaxing space

Excellent Water Absorption:Made of high-density microfiber, this absorbent bath mat soaks up moisture within 8 seconds, effectively removing wet spots and maintaining dry, clean bathroom floors.
Step 5: Air-Dry to Prevent Mildew and Damage

Since moisture trapped in bathroom rugs invites mildew and mold, air-drying is your best bet for keeping them fresh and intact.
Proper drying protects both your rug’s appearance and longevity. Here’s what works:
- Lay flat in ventilation: Place your rug on a clean, dry surface in a well-ventilated area away from direct sun, which can fade colors
- Use fan-assisted drying indoors: Position the rug near a window and direct a fan toward damp spots for faster moisture removal
- Avoid high heat: Protect the rubber backing and fiber integrity by skipping machine dryers entirely
- Check for complete dryness: Before returning your rug to the bathroom, verify that no moisture remains trapped inside
Once completely dry, brush the fibers with a soft brush to restore their softness and texture, bringing them back to their original condition.

VERSATILE, EFFICIENT, EASY-TO-USE: The Magic Broom is a handy tool for cleaning up all sorts of messes, including broken glass, spilled liquids, fine dust, coffee grounds, sugar, and pet and human hair. This Magic Broom for floor can even easily sweep away sticky substances like ketchup and cracked eggs. This magic broom not only allows you to clean those hard-to-reach areas while protecting your wrists from pain, but also easily cleans up bathroom water puddles and kitchen grease.

Super absorption and quick drying: The bathroom mat has super absorbent, added diatomaceous earth material, fast drying, with magical absorption and drying speed, can avoid water directly on the floor, keep the bathroom floor clean and dry.

MAXIMUM ABSORBENCY: Made from 100% Cotton, this bathroom rug set offers superior absorbency compared to thinner bath mats; enjoy cloud-like comfort when you step out of your shower or bath; Choose from 15 gorgeous colors


